Custom Software
Bohrium has already pre-installed some commonly used software. You can view the provided container images and virtual machine images in the "Images - Public Images". If the existing software does not include the software you need, or you have customization requirements for some software, you can create your own custom software in the "Images - Custom Images - Create Image".
Three ways to create custom software:
Built based on Dockerfile.
Pull images from the public repository.
Create a management node, install and compile the software you need, and then save it as custom software.
Create Custom Software Based on Dockerfile
Step 1: Fill in the Basic Information
Select the project: Required, all members of this project will have access to use this image.
Fill in the image name and Tag: Required, the image name and Tag must not be duplicated with existing images in the project.
Description: Optional, for the convenience of others to understand the software information included in the image.
Step 2: Enter the Dockerfile
As shown below, select the build method as "Based on Dockerfile" and enter the Dockerfile used to build the image.
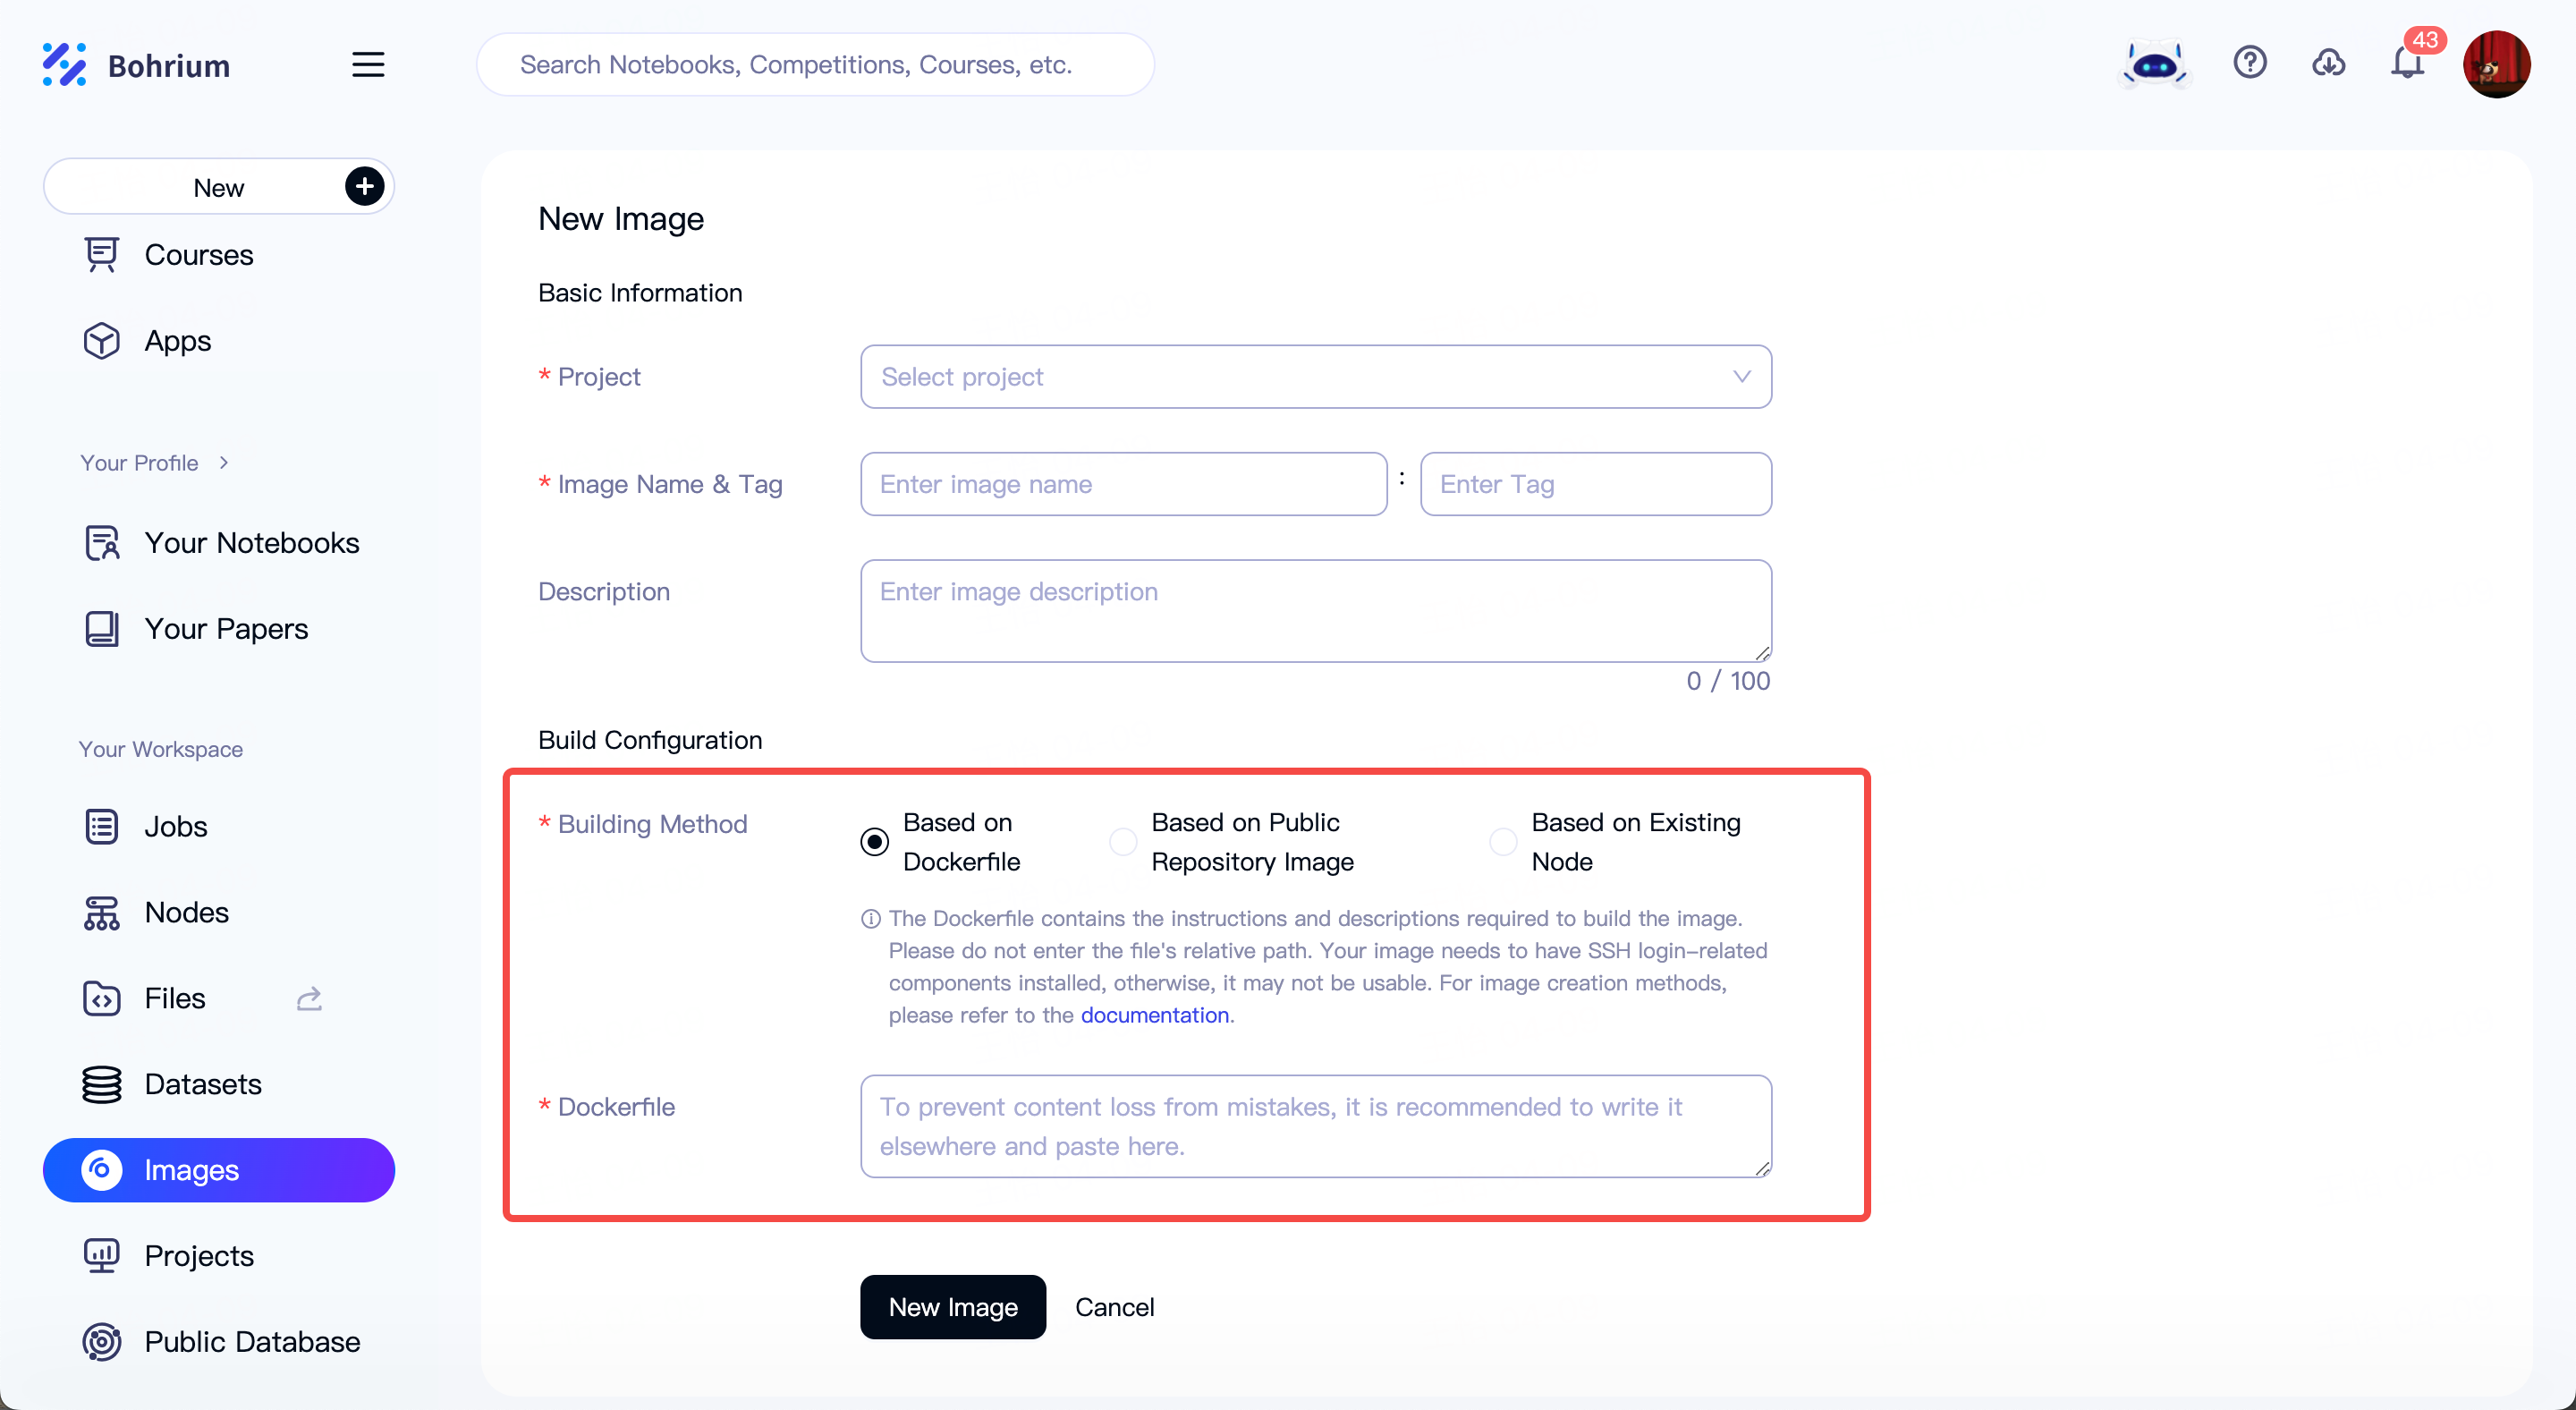
See Docker Official Docs for standard Dockerfile usage.
Some Notes on Using Dockerfile on This Platform:
When downloading foreign packages via pip, use domestic mirrors to avoid download failures. For example:
pip install -i https://pypi.tuna.tsinghua.edu.cn/simple some-packageWhen downloading software via apt-get, use domestic mirrors to avoid download failures. For example:
RUN sed -i 's/archive.ubuntu.com/mirrors.aliyun.com/g' /etc/apt/sources.list
RUN apt-get update
RUN apt-get install -y some-package
When downloading software via yum, use domestic mirrors. For example:
RUN yum install -y some-packageWhen downloading software via conda, use domestic mirrors. For example:
RUN conda install -y some-packageCopying local files into image is not supported for now. For example:
COPY ./some-file /some-pathThe image you pull needs to install the relevant components for SSH Login. Otherwise it may cause the image to fail to use on the management node. It does not affect using this image to submit jobs. The required software is as follows:
- openssh-server
- supervisor
- net-tools
If you are unsure how to install the above software, you can download the script below for one-click installation. After the installation is successful, try pulling the image again.
For Ubuntu image, Click here to download the corresponding script.
For Centos image, Click here to download the corresponding script.
Step 3: View, use, and share the created images
After the image is created, you can go to "Images - Custom Images - Container Image" to view the creation progress and basic information of the image. You can view the build log in the image details to understand the progress and failure reasons of the build.
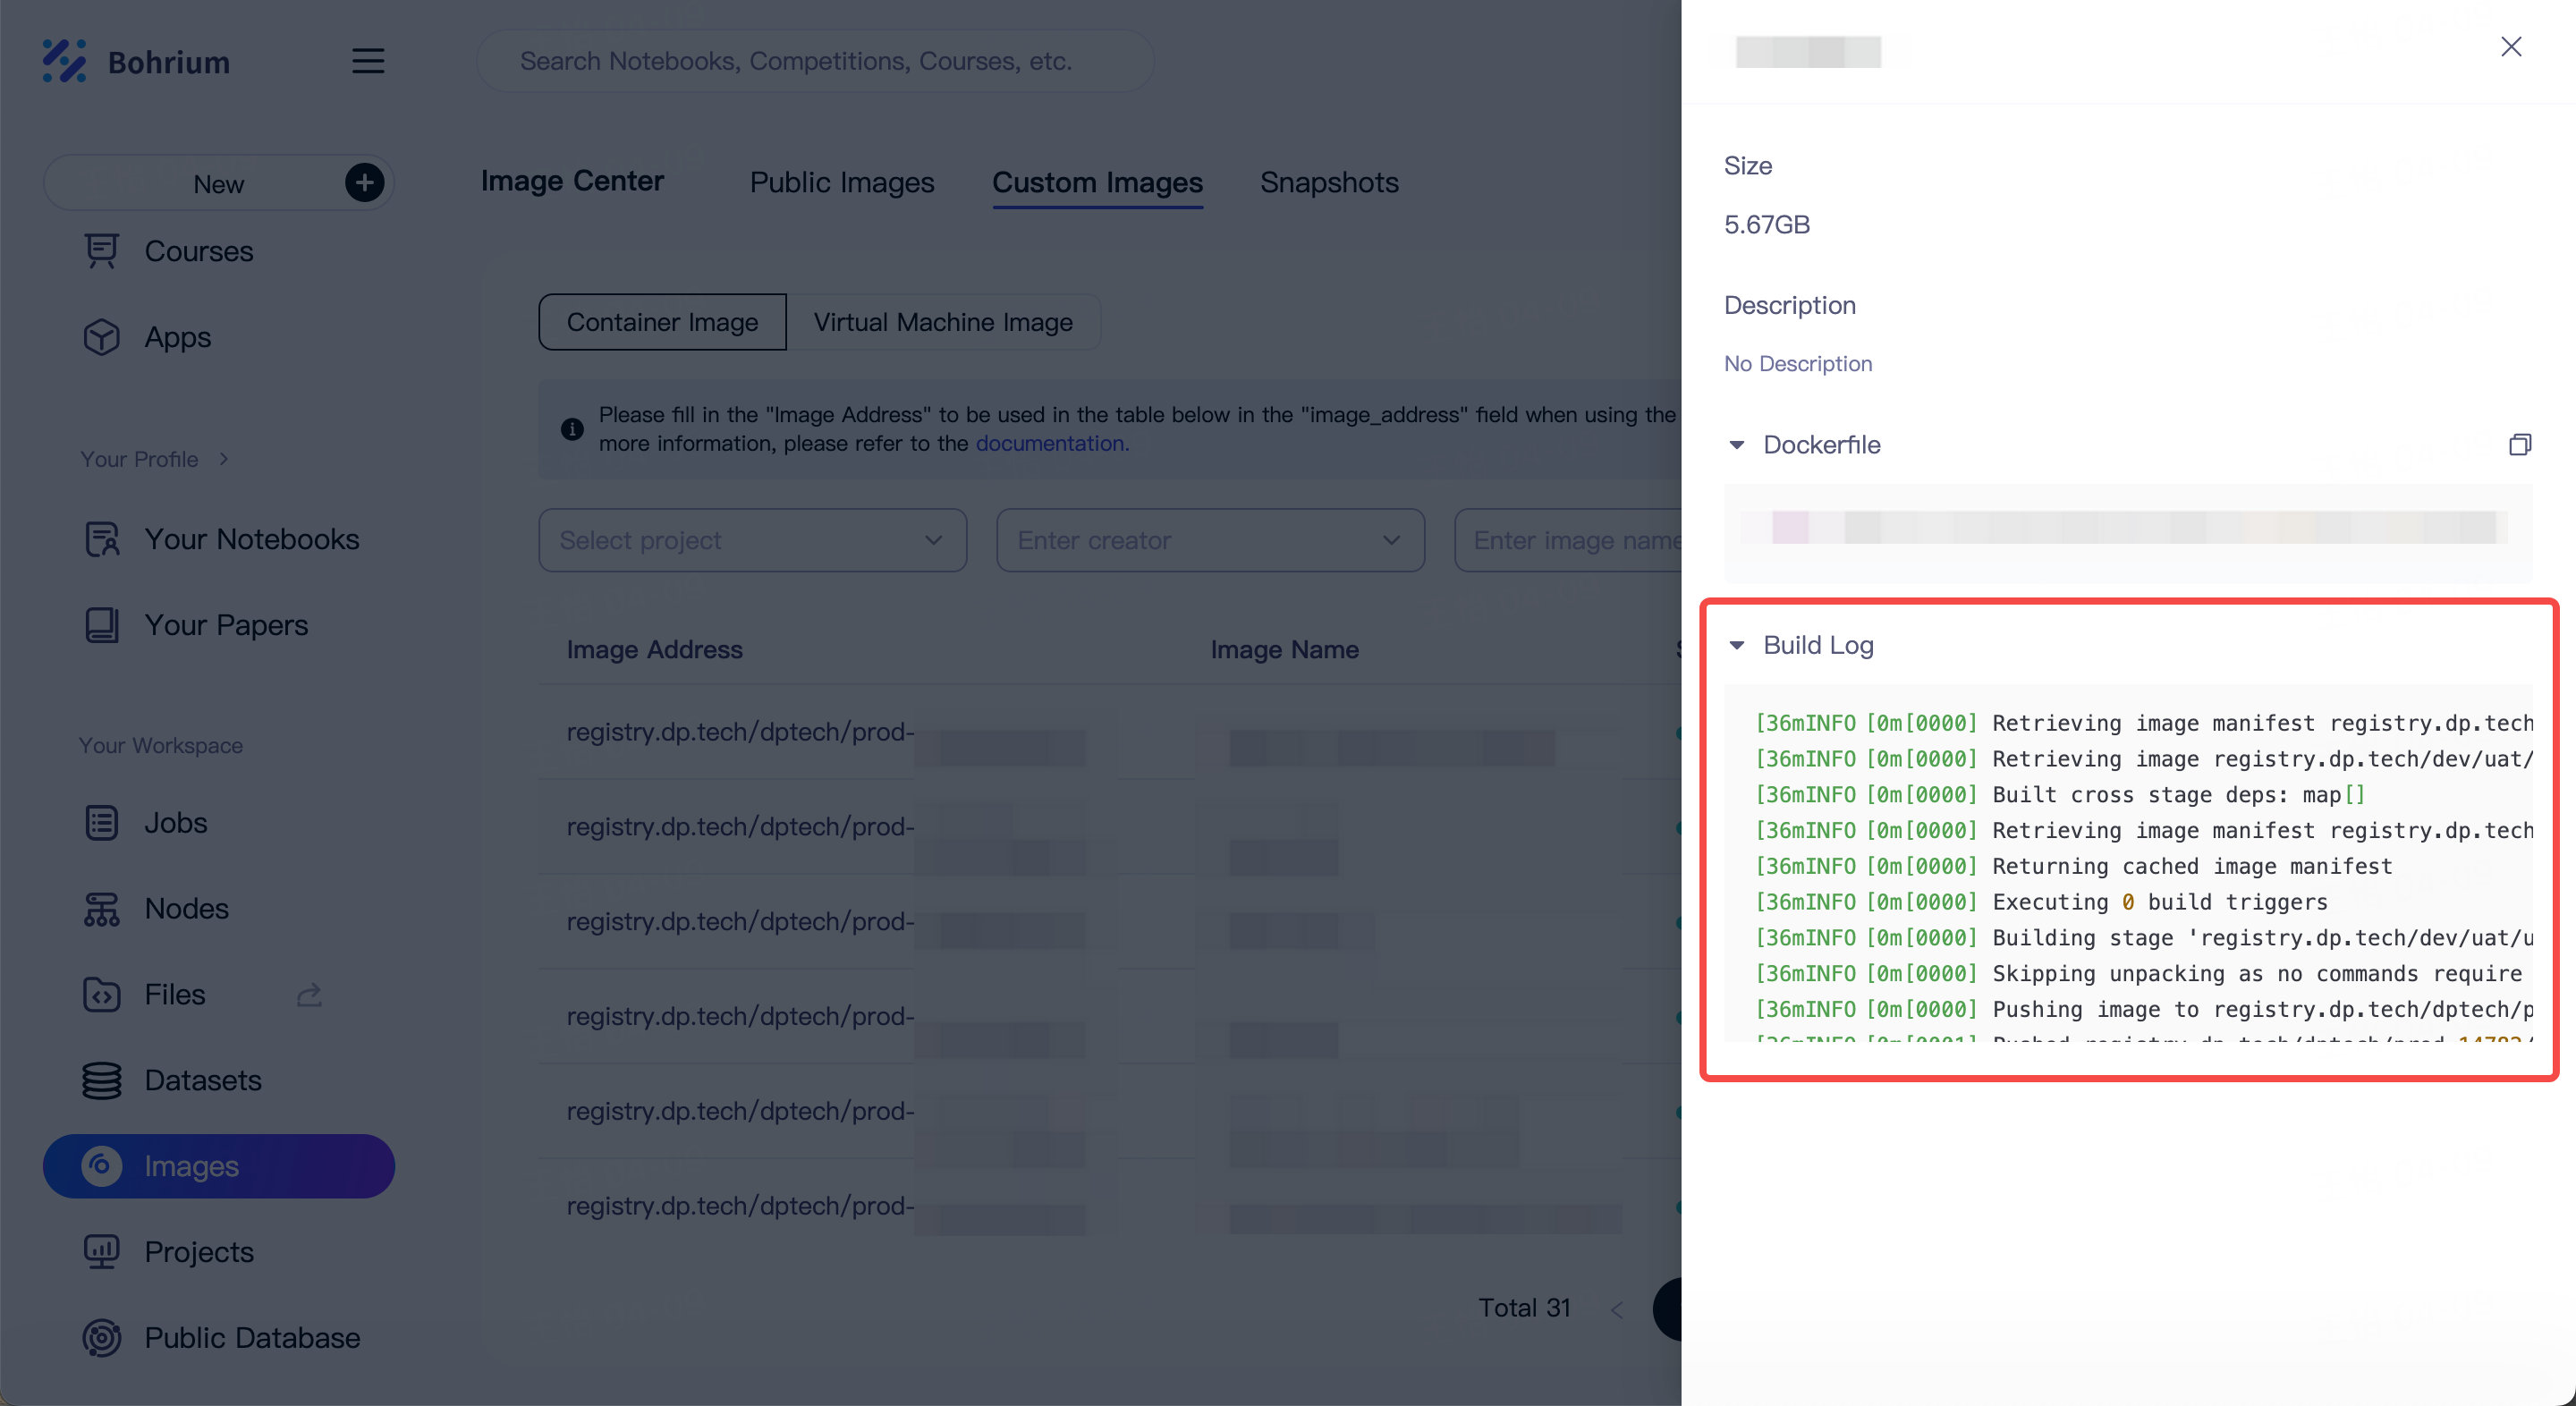
You can use the image for job submission without waiting for the image creation to be completed.
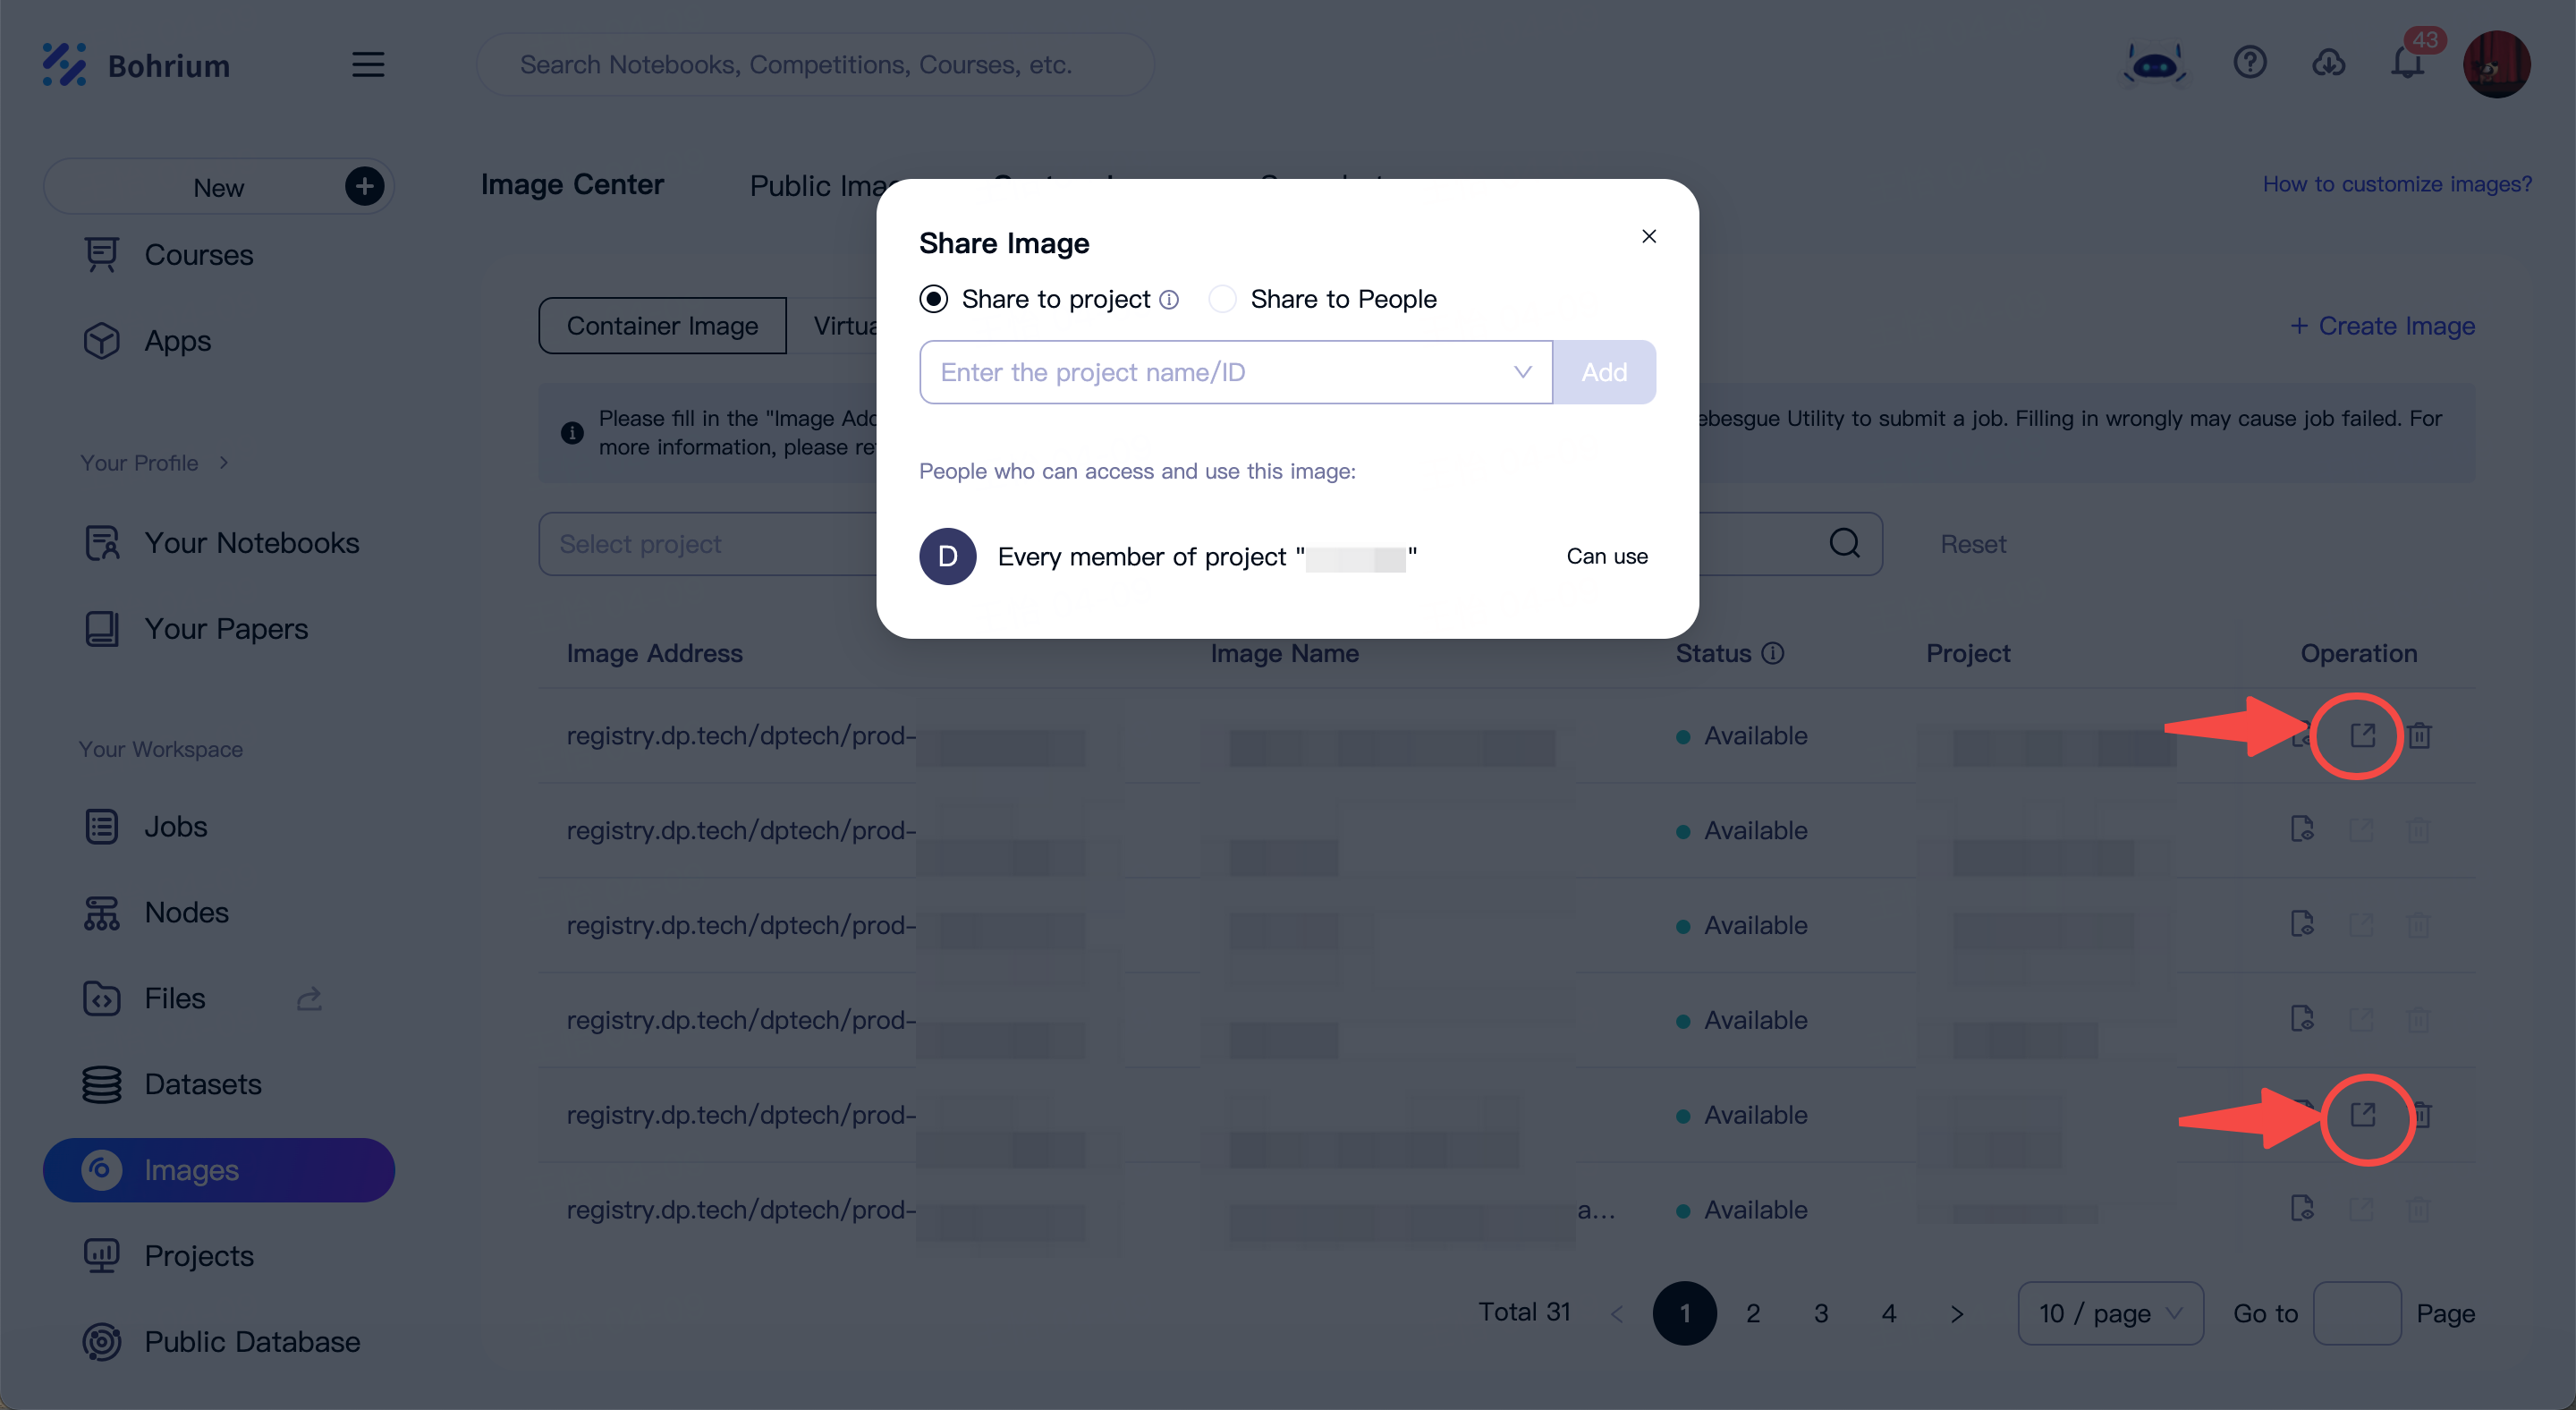
Of course, you can also share the custom images you've created with others.
Create Custom Software by Pulling Images from a Public Repository
Bohrium supports pull images from the DockerHub public repository and automatically converts them into custom images that can be used within Bohrium for development, debugging, and job computing.
Step 1: Fill in the Basic Information
Select the project: Required, all members of this project will have access to use this image.
Fill in the image name and Tag: Required, the image name and Tag must not be duplicated with existing images in the project.
Description: Optional, for the convenience of others to understand the software information included in the image.
Step 2: Fill in the public repository address
As shown below, select the build method as "Based on Public Repository Image", and fill in the public image address to be pulled, such as: nvcr.io/nvidia/pytorch:23.09-py3.
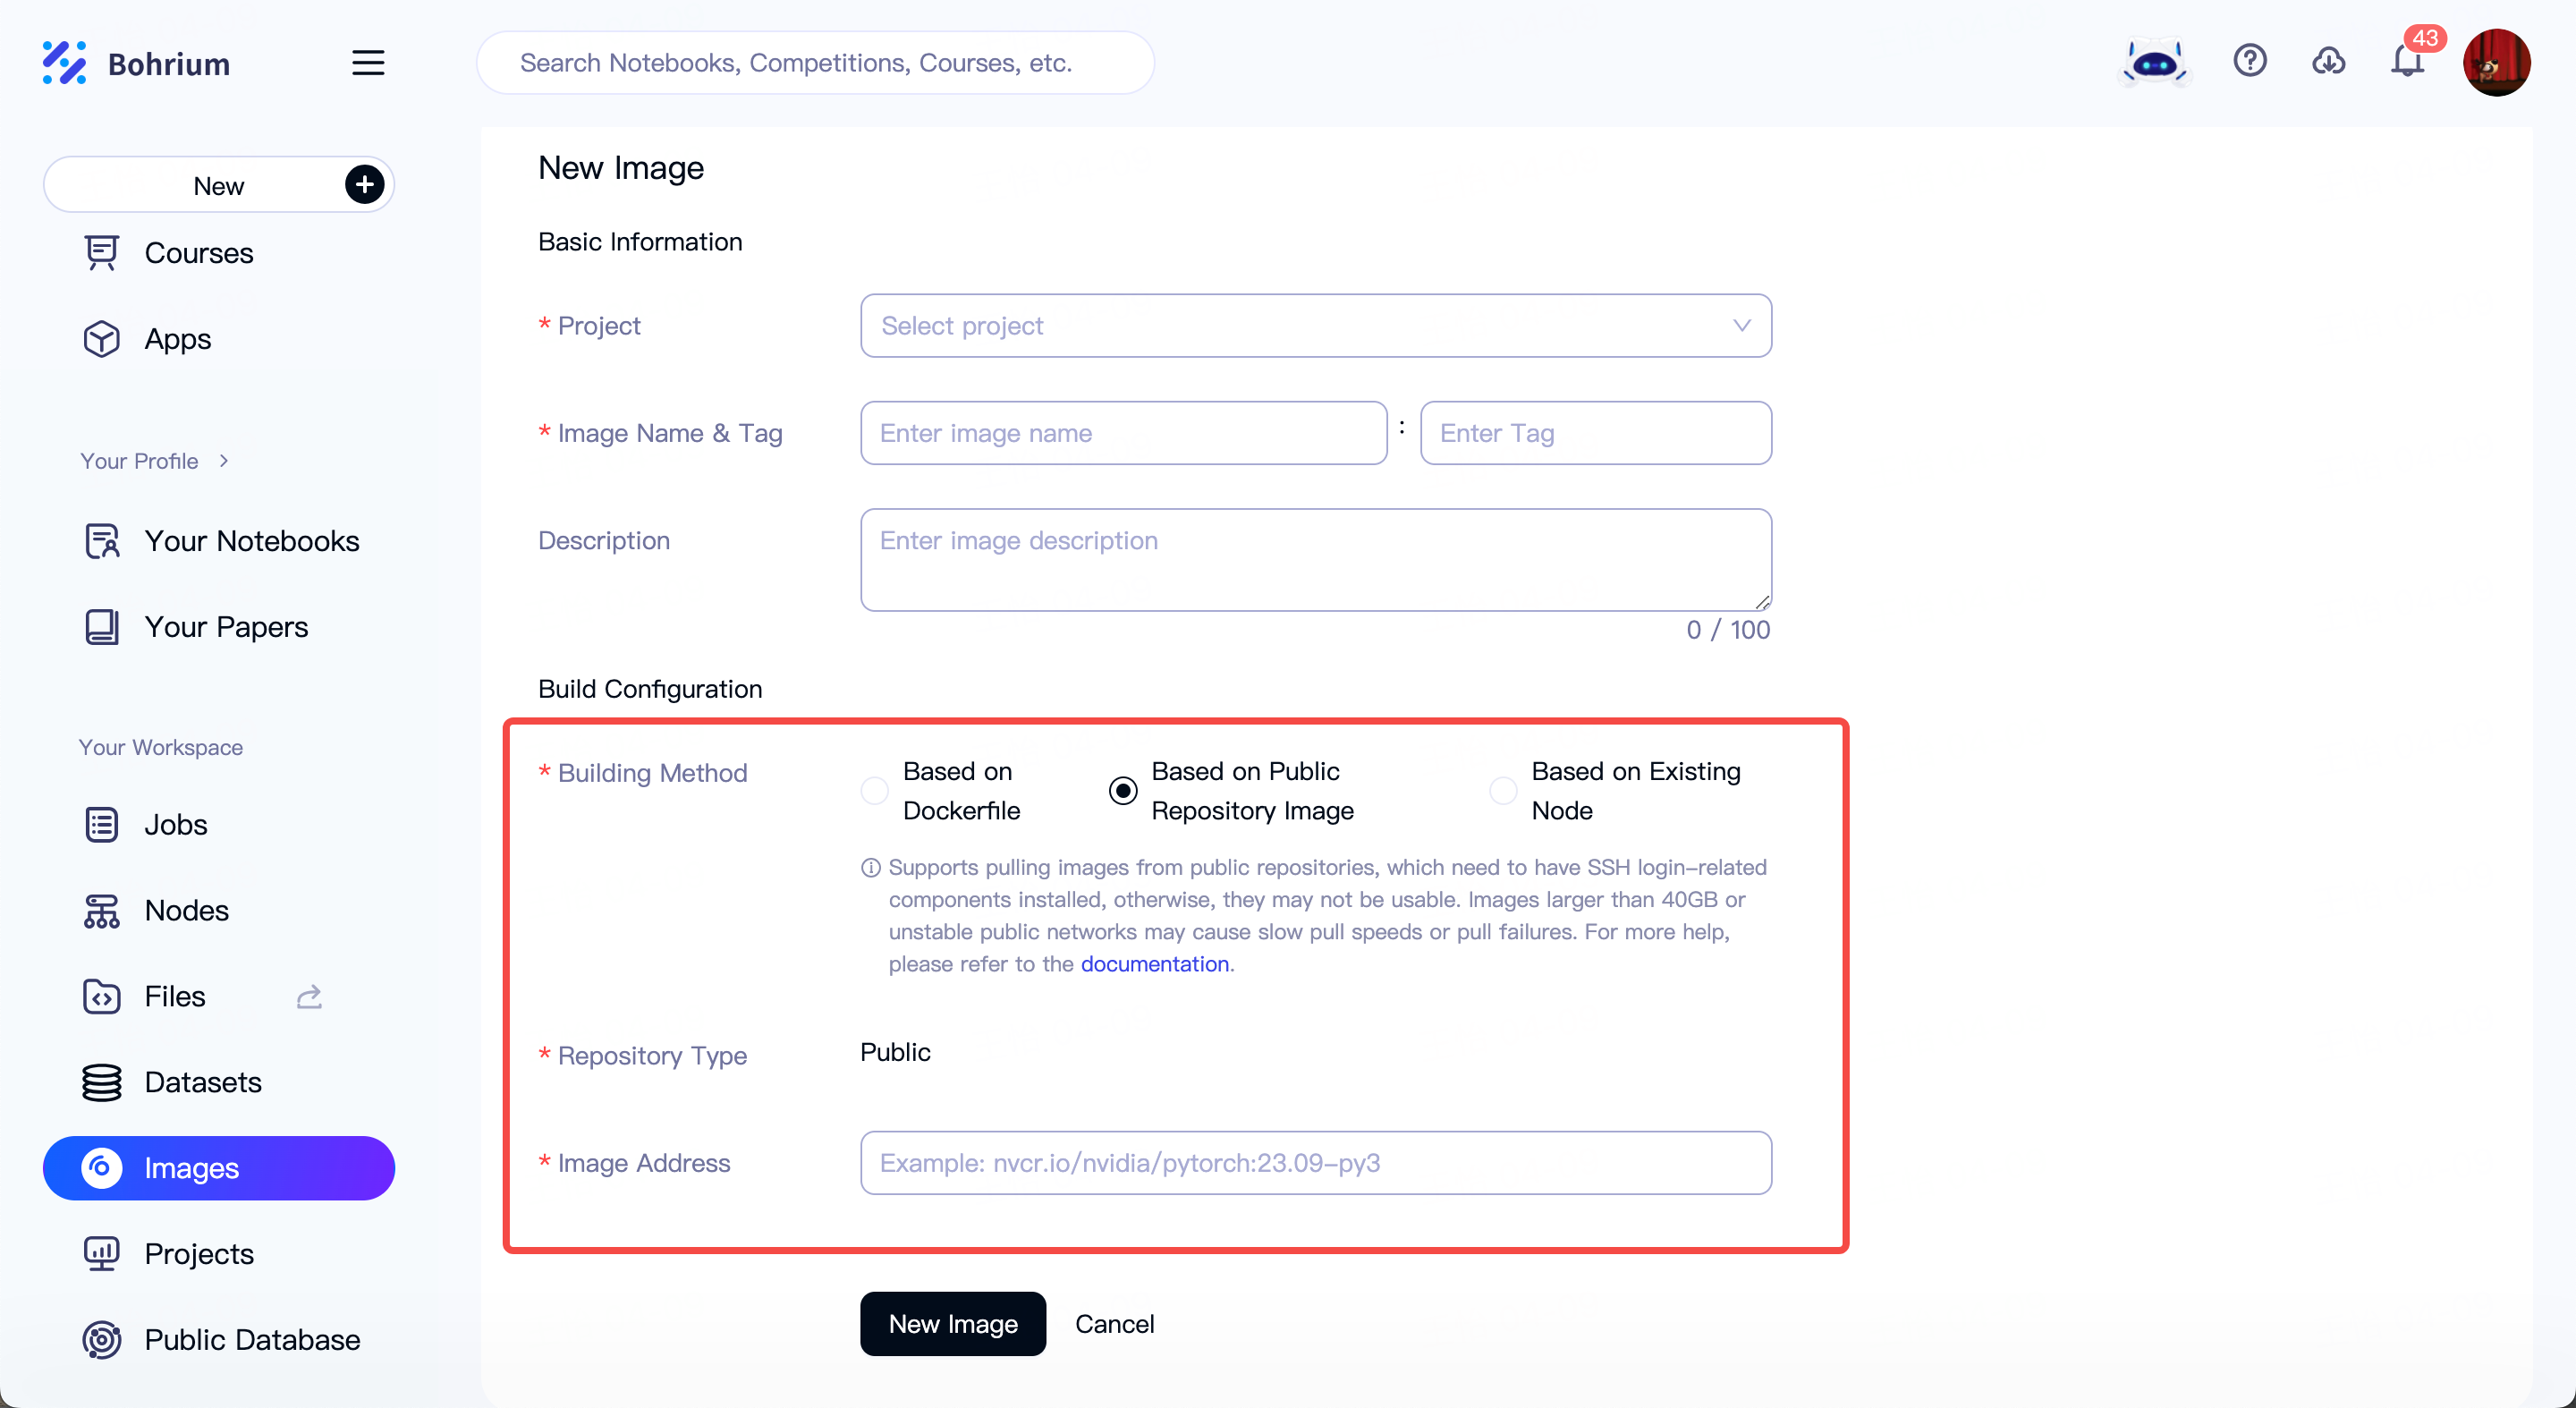
Notice:
- The image you pull needs to install the relevant components for SSH Login. Otherwise it may cause the image to fail to use on the management node. It does not affect using this image to submit jobs. The required software is as follows:
- openssh-server
- supervisor
- net-tools
If you are unsure how to install the above software, you can download the script below for one-click installation. After the installation is successful, try pulling the image again.
For Ubuntu image, Click here to download the corresponding script.
For Centos image, Click here to download the corresponding script.
- Image larger than 40GB or having an unstable public network may result in slow pulling or failure to pull.
Step 3: View, use, and share the created images
After the image is created, you can go to "Images - Custom Images - Container Image" to view the creation progress and basic information of the image. You can view the build log in the image details to understand the progress and failure reasons of the build.

You can use the image for job submission without waiting for the image creation to be completed.
Of course, you can also share the custom images you've created with others.

Create Custom Software Based on Management Node
Step 1: Fill in the Basic Information
Select the project: Required, all members of this project will have access to use this image.
Fill in the image name and Tag: Required, the image name and Tag must not be duplicated with existing images in the project.
Description: Optional, for the convenience of others to understand the software information included in the image.
Step 2:Select an existing node or start a new node
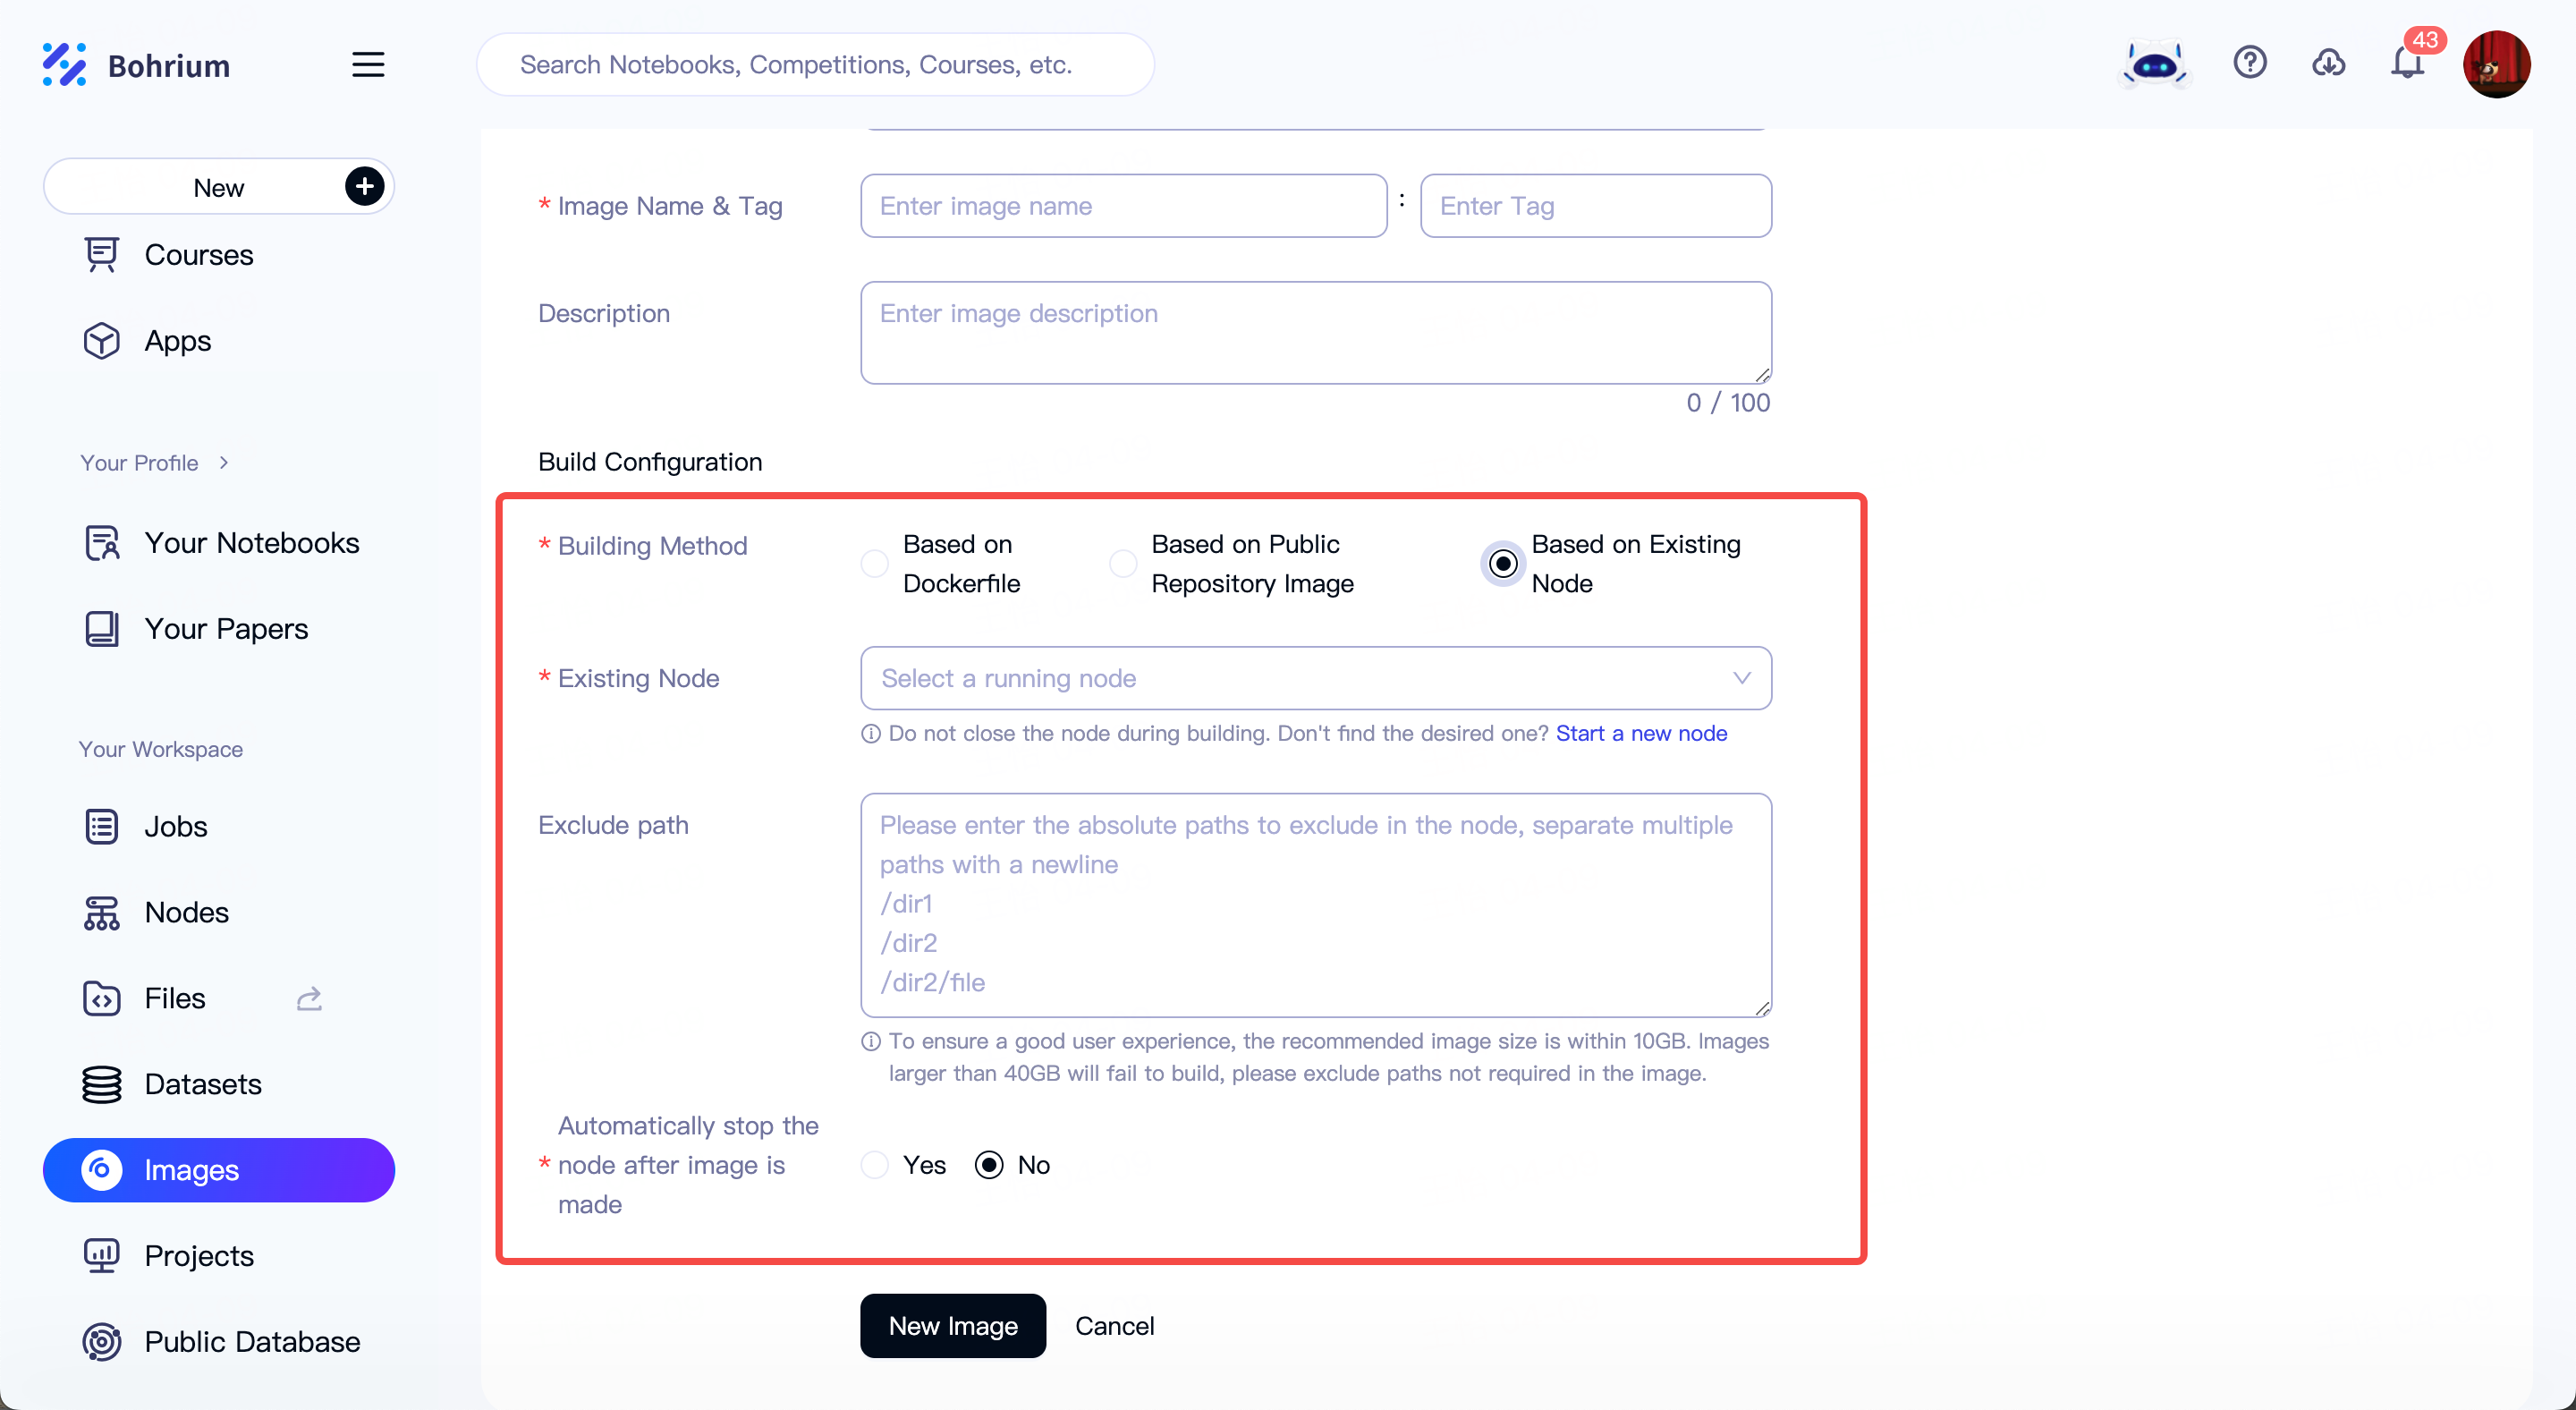
Select "Based on Existing Node" for image building within Bohrium "Image Center - Custom Images - Create Image".
You can choose any running node to build its environment directly into a custom image.
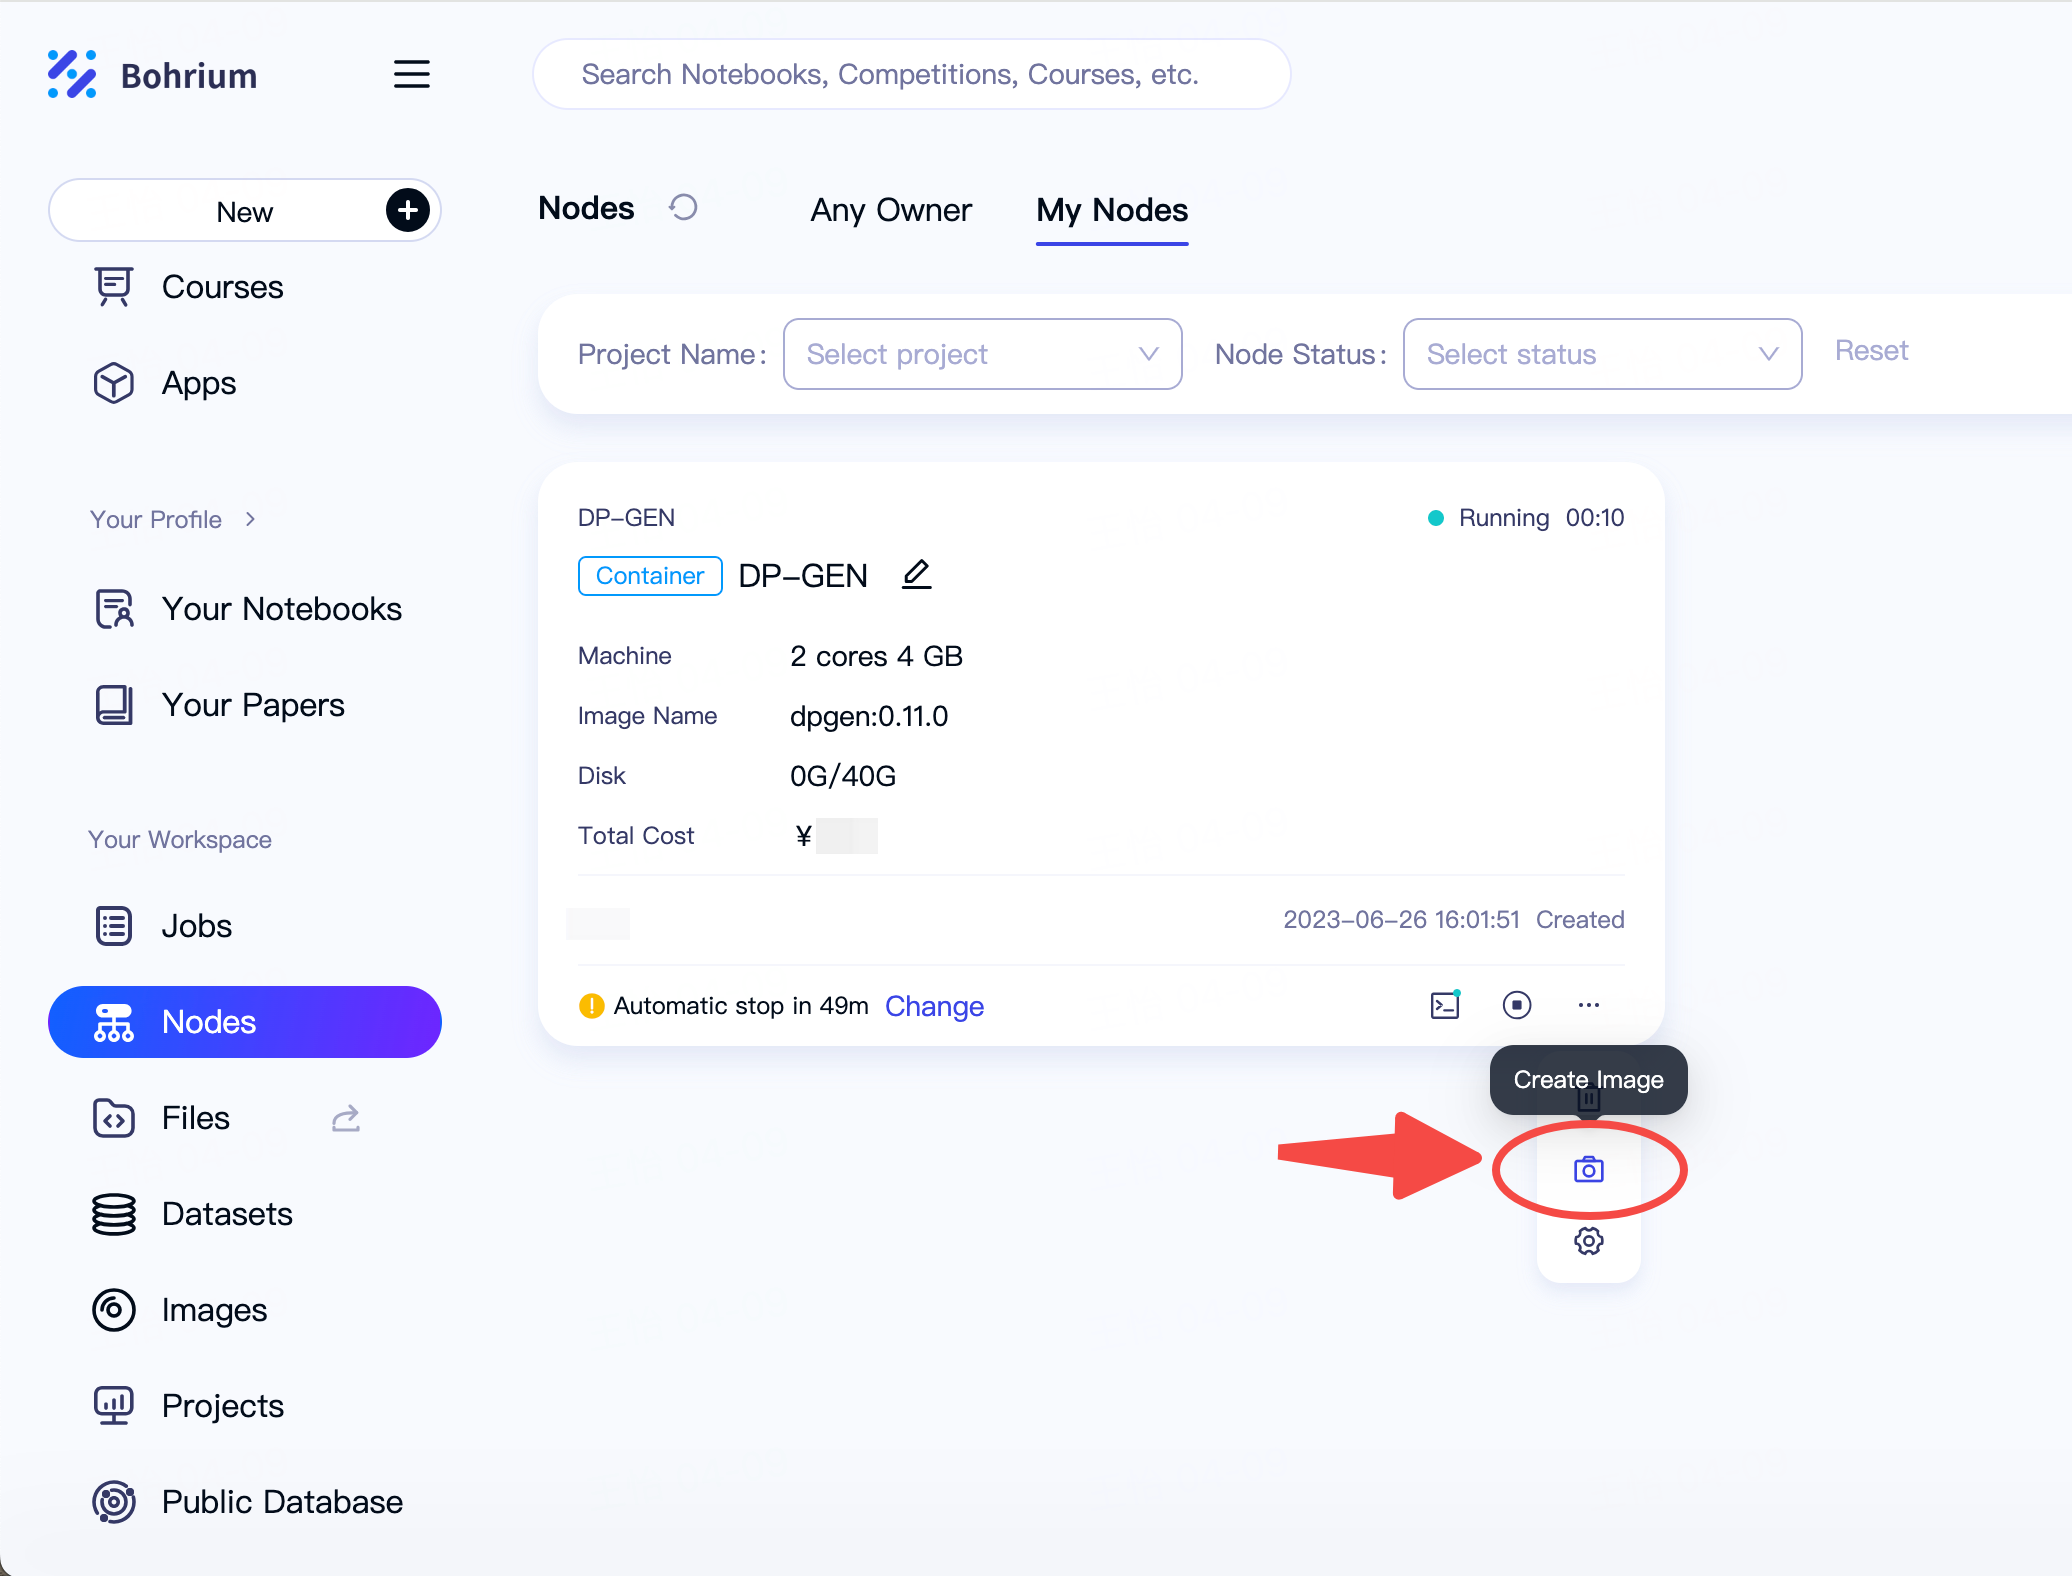
You can also click on "Start a New Node" to start a new node for the installation and compilation of custom software. Once the installation is complete, go to the corresponding node card in the "Node Management" page and select "Create Image" (as shown in the red circle below) to save the software environment.
Notice:
Images larger than 40GB will fail to build. Please exclude paths that do not need to be built into the image before building.
Step 3: View, use, and share the created images
After the image is created, you can go to "Images - Custom Images - Container Image" to view the creation progress and basic information of the image.

You can use the image for job submission without waiting for the image creation to be completed.
Of course, you can also share the custom images you've created with others.
