Notebook
This article introduces how to use Notebook on Bohrium.
What is Notebook?
Notebook on Bohrium provides an interactive environment for writing and running code, allowing you to create documents with executable code, LaTeX, rich text, images, HTML, etc. It comes with pre-installed software like DeePMD-kit and frameworks such as PyTorch and TensorFlow. You can easily connect to vast CPU and GPU resources and share the Notebook for collaboration.
The interactive development environment is provided by the open-source project Jupyter. For more information, visit the Jupyter homepage.
Creating a Notebook
Click the "New" button on the Bohrium main navigation to create a new Notebook draft and start editing:

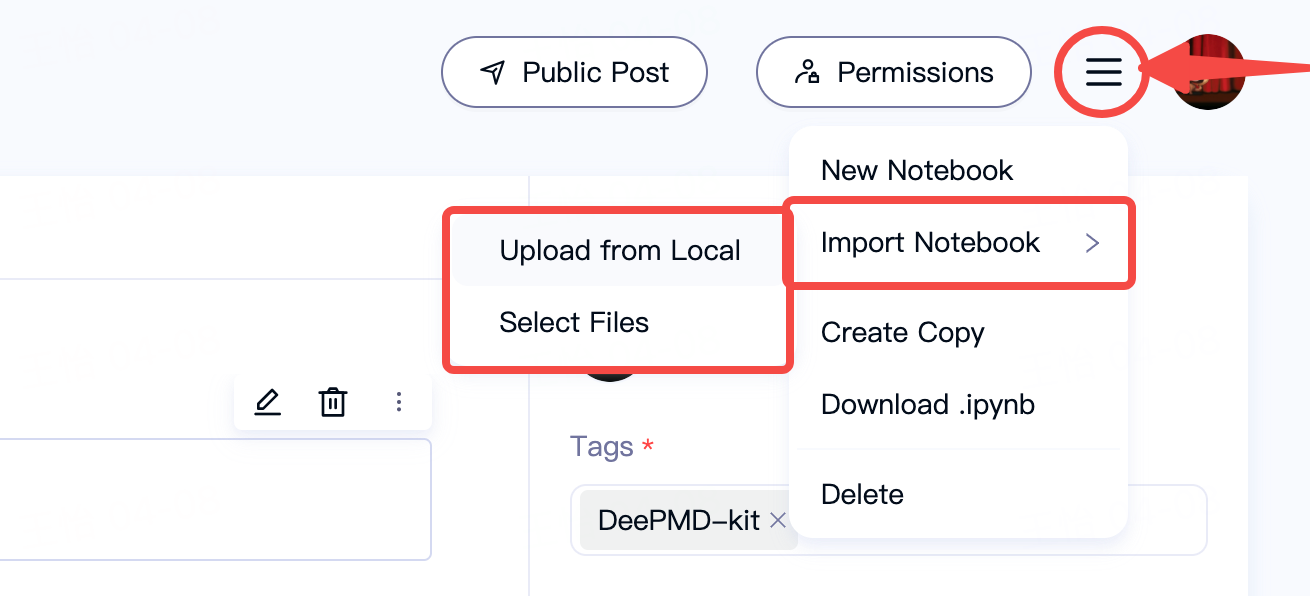
To import a pre-existing Notebook, click the button in the top right corner, and choose "Upload from Local" or "Select Files":
Editing a Notebook
In the Notebook editing page, you can perform various actions:
On the main edit area, you can write the Notebook title and content.
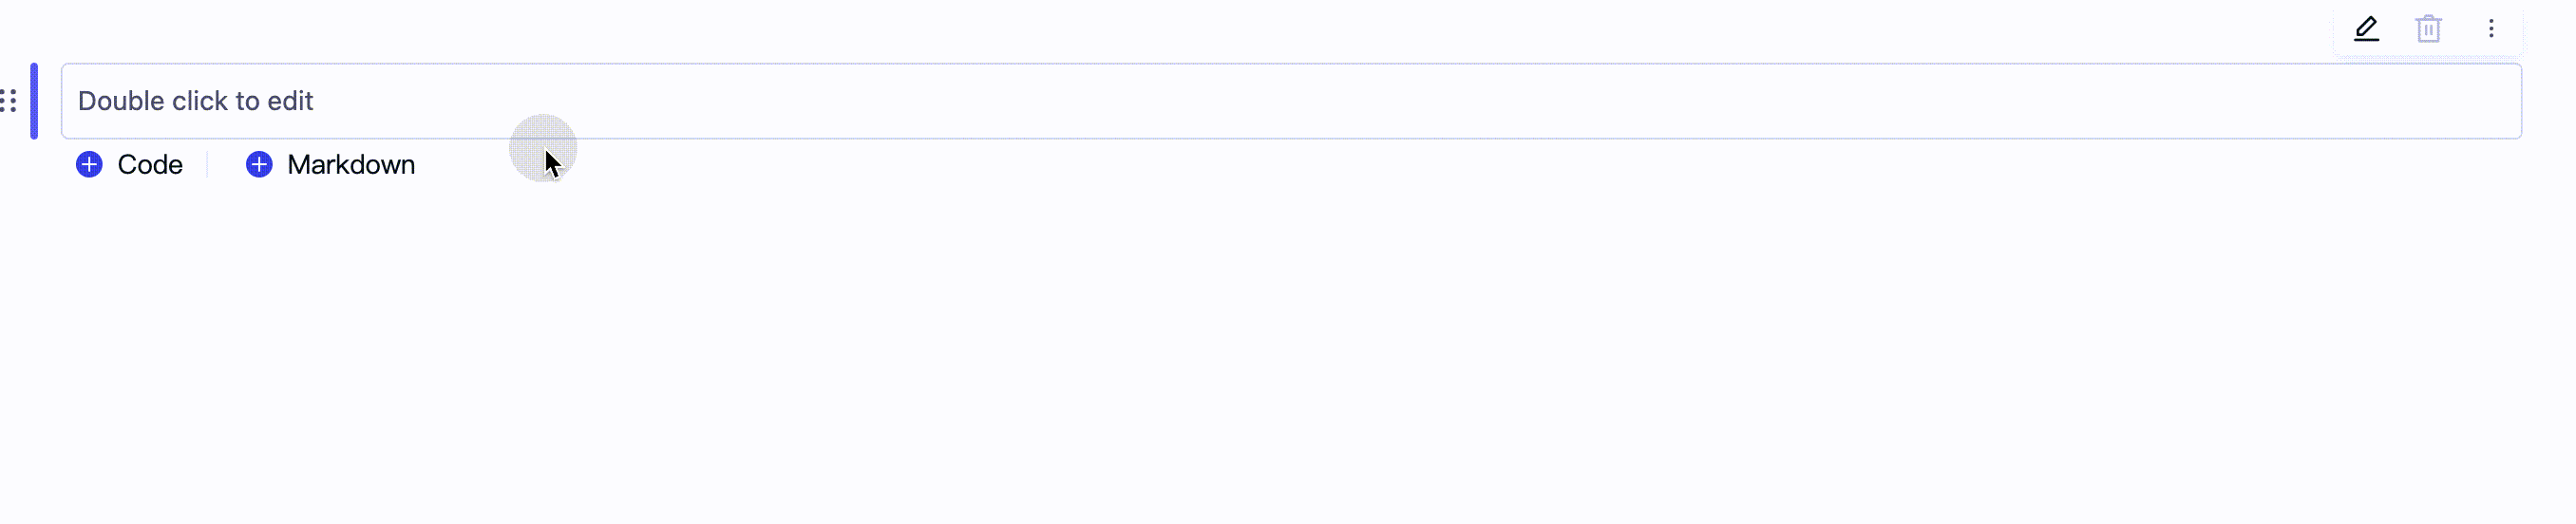
The text cells support common Markdown syntax, such as headings, bold/italic, ordered/unordered lists, code blocks, links, tables, images, and more. Double-click on the cell to utilize Bohrium's provided visual editing capabilities:
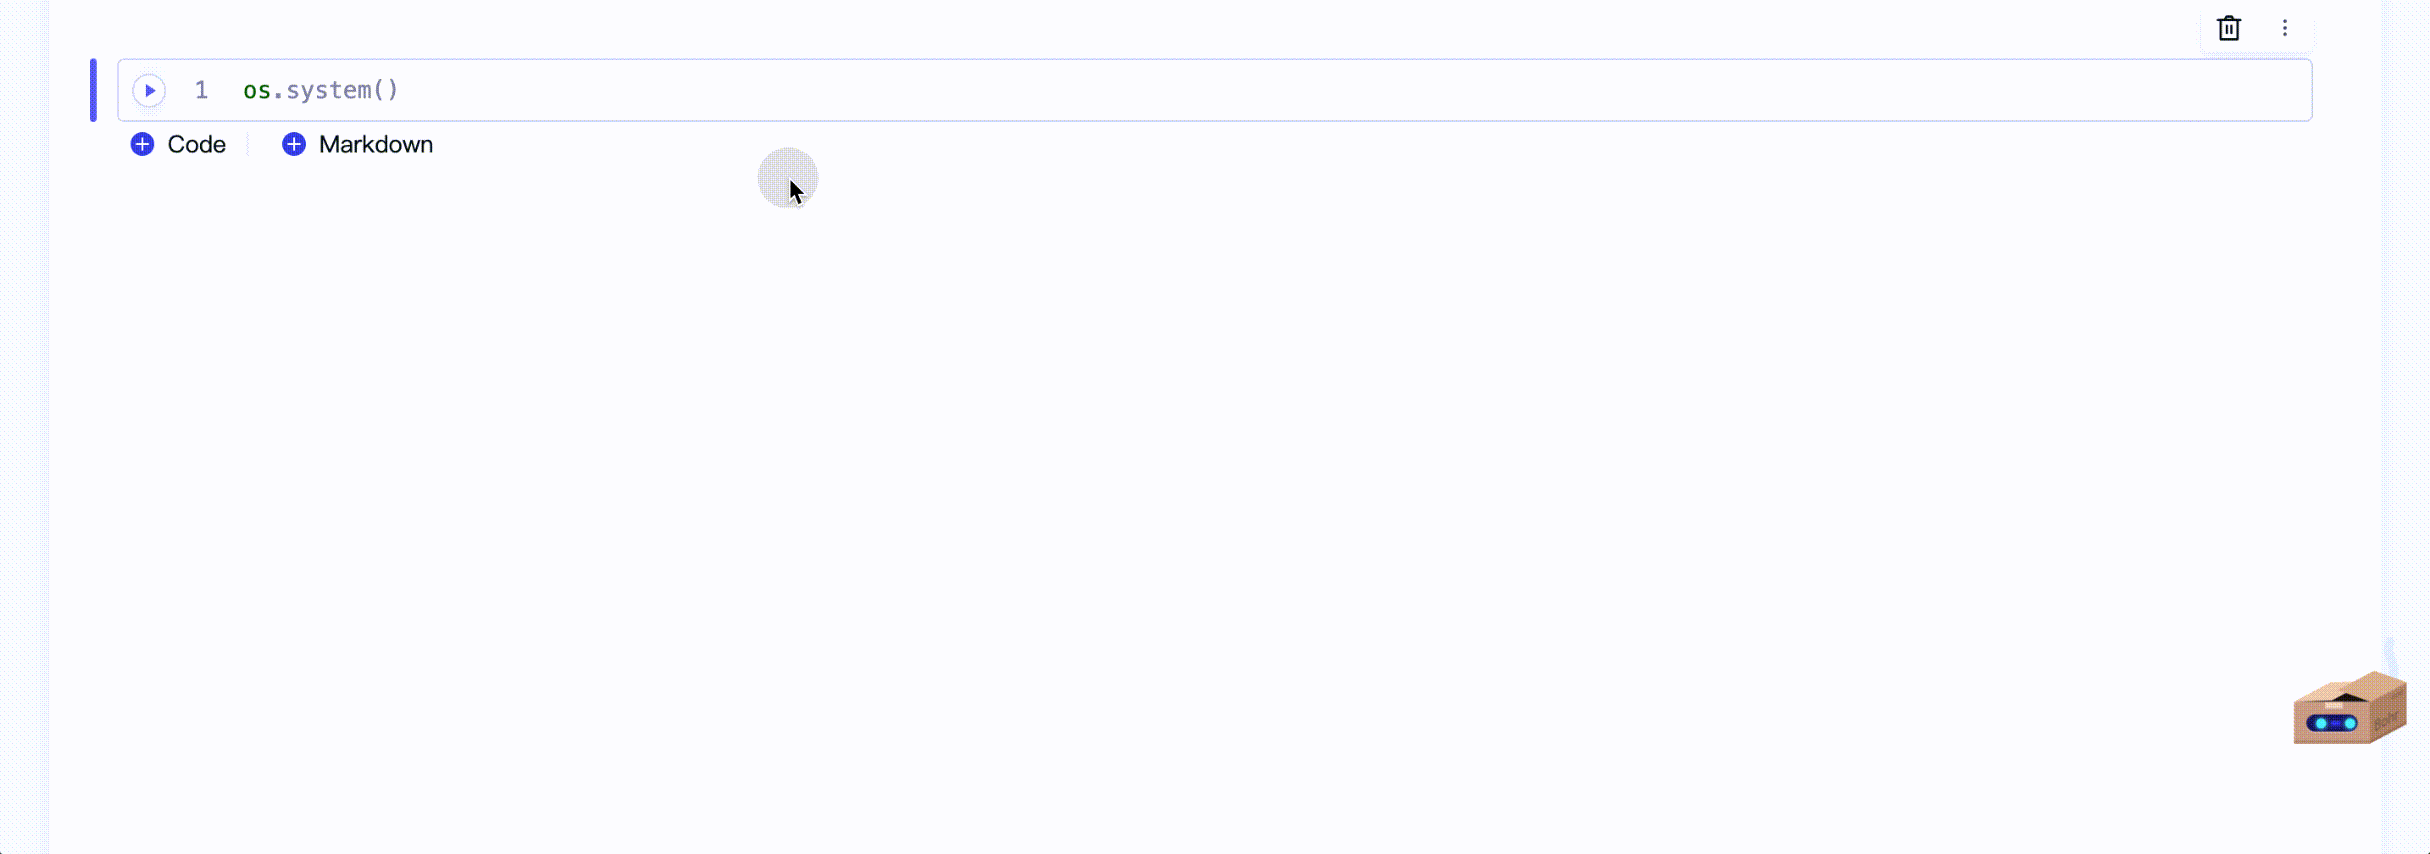
Code cells support Python code and Shell commands. You can click the Run button to run the code cells. When code execution encounters errors, Bohrium's built-in AI assistant intelligently identifies the reasons for the errors and provides correct examples:
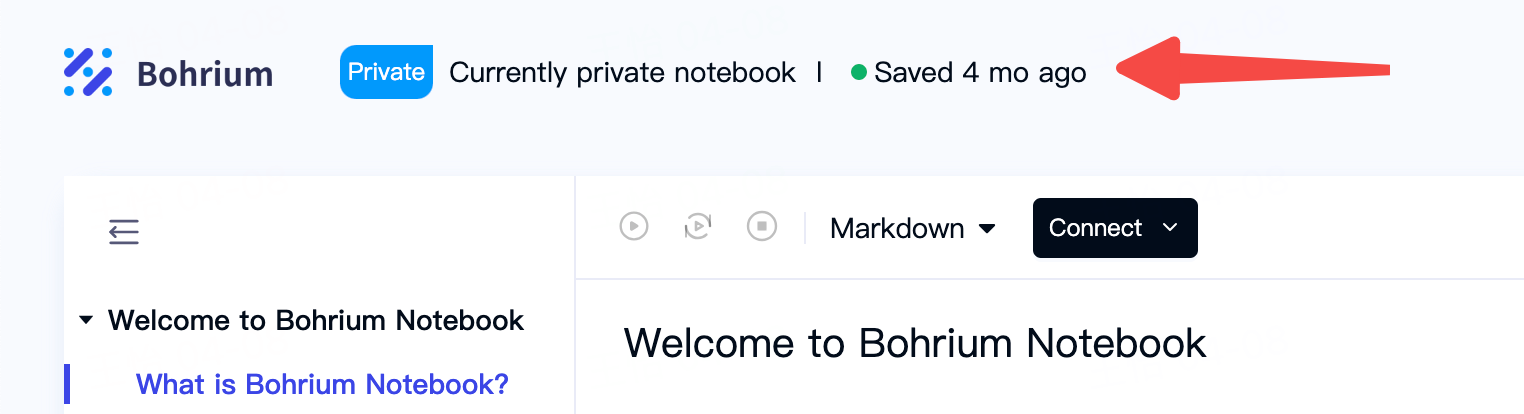
Notebook automatically saves while editing. When the indicator light turns green, it means the autosave is complete:
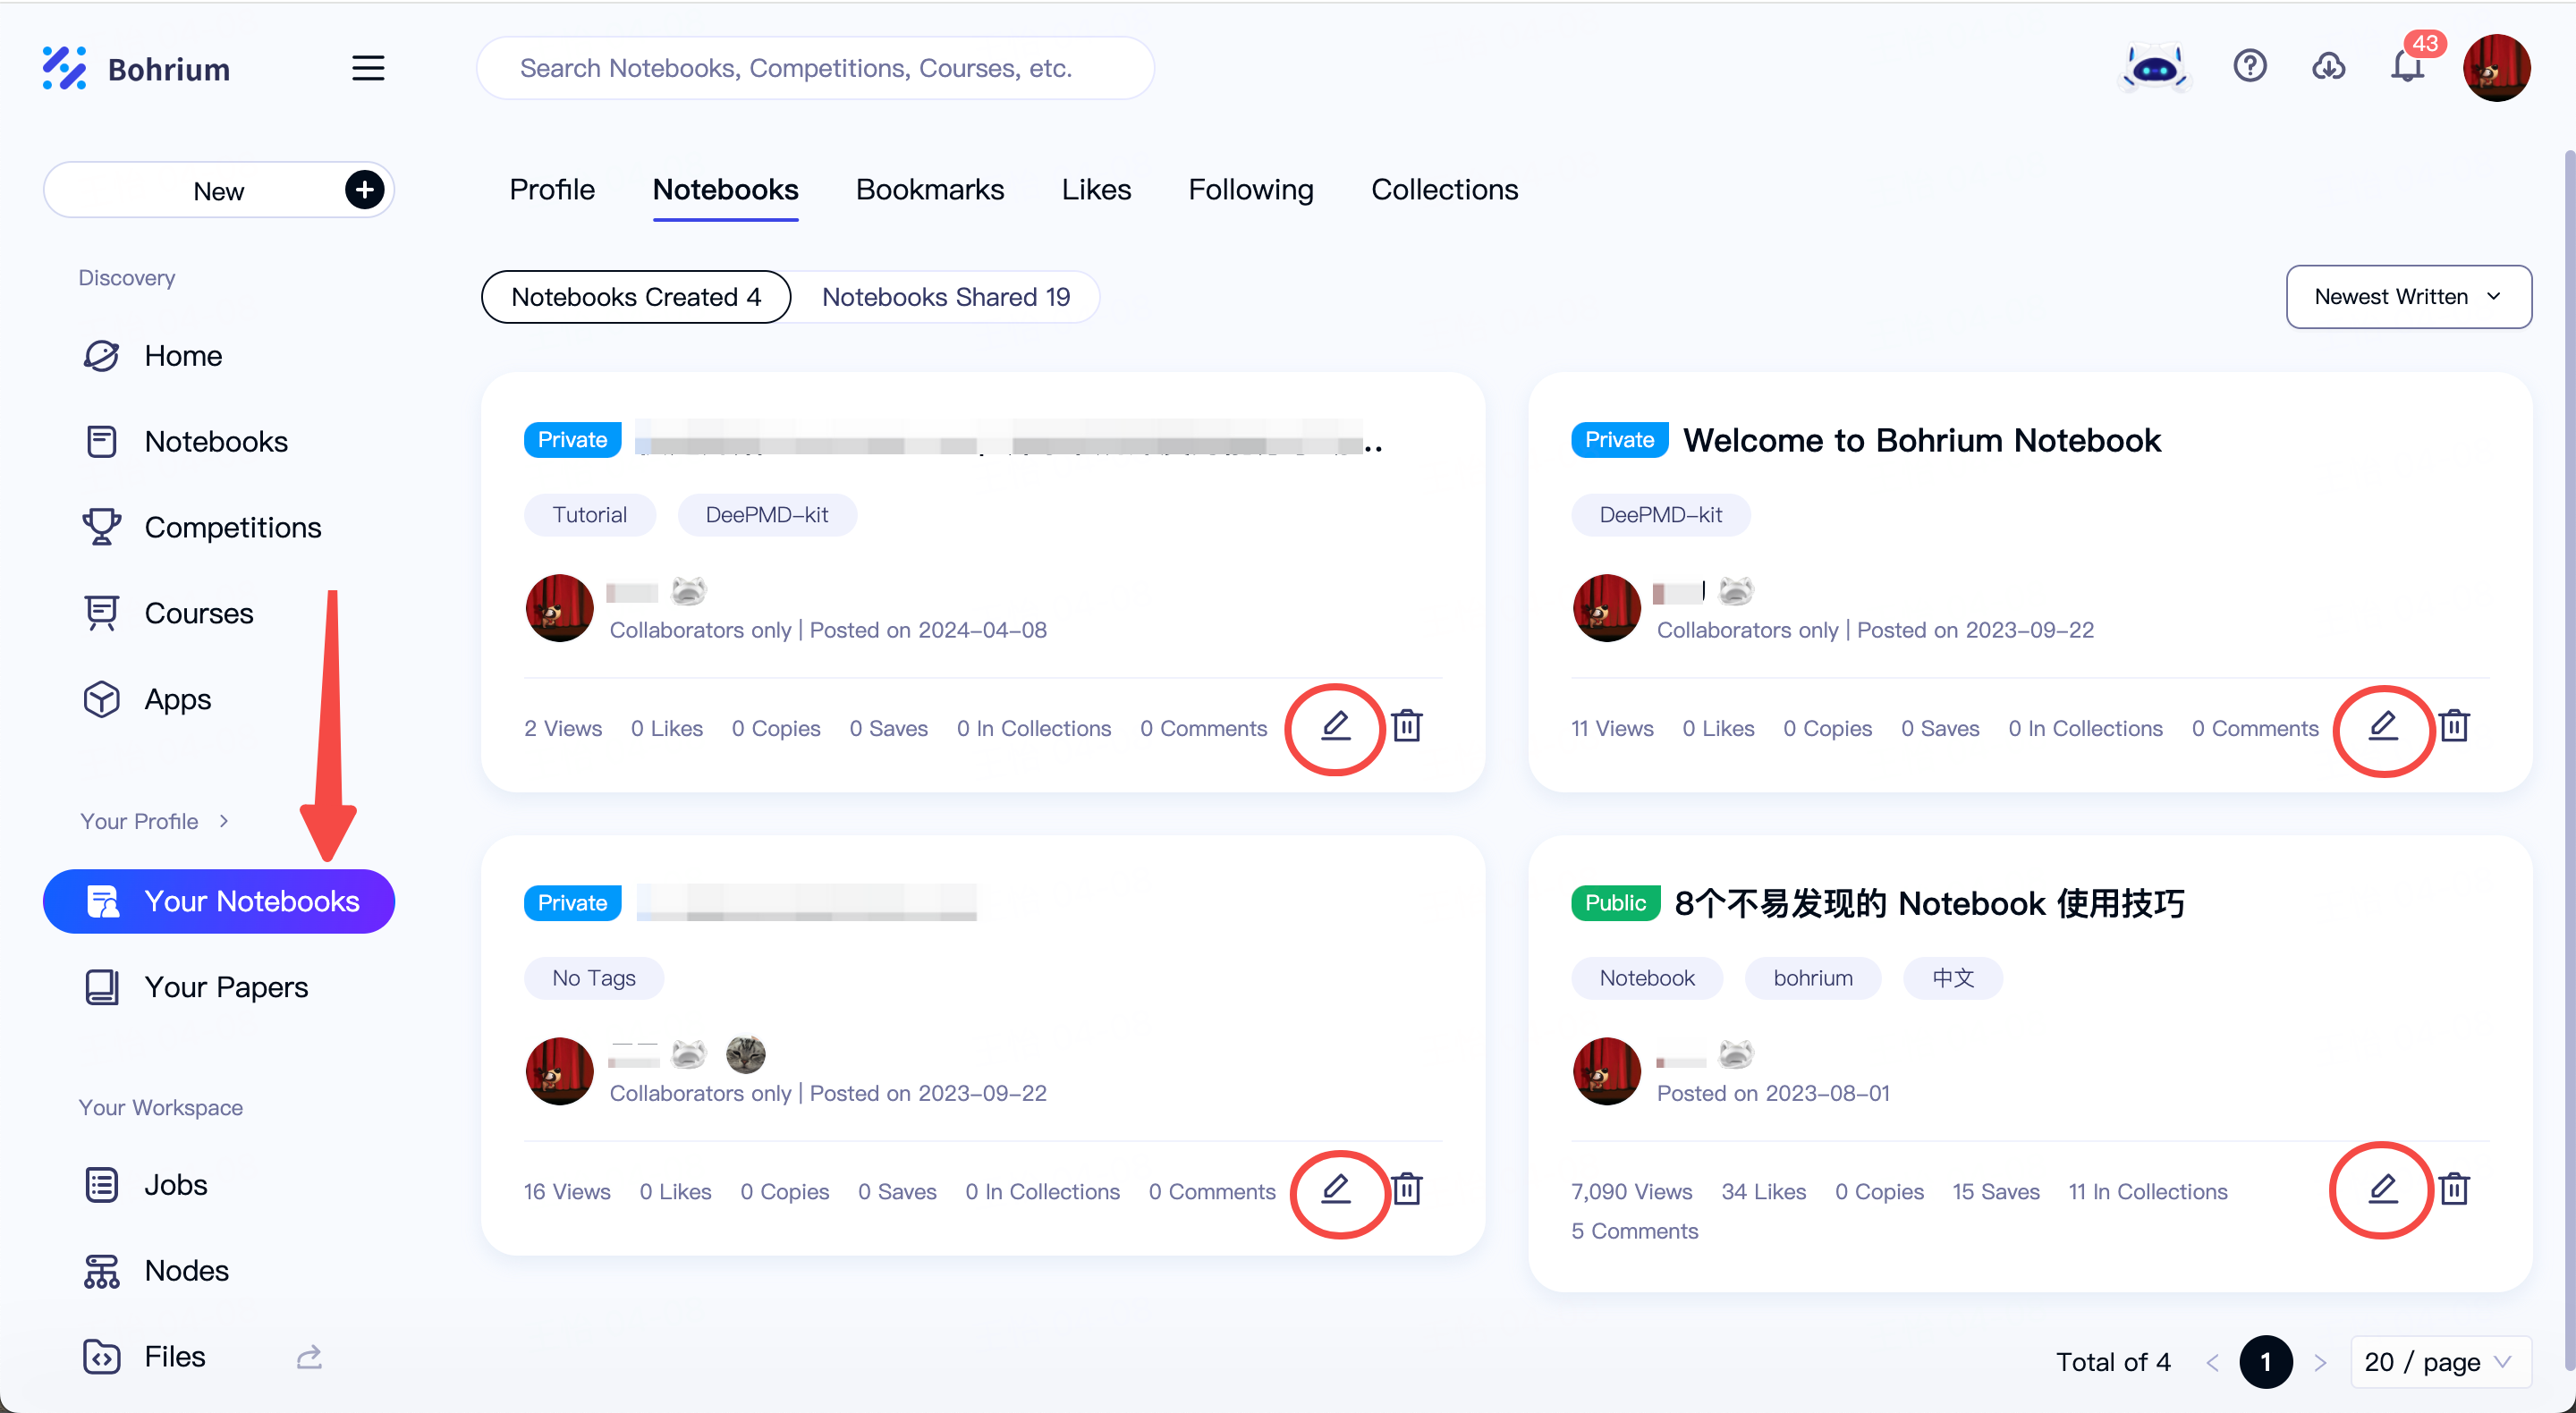
You can find all your Notebooks or Notebooks shared by others in the "Notebooks" page of your profile page. Click the red circle button to continue editing:
For more detailed editing techniques, you can read the article A Guide to Using Bohrium Notebook written by Bohrium's product manager. It provides detailed methods for markdown editing, practical examples of data visualization using Notebook, and helpful shortcut key usage to enhance editing efficiency.
For more Notebook writing tips, read NBHub | Notebook Writing Help and 8 Hidden Notebook Usage Tips, or search online for more methods. Additionally, Bohrium has numerous high-quality Notebooks created by users, which you can explore at the Notebooks page.
Running Notebooks
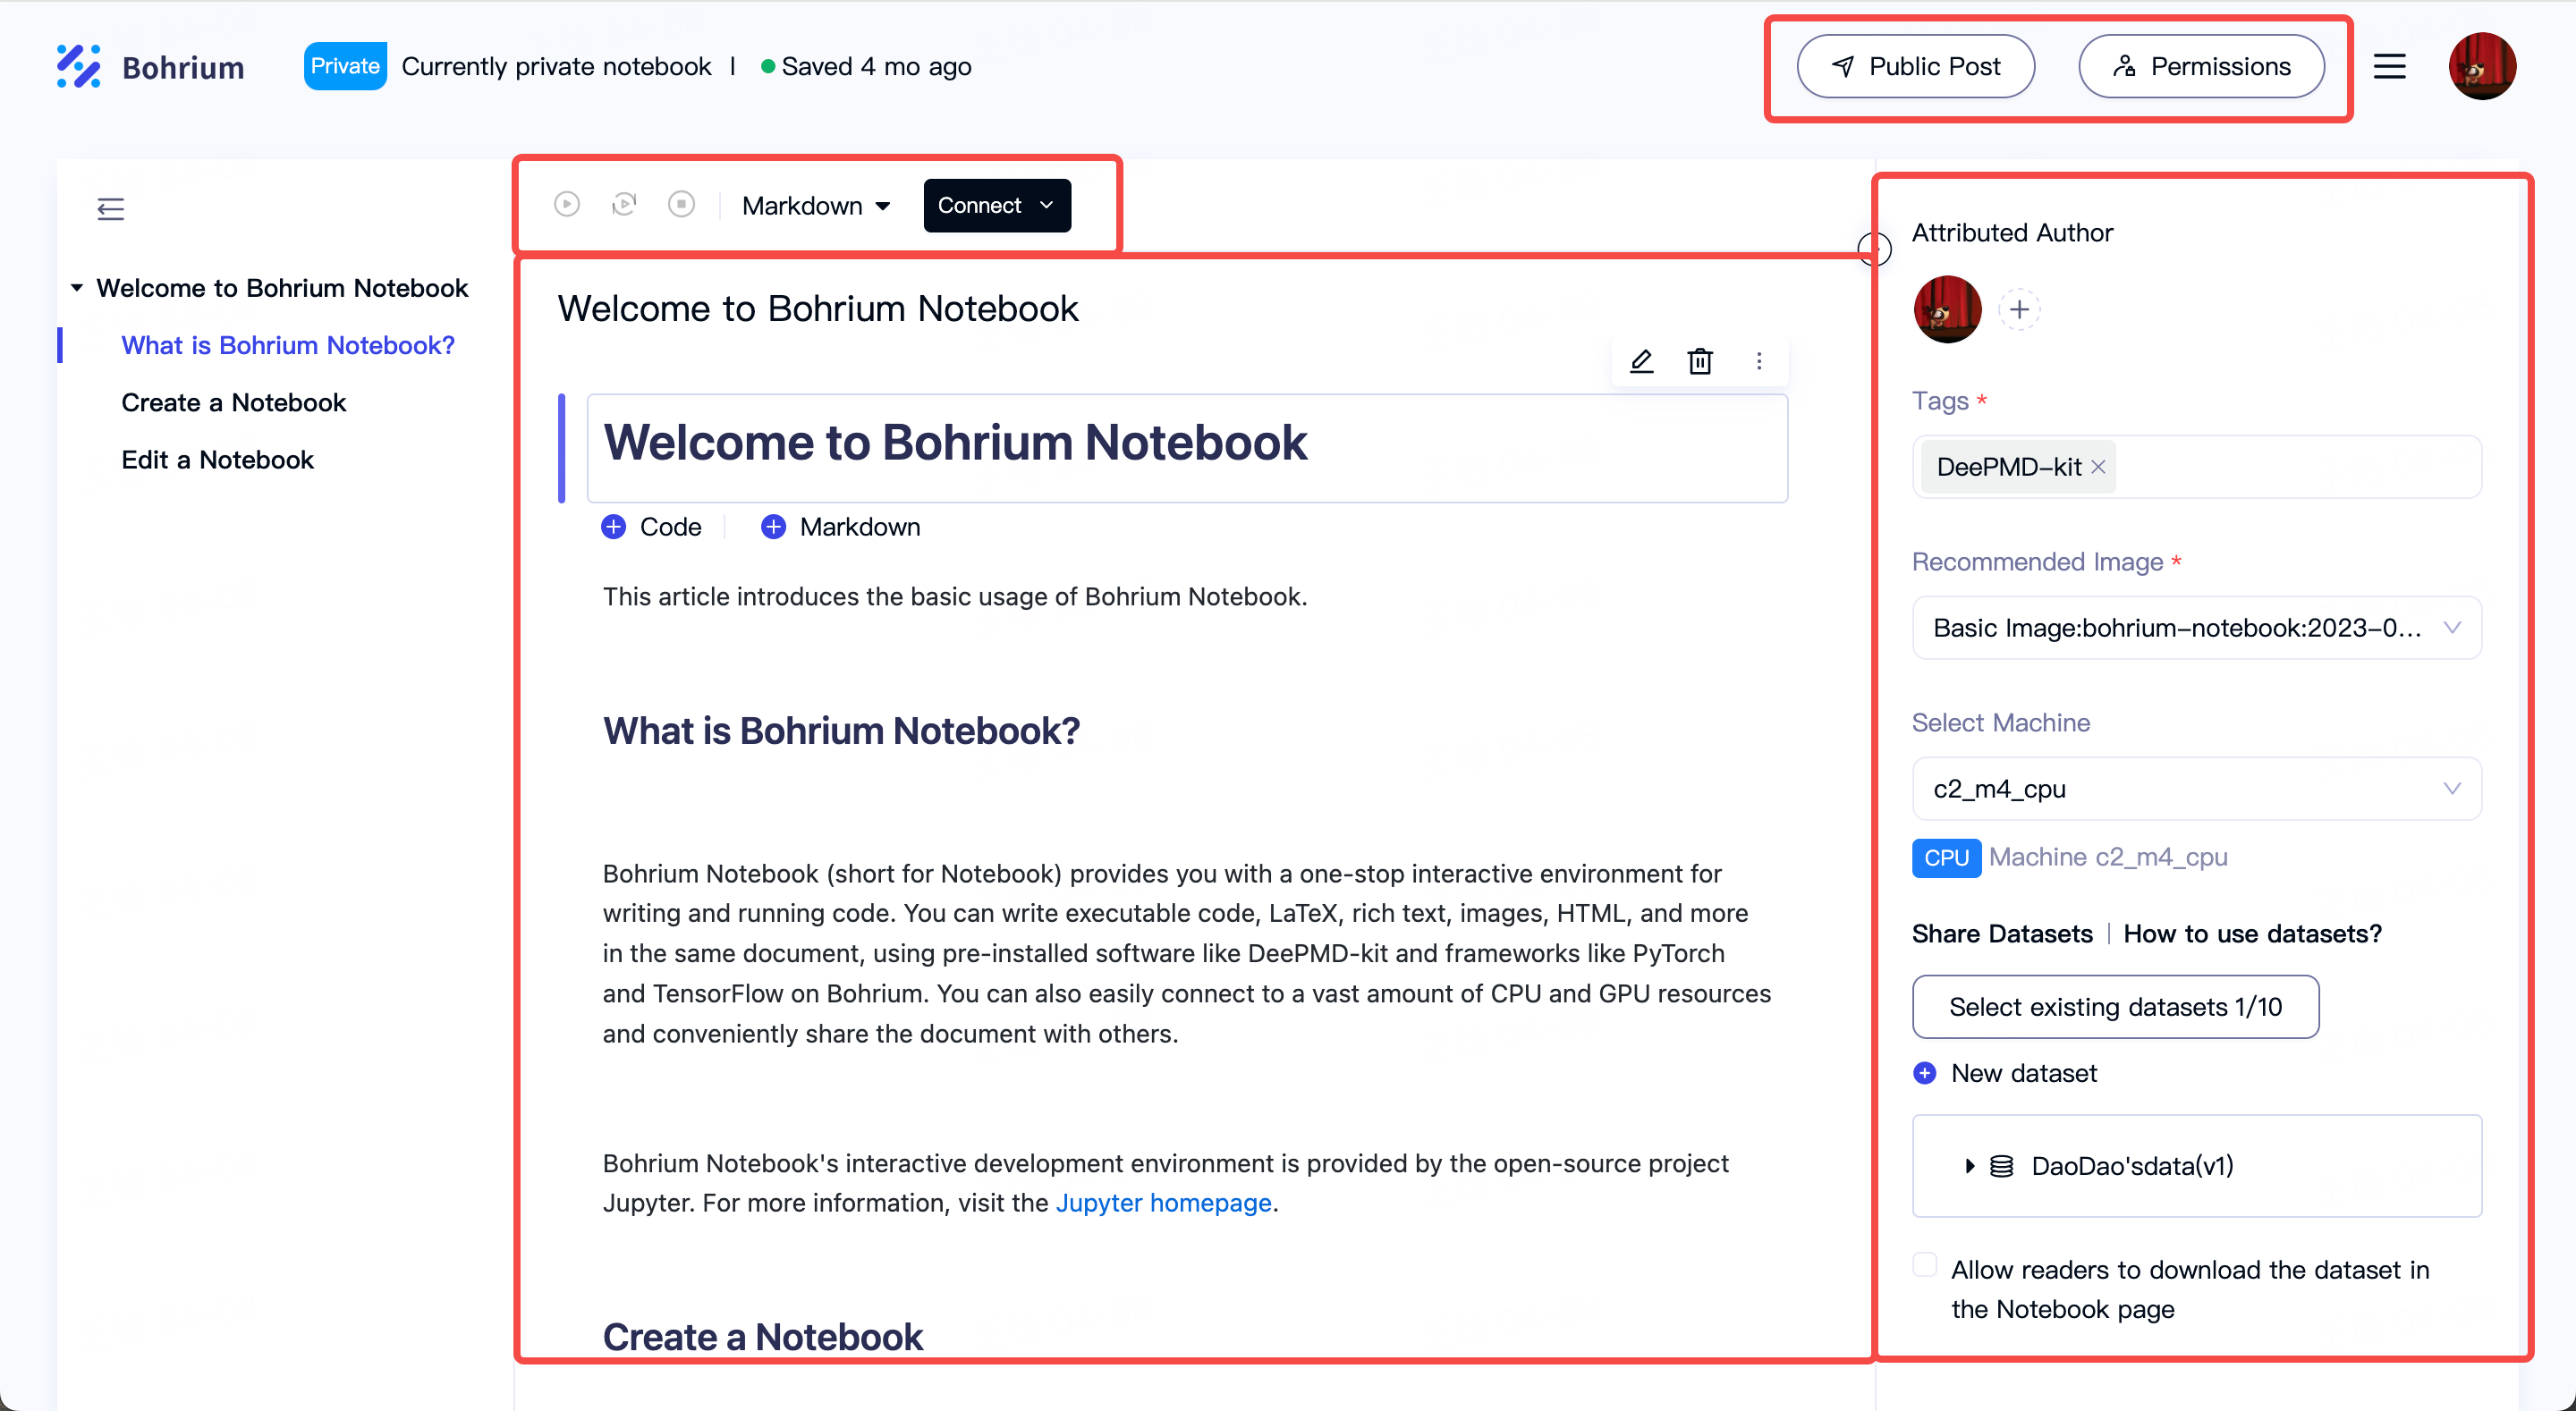
To run a Notebook, click the "Connect" button as shown in the picture:
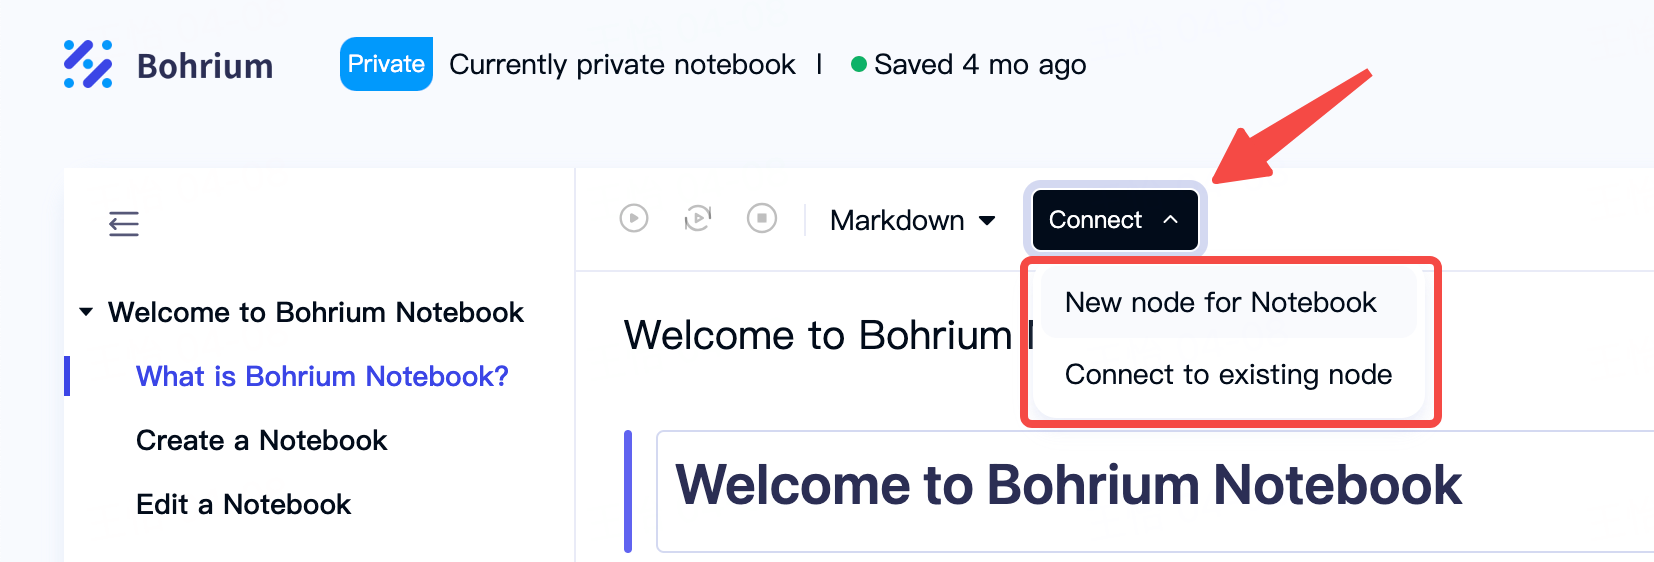
Clicking "New node for Notebook" will launch a new Notebook-specific node with the specified configuration. If you already have a running node with the necessary Notebook environment, you can choose "Connect to existing node".
Bohrium offers a variety of CPU and GPU models to choose from, with the 2-core 4G CPU being completely free:
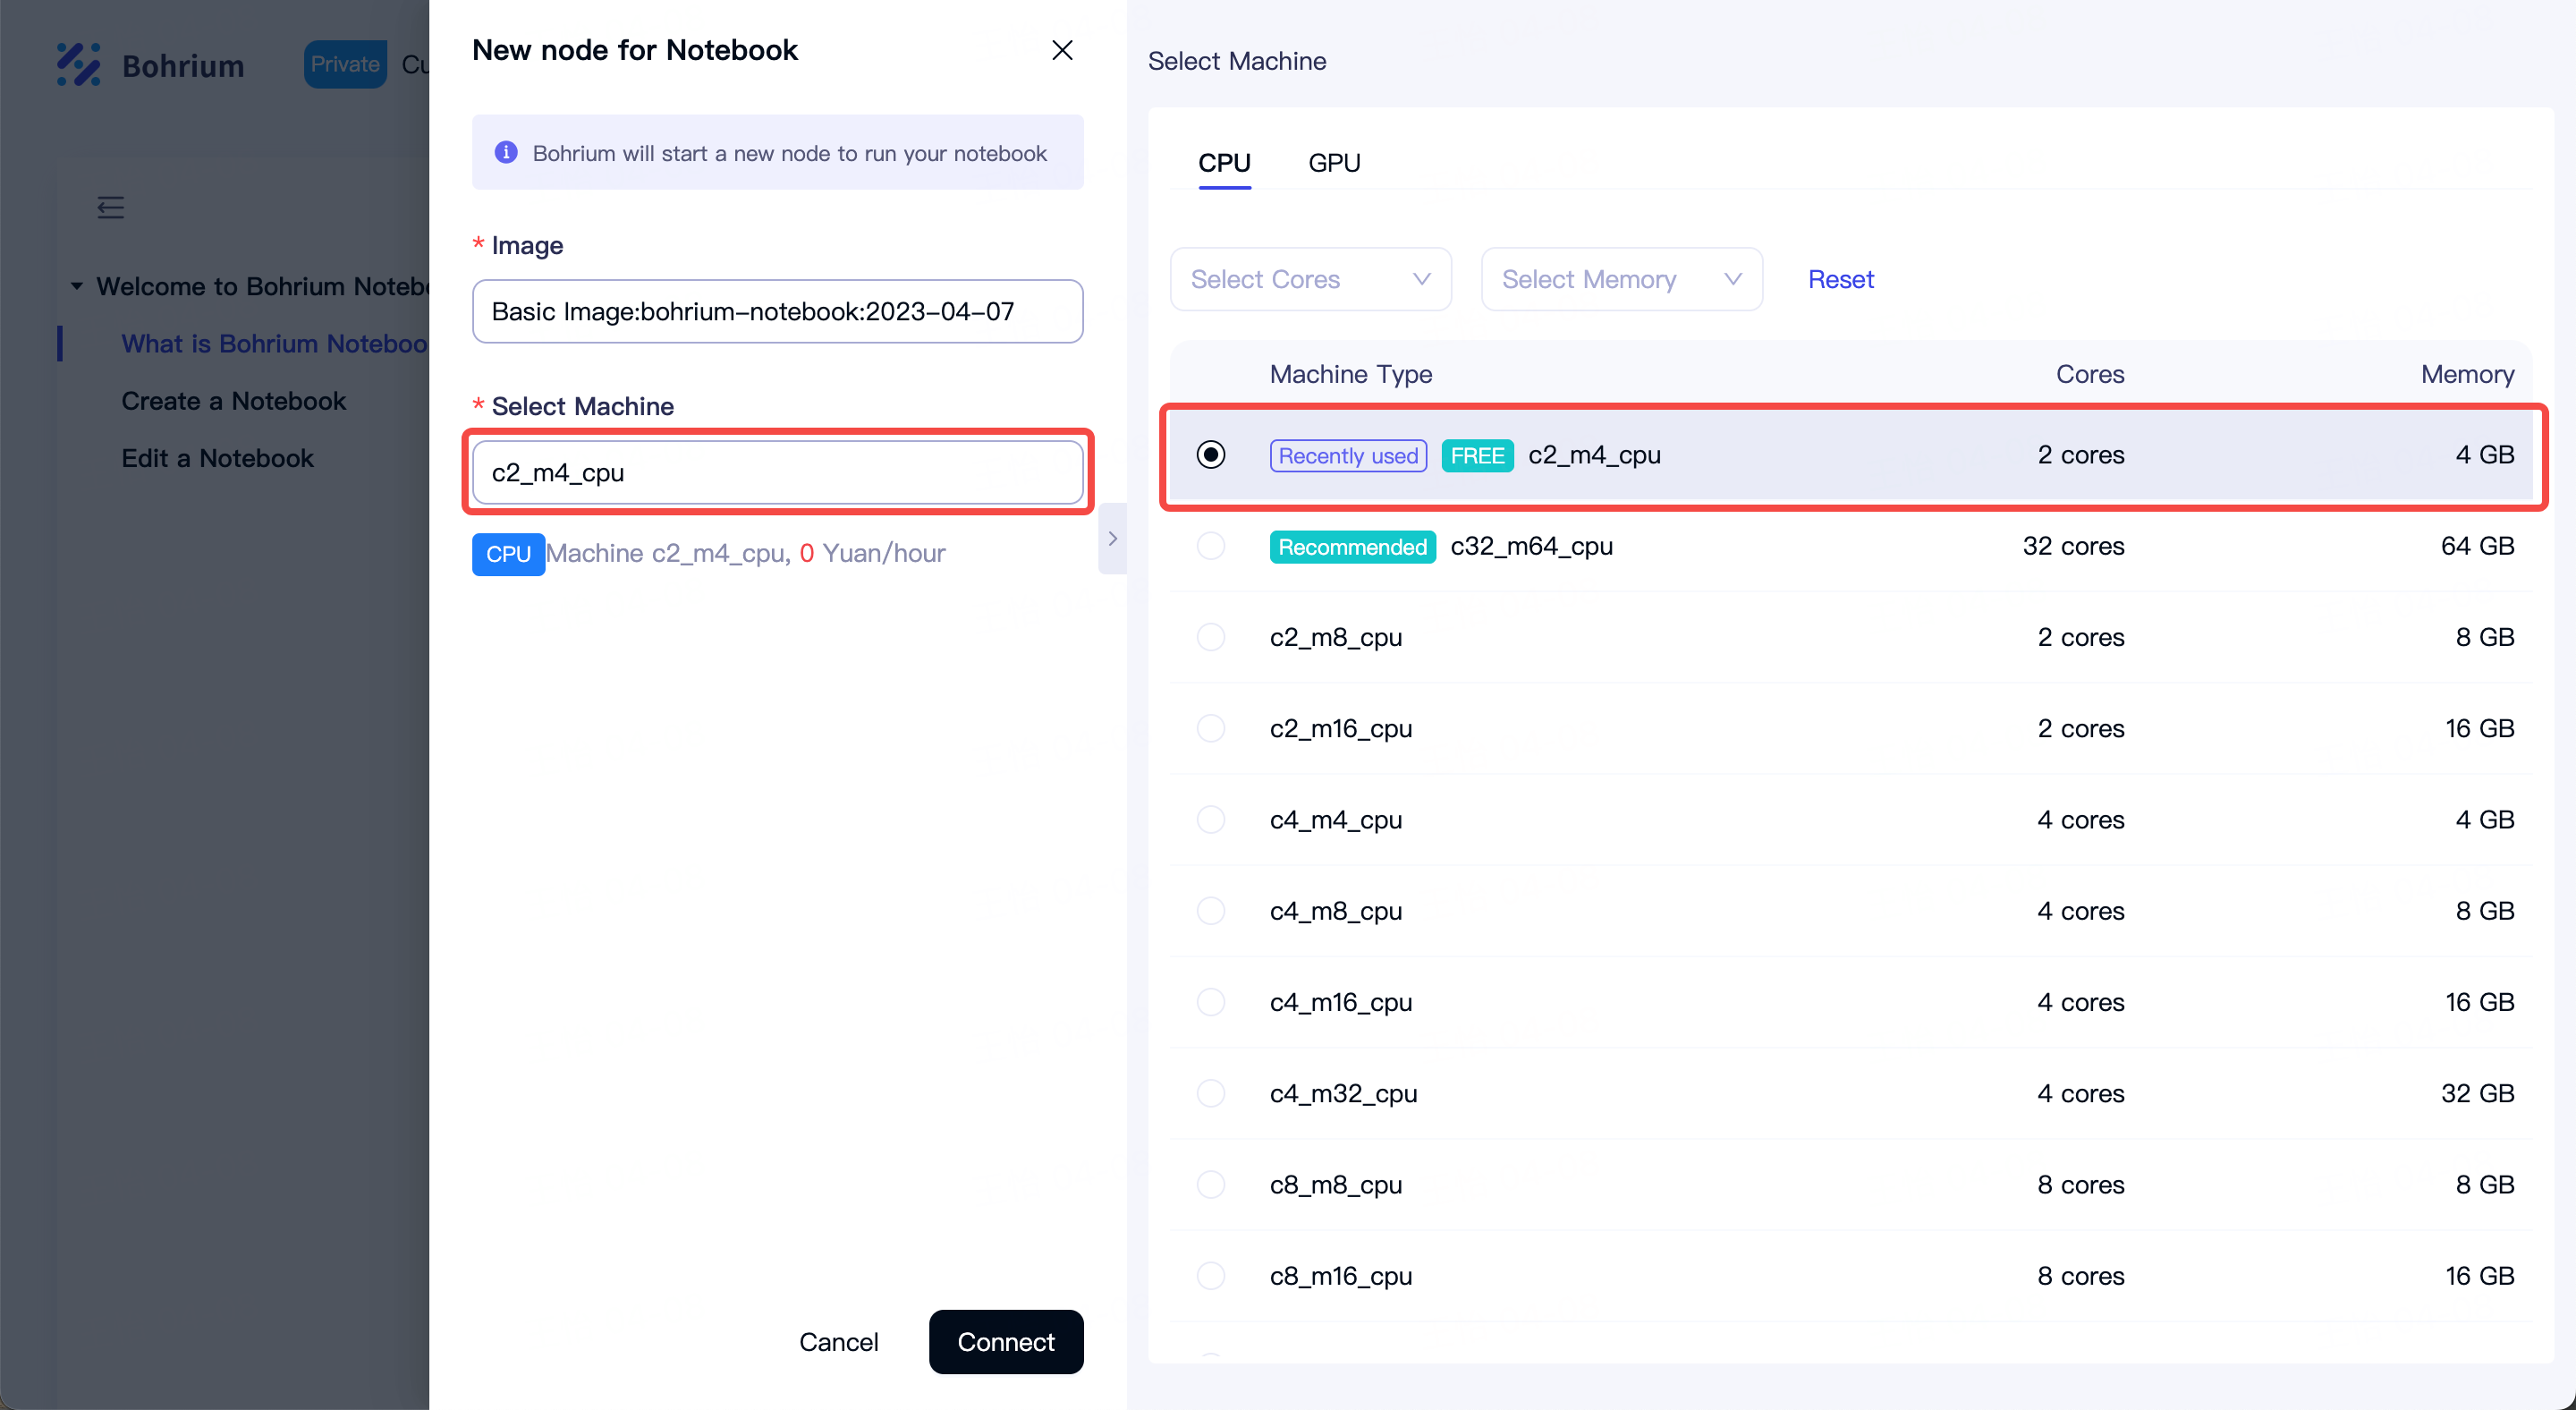
After making your selection, click "Connect" and wait about 10 seconds for the node to start. When the button shows a green "Connected" status, you can start running your Notebook.
Note: If you choose to run a Notebook with a custom image, make sure it has JupyterLab version 3.0 or above installed, preferably the latest version. Install it using the official recommended method to ensure the jupyter lab command works correctly. If the image does not meet the launch requirements, the connection will fail, so please try another image.
To save costs, Bohrium will automatically release the node if the Notebook is idle for more than 120 minutes (no code has been run and the page is not active). Releasing the node will not affect your saved Notebook files or any files saved in the /personal disk, but changes made to the node's system disk (e.g., newly installed software) will be lost.
If you don't want to lose these changes, keep your Notebook active or save the environment as a custom image in the node list here. The next time you connect, use that image to start the node.
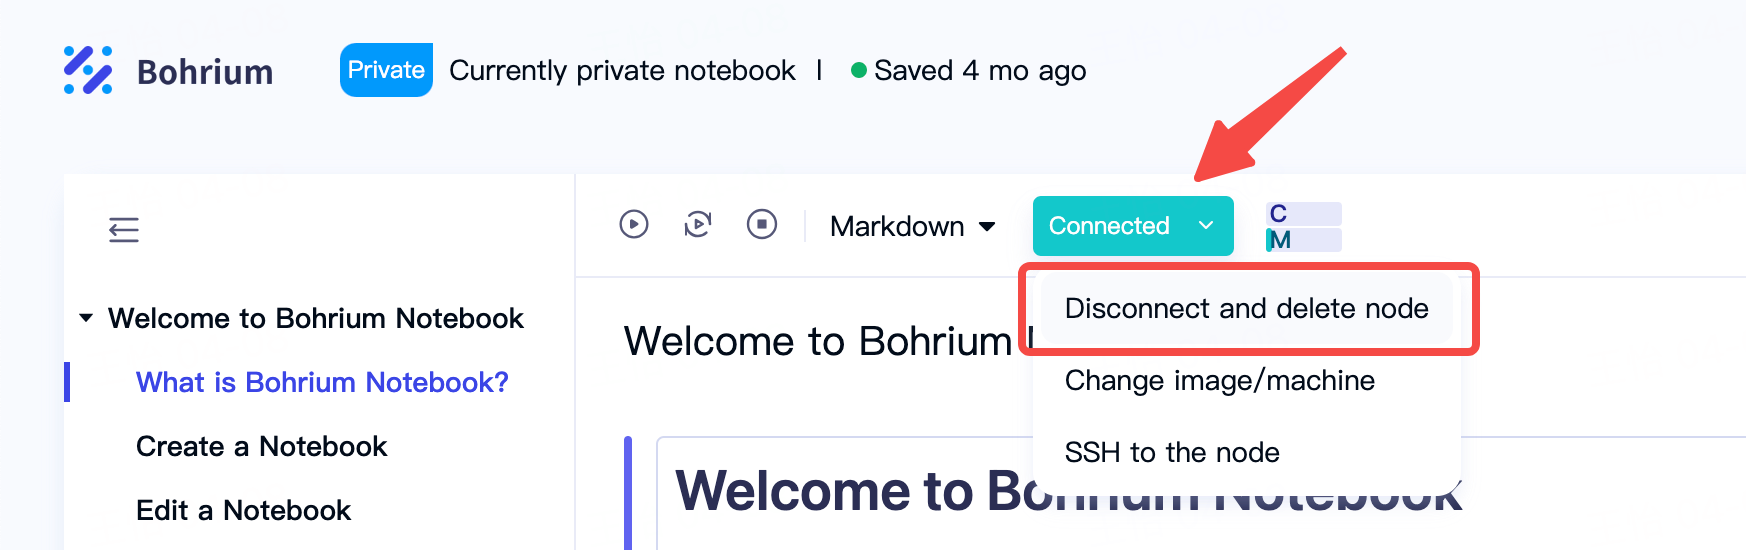
You can also manually disconnect when you don't need computing resources:
Configure Notebook with Multiple Kernels
Install Multiple Kernels
If you want to install multiple Notebook kernels in the image for switching, you can follow these steps:
Select the node you want to configure multiple kernels from the node list and connect using WebShell;
Use conda to create a new Python virtual environment
conda create --name myenv python=3.8
- Activate the newly created virtual environment
conda activate myenv
- Install IPython
conda install ipython
- Install the required kernel (e.g., python3 kernel)
python -m pip install ipykernel
You can also use this command to install other kernels, such as the R kernel or Julia kernel.
- Register the installed kernel
python -m ipykernel install --user --name=myenv --display-name "Python (myenv)"
Where,
- The
--useroption means that the kernel is registered to the current user's directory instead of the system-wide directory, which avoids permission issues. - The
--name=myenvoption is for naming the kernel, where myenv is your environment name, and you can change this name as needed. - The
--display-nameoption is for the kernel name displayed in the Notebook interface, and you can change this name as needed.
- Verify if the kernel configuration is successful
jupyter kernelspec list
Note: After configuring multiple kernels, remember to save the environment as a custom image and connect using the new image, otherwise the configuration will not take effect.
Change the default kernel
If you have multiple Notebook kernels installed in your image environment, you can use the following steps to change the default startup kernel using WebShell:
- Generate the default configuration file using generate-config
jupyter lab --generate-config
- Locate the configuration directory of Notebook
jupyter --config-dir
- Check the installed Notebook multi-kernels
jupyter kernelspec list
- Switch to the configuration directory and add the following configuration to the end of the
jupyter_lab_config.pyfile
c.NotebookApp.kernel_spec_manager.default_kernel_name = 'ir'
In this case, ir is the name of the installed R kernel, which can be replaced with any installed kernel.
Note: After changing the default kernel, you also need to save the environment as a custom image and connect using the new image, otherwise the configuration will not take effect.
Sharing Notebooks
Newly created Notebooks are visible only to you by default. To invite others to read or edit, click the "Permissions" button in the top-right corner and share the Notebook with specific users:
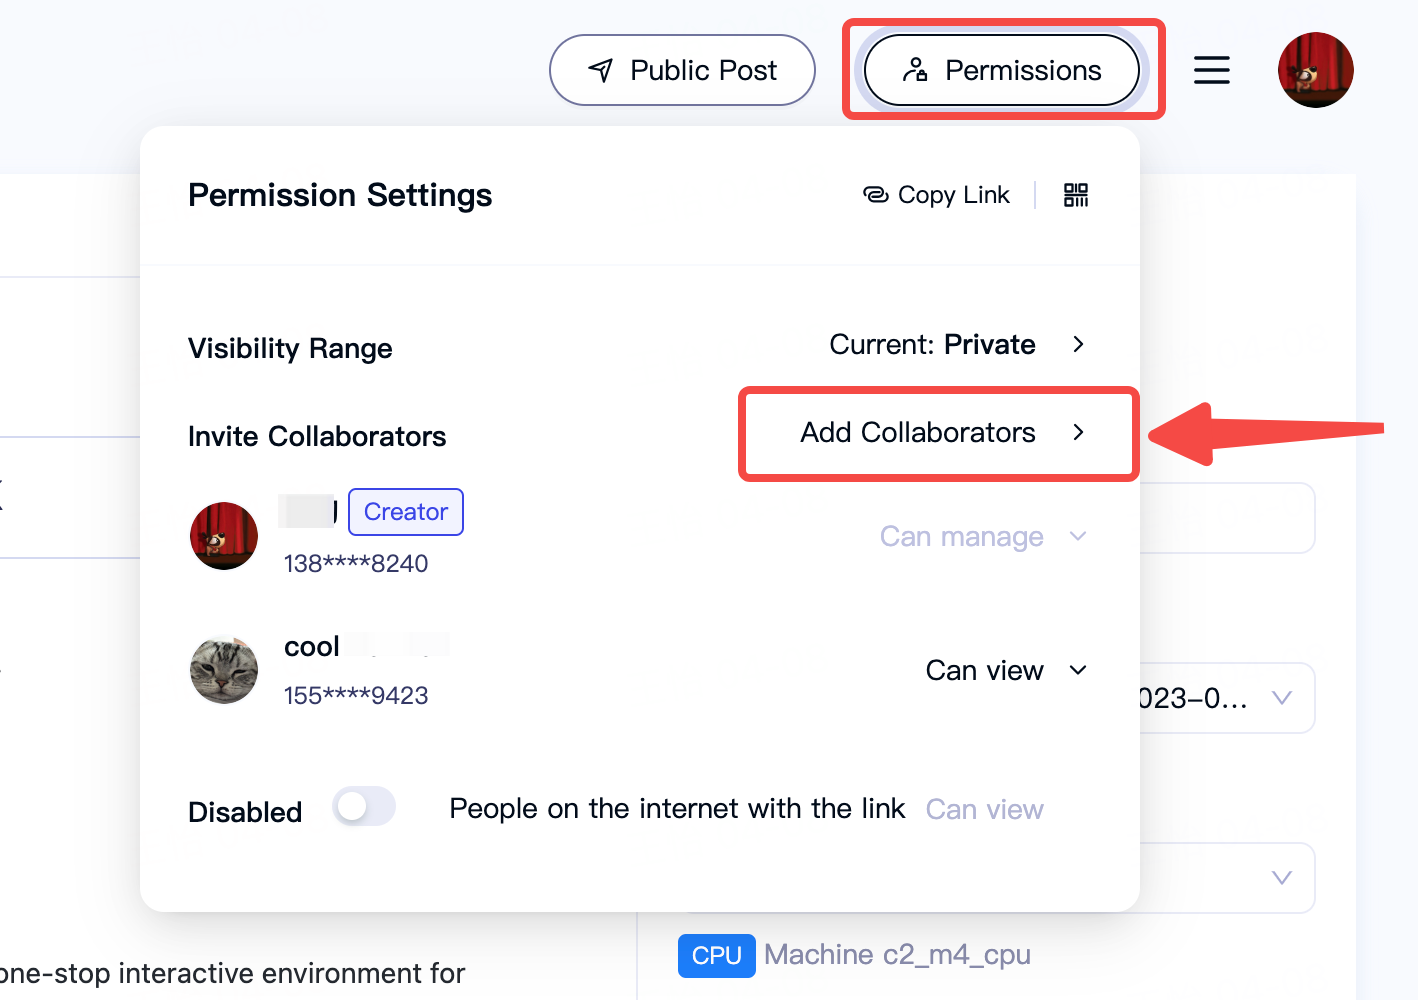
You can invite specific Bohrium users or all members of a project. When inviting collaborators, you can specify their permission levels, with Bohrium offering read, edit, and manage access types.
If you're unsure of the invitee's Bohrium account (e.g., for open lectures or courses) or if they don't have one, enable "Link Sharing" so that anyone with the link can read your Notebook.
To share your Notebook with all Bohrium Notebooks users, choose "Public". This makes it searchable by all users and visible on your personal homepage. If your Notebook receives many likes, it may appear on the Bohrium Notebooks homepage.
When publicly releasing a Notebook, you can:
- Add Authors: Add other contributors and determine their ranking by the order added;
- Add Tags: Make it easier for users to search and for the platform to recommend related content;
- Recommend Image and Machine: Specify an image and machine, and the system will automatically use them when readers run your Notebook. If you recommend a custom image, ensure it doesn't contain private data and is functional;
- Share Datasets: If your Notebook references other data or files, create datasets and share them when publishing so readers can access these files when running your Notebook.

You can continue to modify publicly released Notebooks, but don't forget to click the "Republish" button to sync the latest content:

Note: Only publicly released notebooks need to be republished. Private notebooks don't require this action, as collaborators will always see the latest version after any user edits.