Project Management and Collaboration
Introduction
In daily scientific research and teaching, teachers/students often have the following needs:
- How to centrally manage the funds of several people and set budgets: for example, members of the same research group, students participating in a course or workshop together, they need to use the funds of a project together;
- How can members involved in the same research topic conveniently and "painlessly" use the code developed by other members;
- It would be so much more convenient for the members of a research group if there was a place to share files instead of constantly sending them back and forth;
- It would be great if the teacher could log in directly to check the problem when their own code doesn't work.
To meet these needs, Bohrium provides a series of tools to help you complete project collaboration and improve team efficiency. All team collaborations are based on projects, and we first need to create a project.
Creating a Project
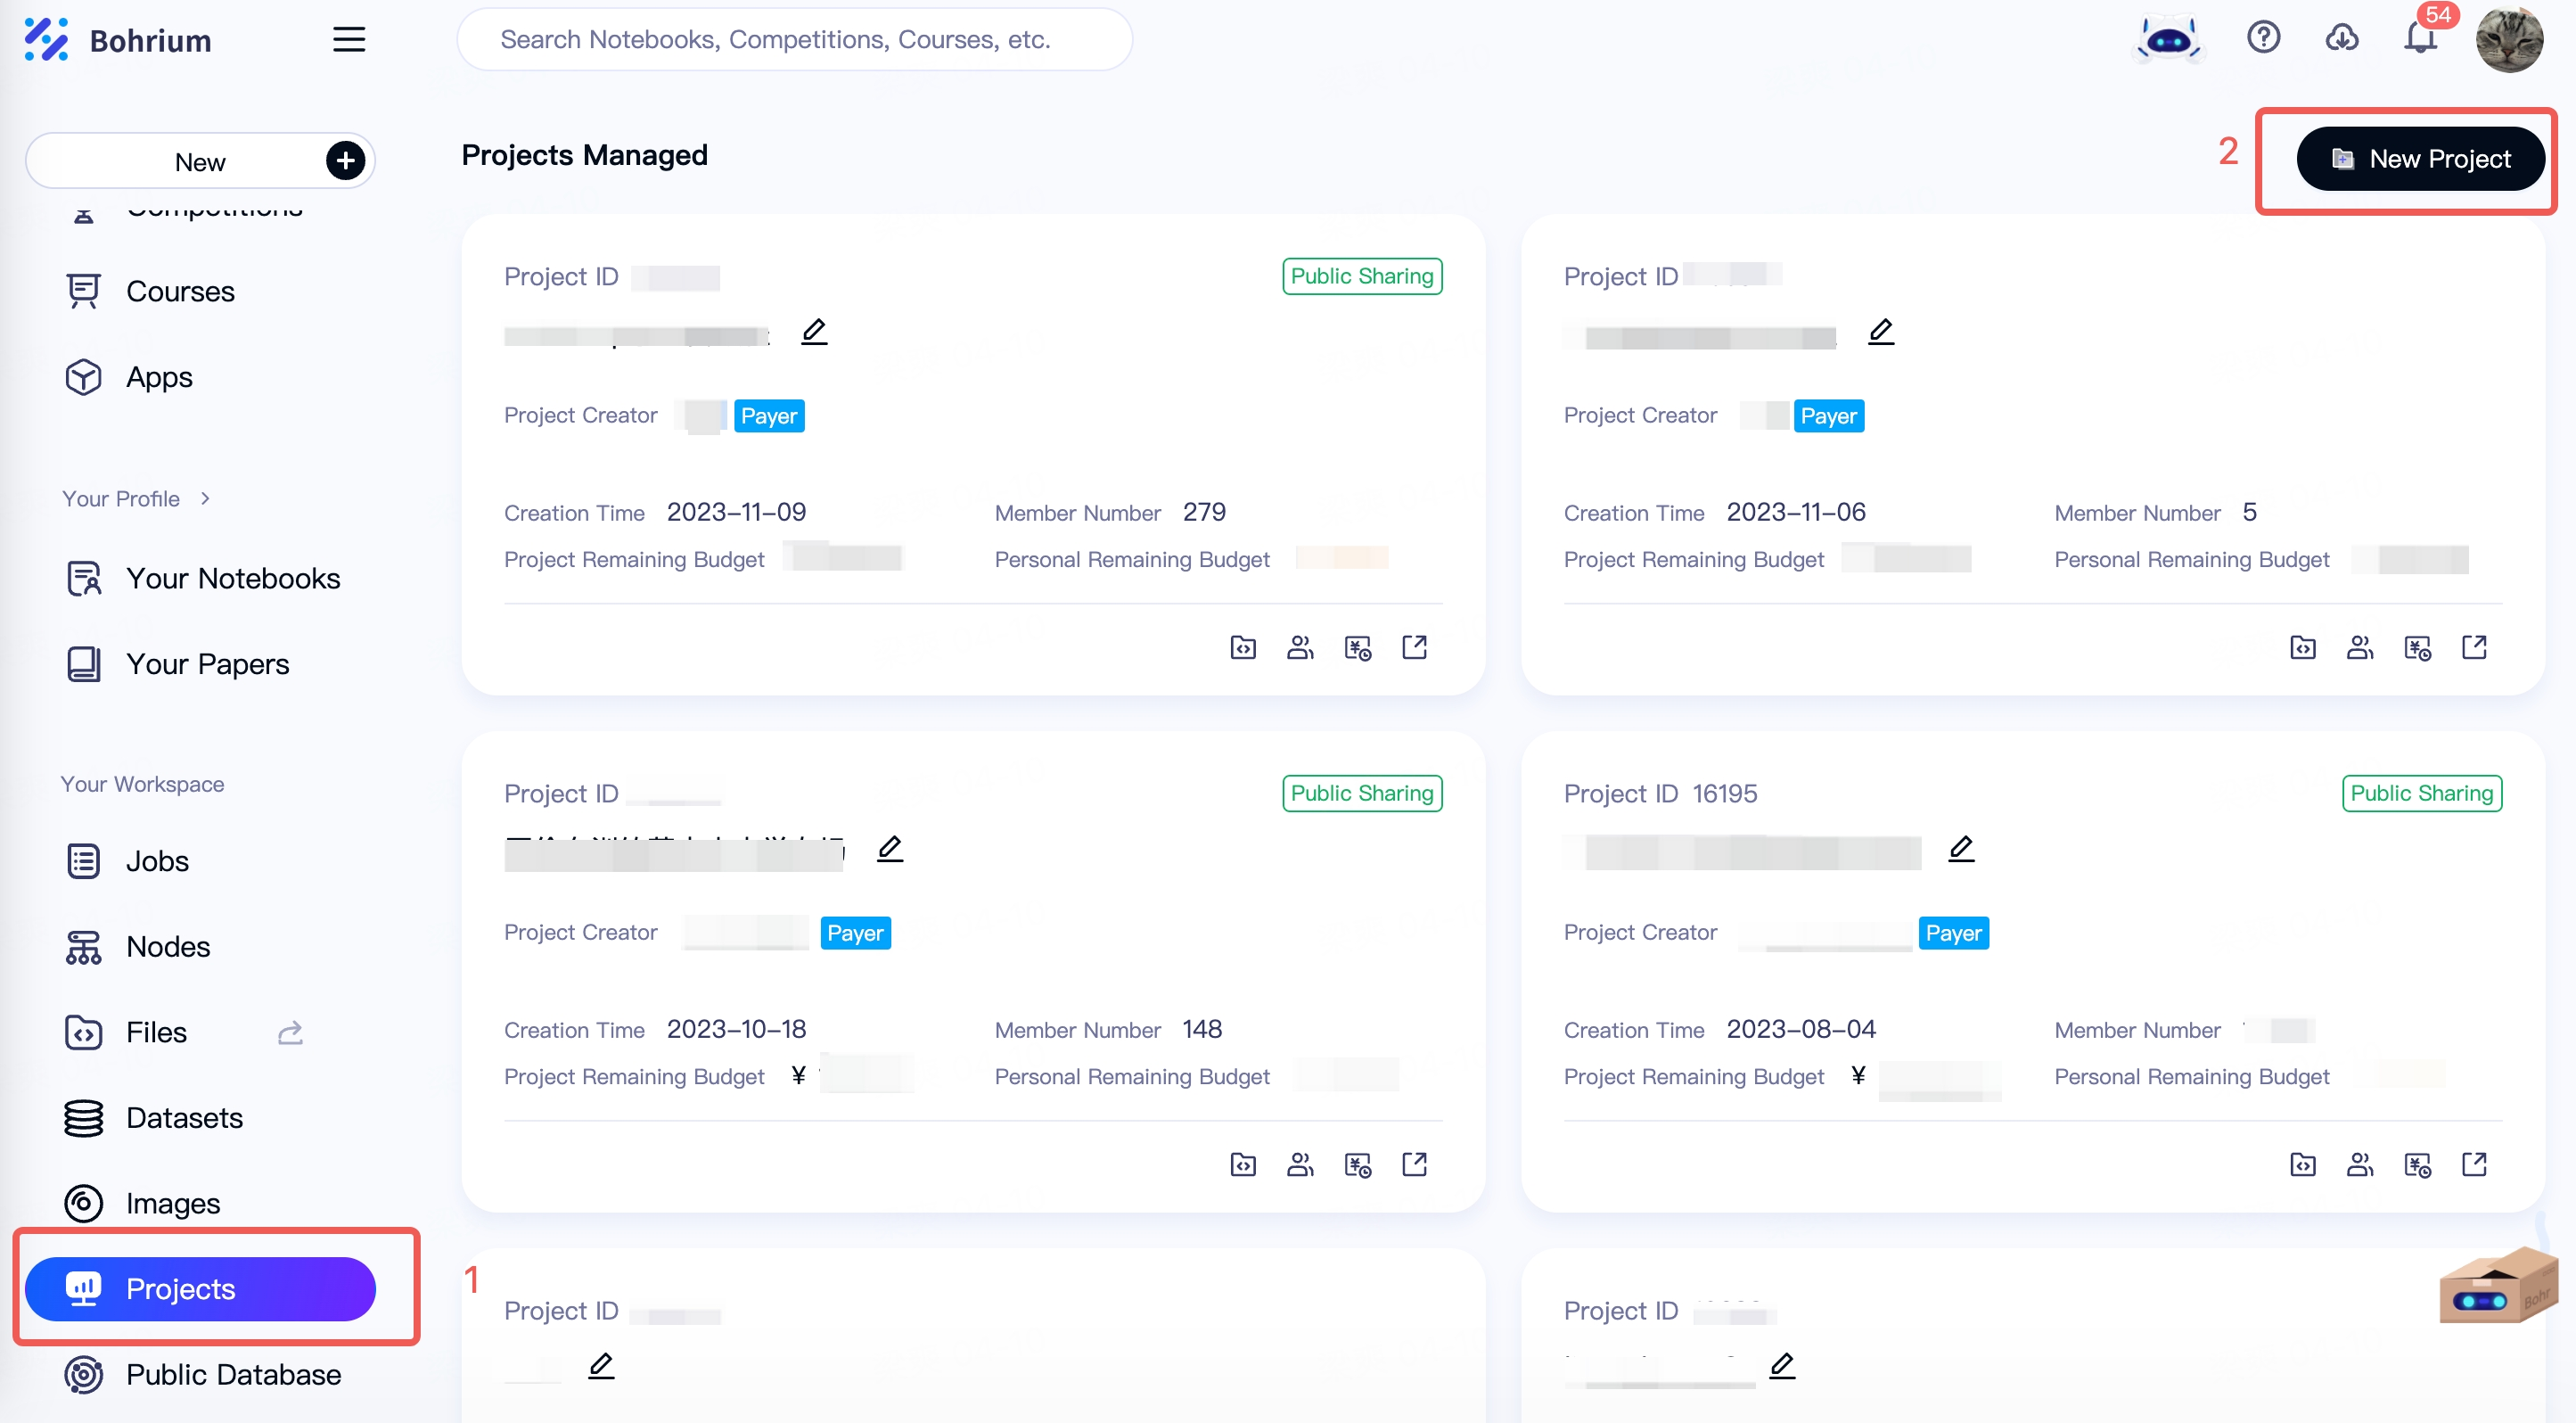
After completing Bohrium account registration and top-up, click on "Projects" in the navigation bar on the Bohrium homepage (red box 1 in the picture), and select "New Project" in the upper right corner of the page (red box 2 in the picture).
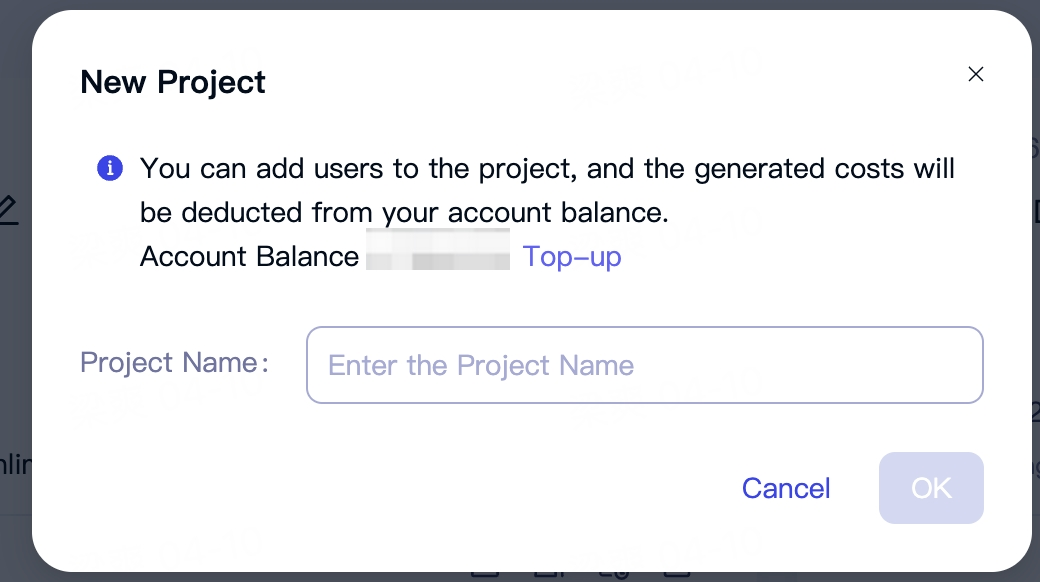
In the pop-up window, give the project a name that is easy for you to recognize (such as the name of your research group, course or project), and click "OK".
Project Roles and Permissions Description
There are currently 3 roles in the project:
- Creator: The user who creates the project is the creator of the project. A project must have and only have one creator, and this role cannot be transferred to others or deleted.
- Administrator: Appointed by the creator, a project can have multiple administrators, which is not a mandatory role and can be appointed or removed at any time.
- Member: Users added to the project are by default in this role.
The specific permissions of each role are as follows:
Symbol explanation: √ means that the role has this permission; X means that the role does not have this permission.
| Function Module | Permission Content | Creator | Administrator | Member |
|---|---|---|---|---|
| Project Management | Modify project name | √ | √ | X |
| Project Management | Delete project | √ | X | X |
| Project Member Management | Add or delete project members | √ | √ | X |
| Project Member Management | Appoint or cancel project administrators | √ | X | X |
| Project Budget Management | View the overall and individual consumption of the project Adjust the overall and individual budget amounts of the project | √ | √ | X |
| Project Node Management | View and operate all management nodes within the project: such as logging into management nodes, shutting down, deleting, etc. | √ | √ | X |
| Project Job Management | View and operate all jobs within the project: such as logging into computing nodes, viewing logs, downloading files, etc. | √ | √ | X |
| Project Image Management | View and operate all images within the project: such as sharing, deleting | √ | √ | X |
| Project Expense Bill | View and download the project's consumption bill | √ | √ | X |
Add/Remove Members
If the project has other collaborators (such as course assistants, team members, or students in a course or workshop), you can click on the "Project Member Management" button (circled in red in the figure) to enter the member management page for operations.
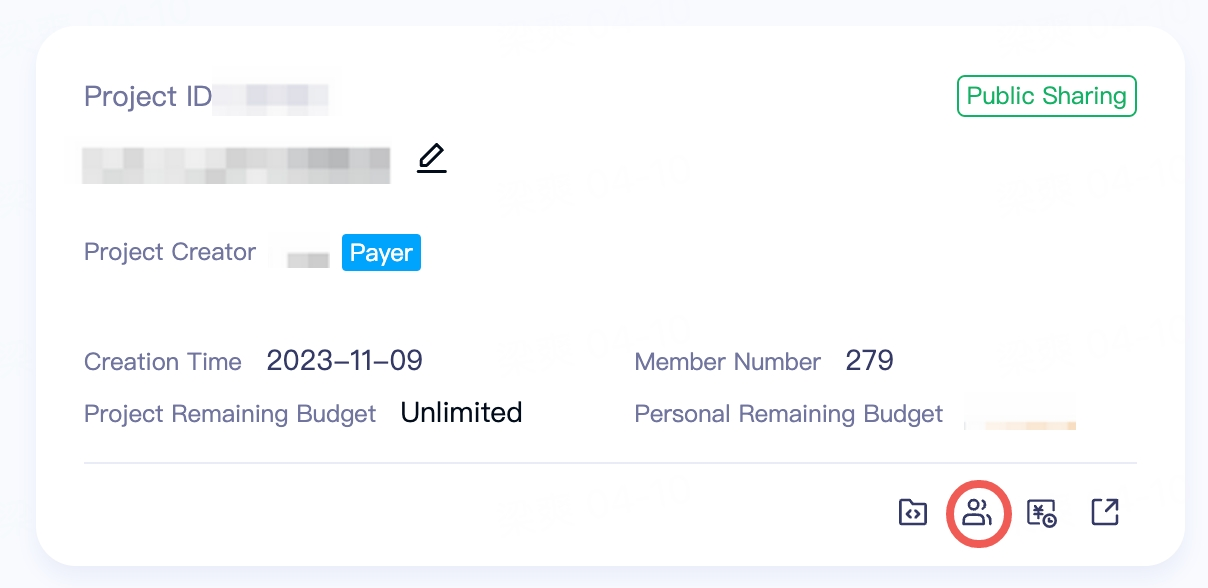
On the member management page, you can add project members in bulk, delete them in bulk, set administrators, and view the budget and expenses of each member within the organization. For differences between roles, please check the role permission description.
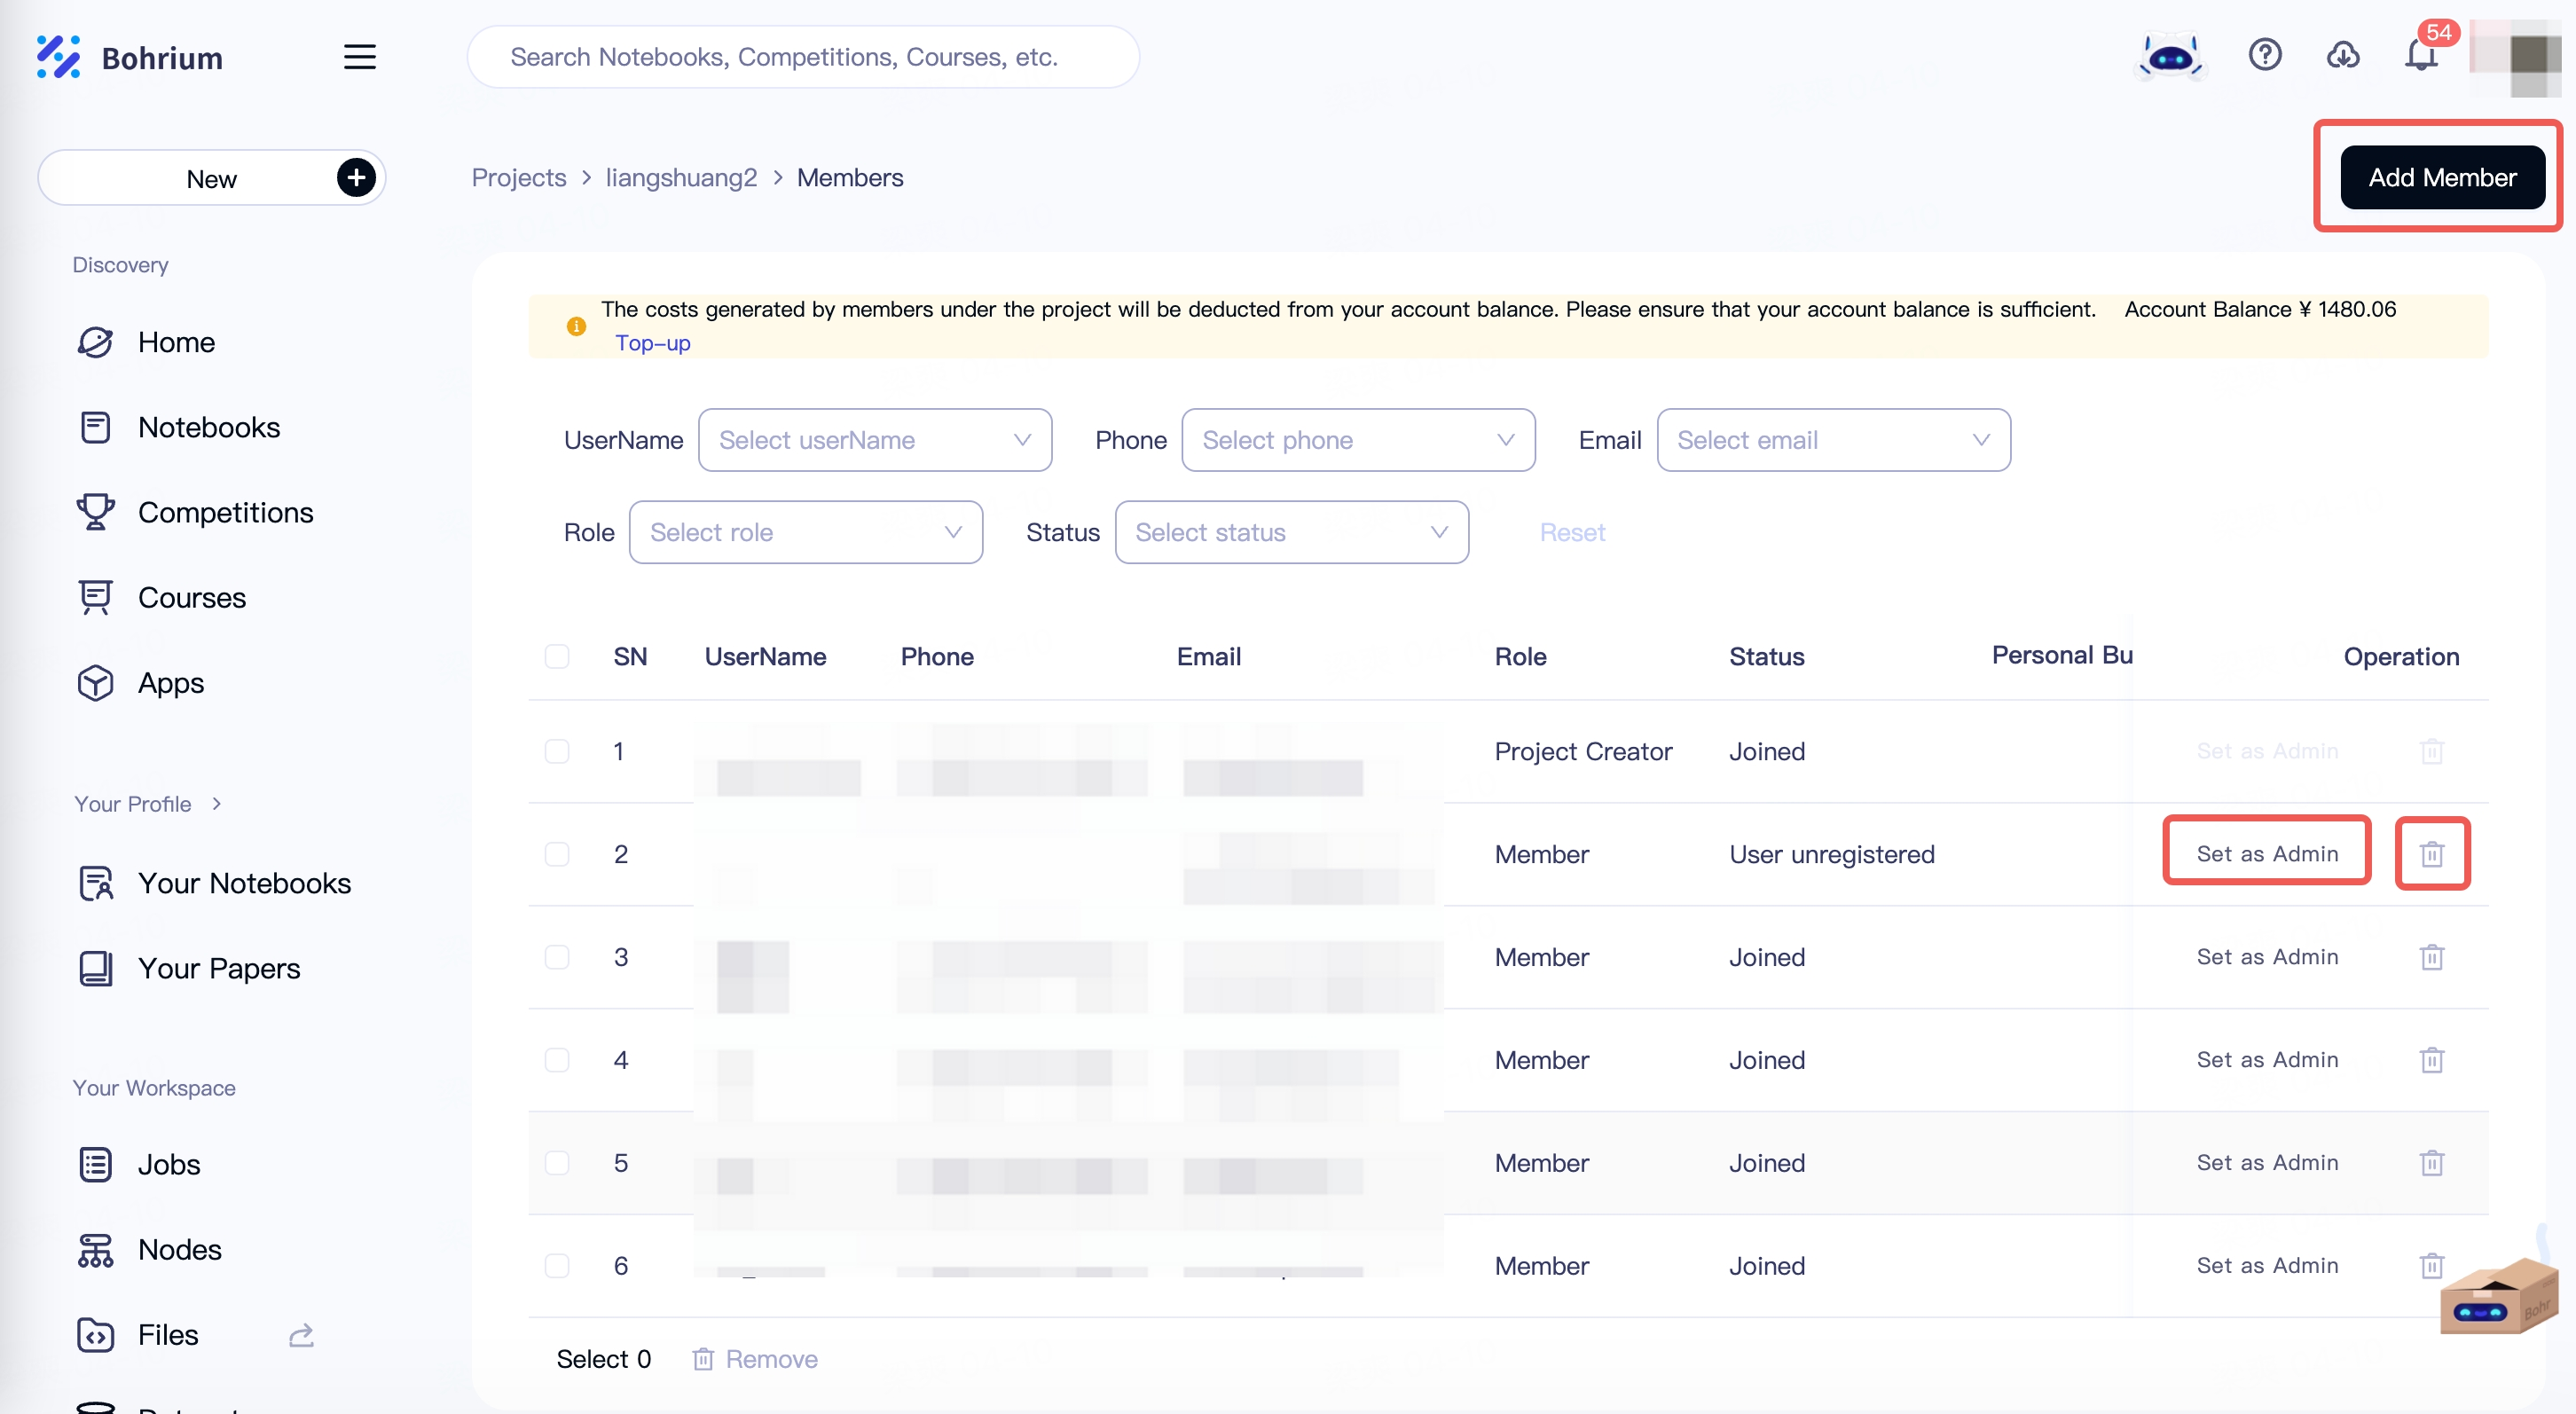
Special Note: The expenses incurred by members within the project directly consume the balance in the project creator's wallet. It is recommended that you set up a budget for the project and its members.
Project and Member Budget
- Project Budget
The project creator and administrators can set a budget for the project (not mandatory) to control the total expenses of the project. If you do not set a budget, the default project budget will be "unlimited". Click the "Project Budget" button (circled in red in the image) to enter the budget management page.
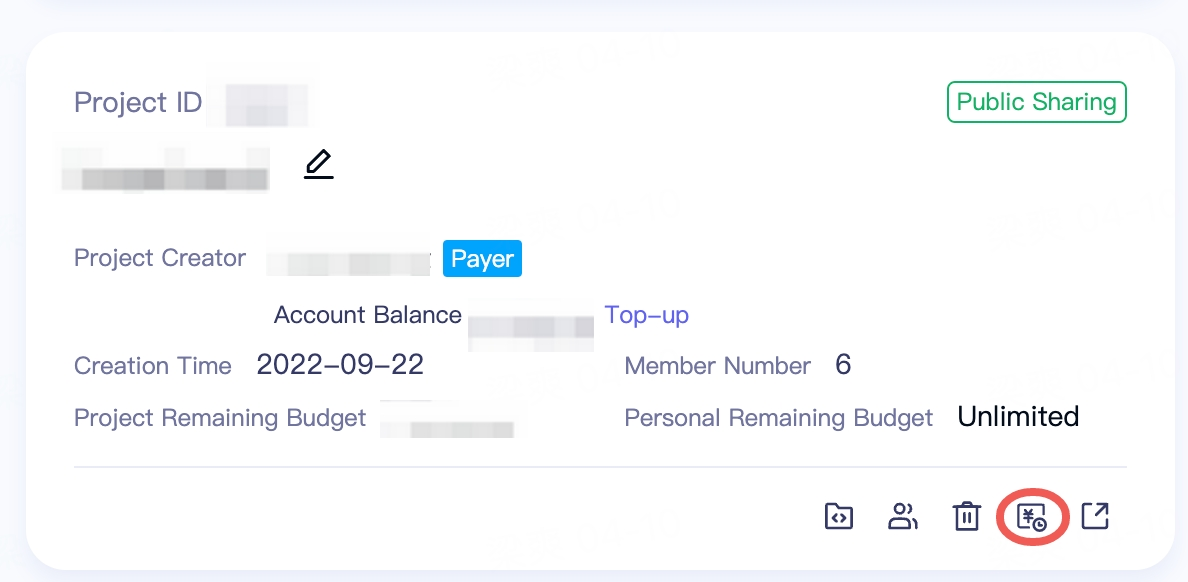
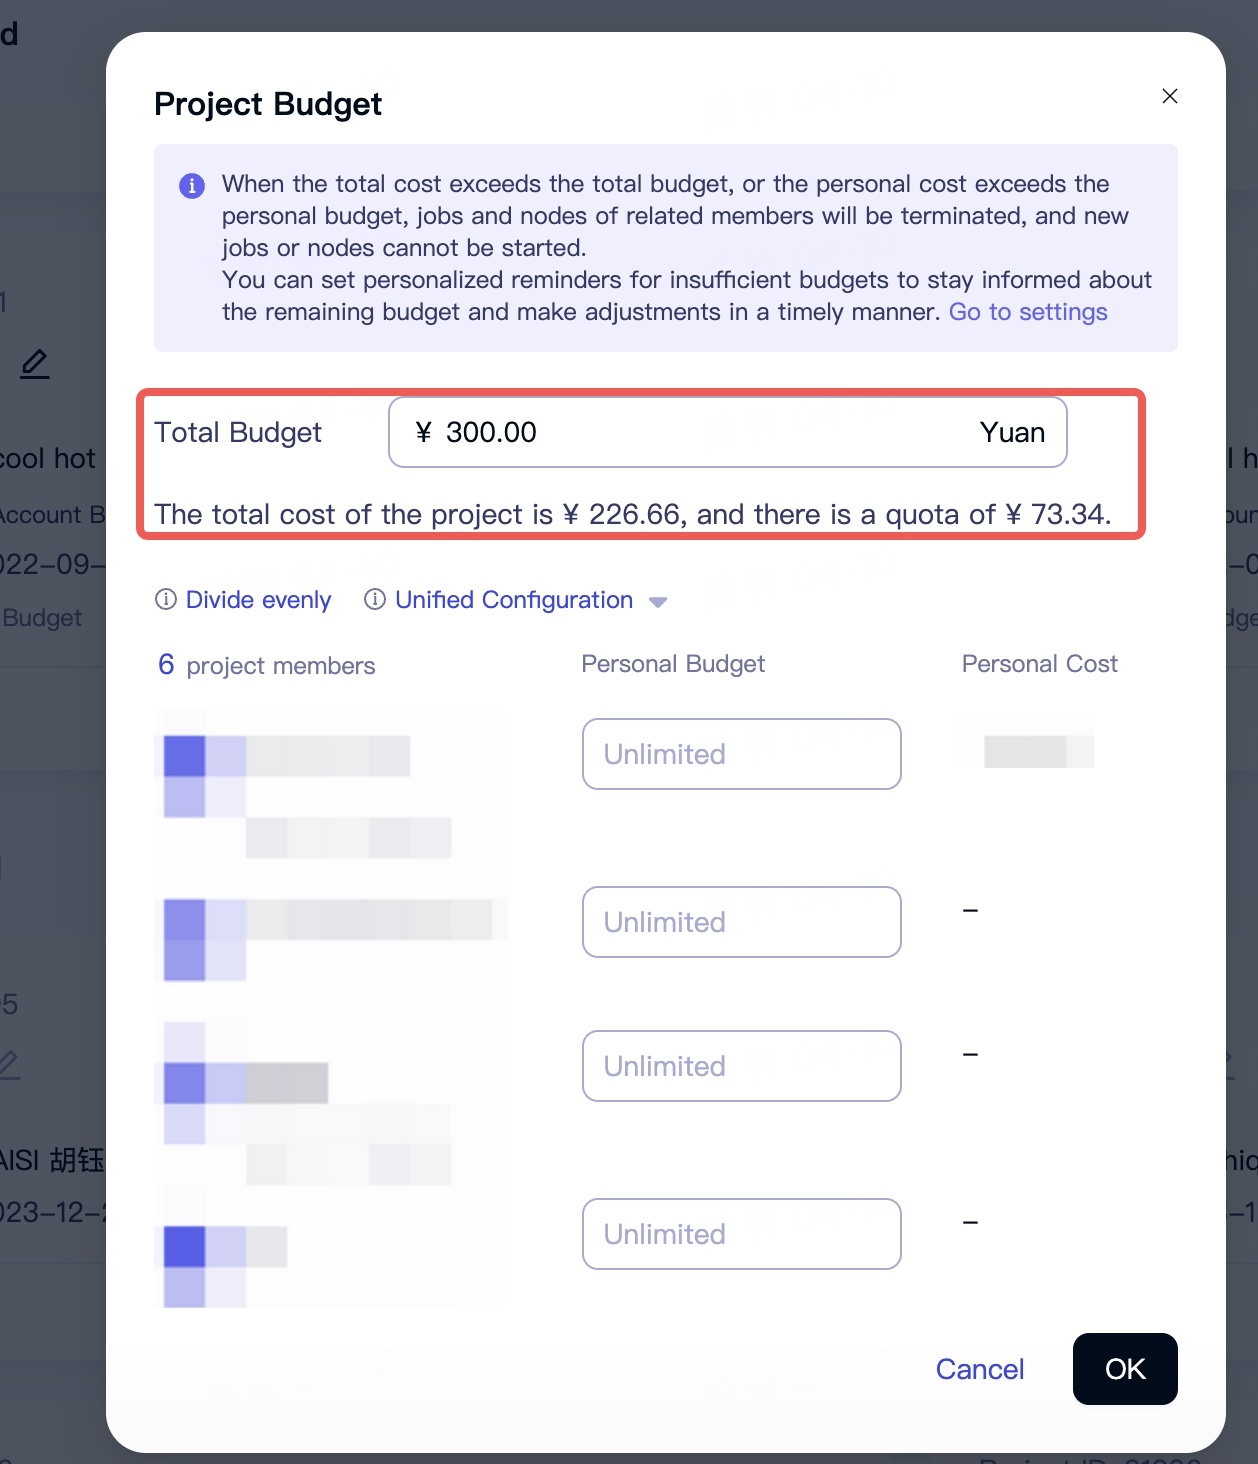
The expenses of all members within the project will be recorded in this budget. When the total expenses of the project exceed the budget, project members will be unable to submit new jobs or start new nodes.
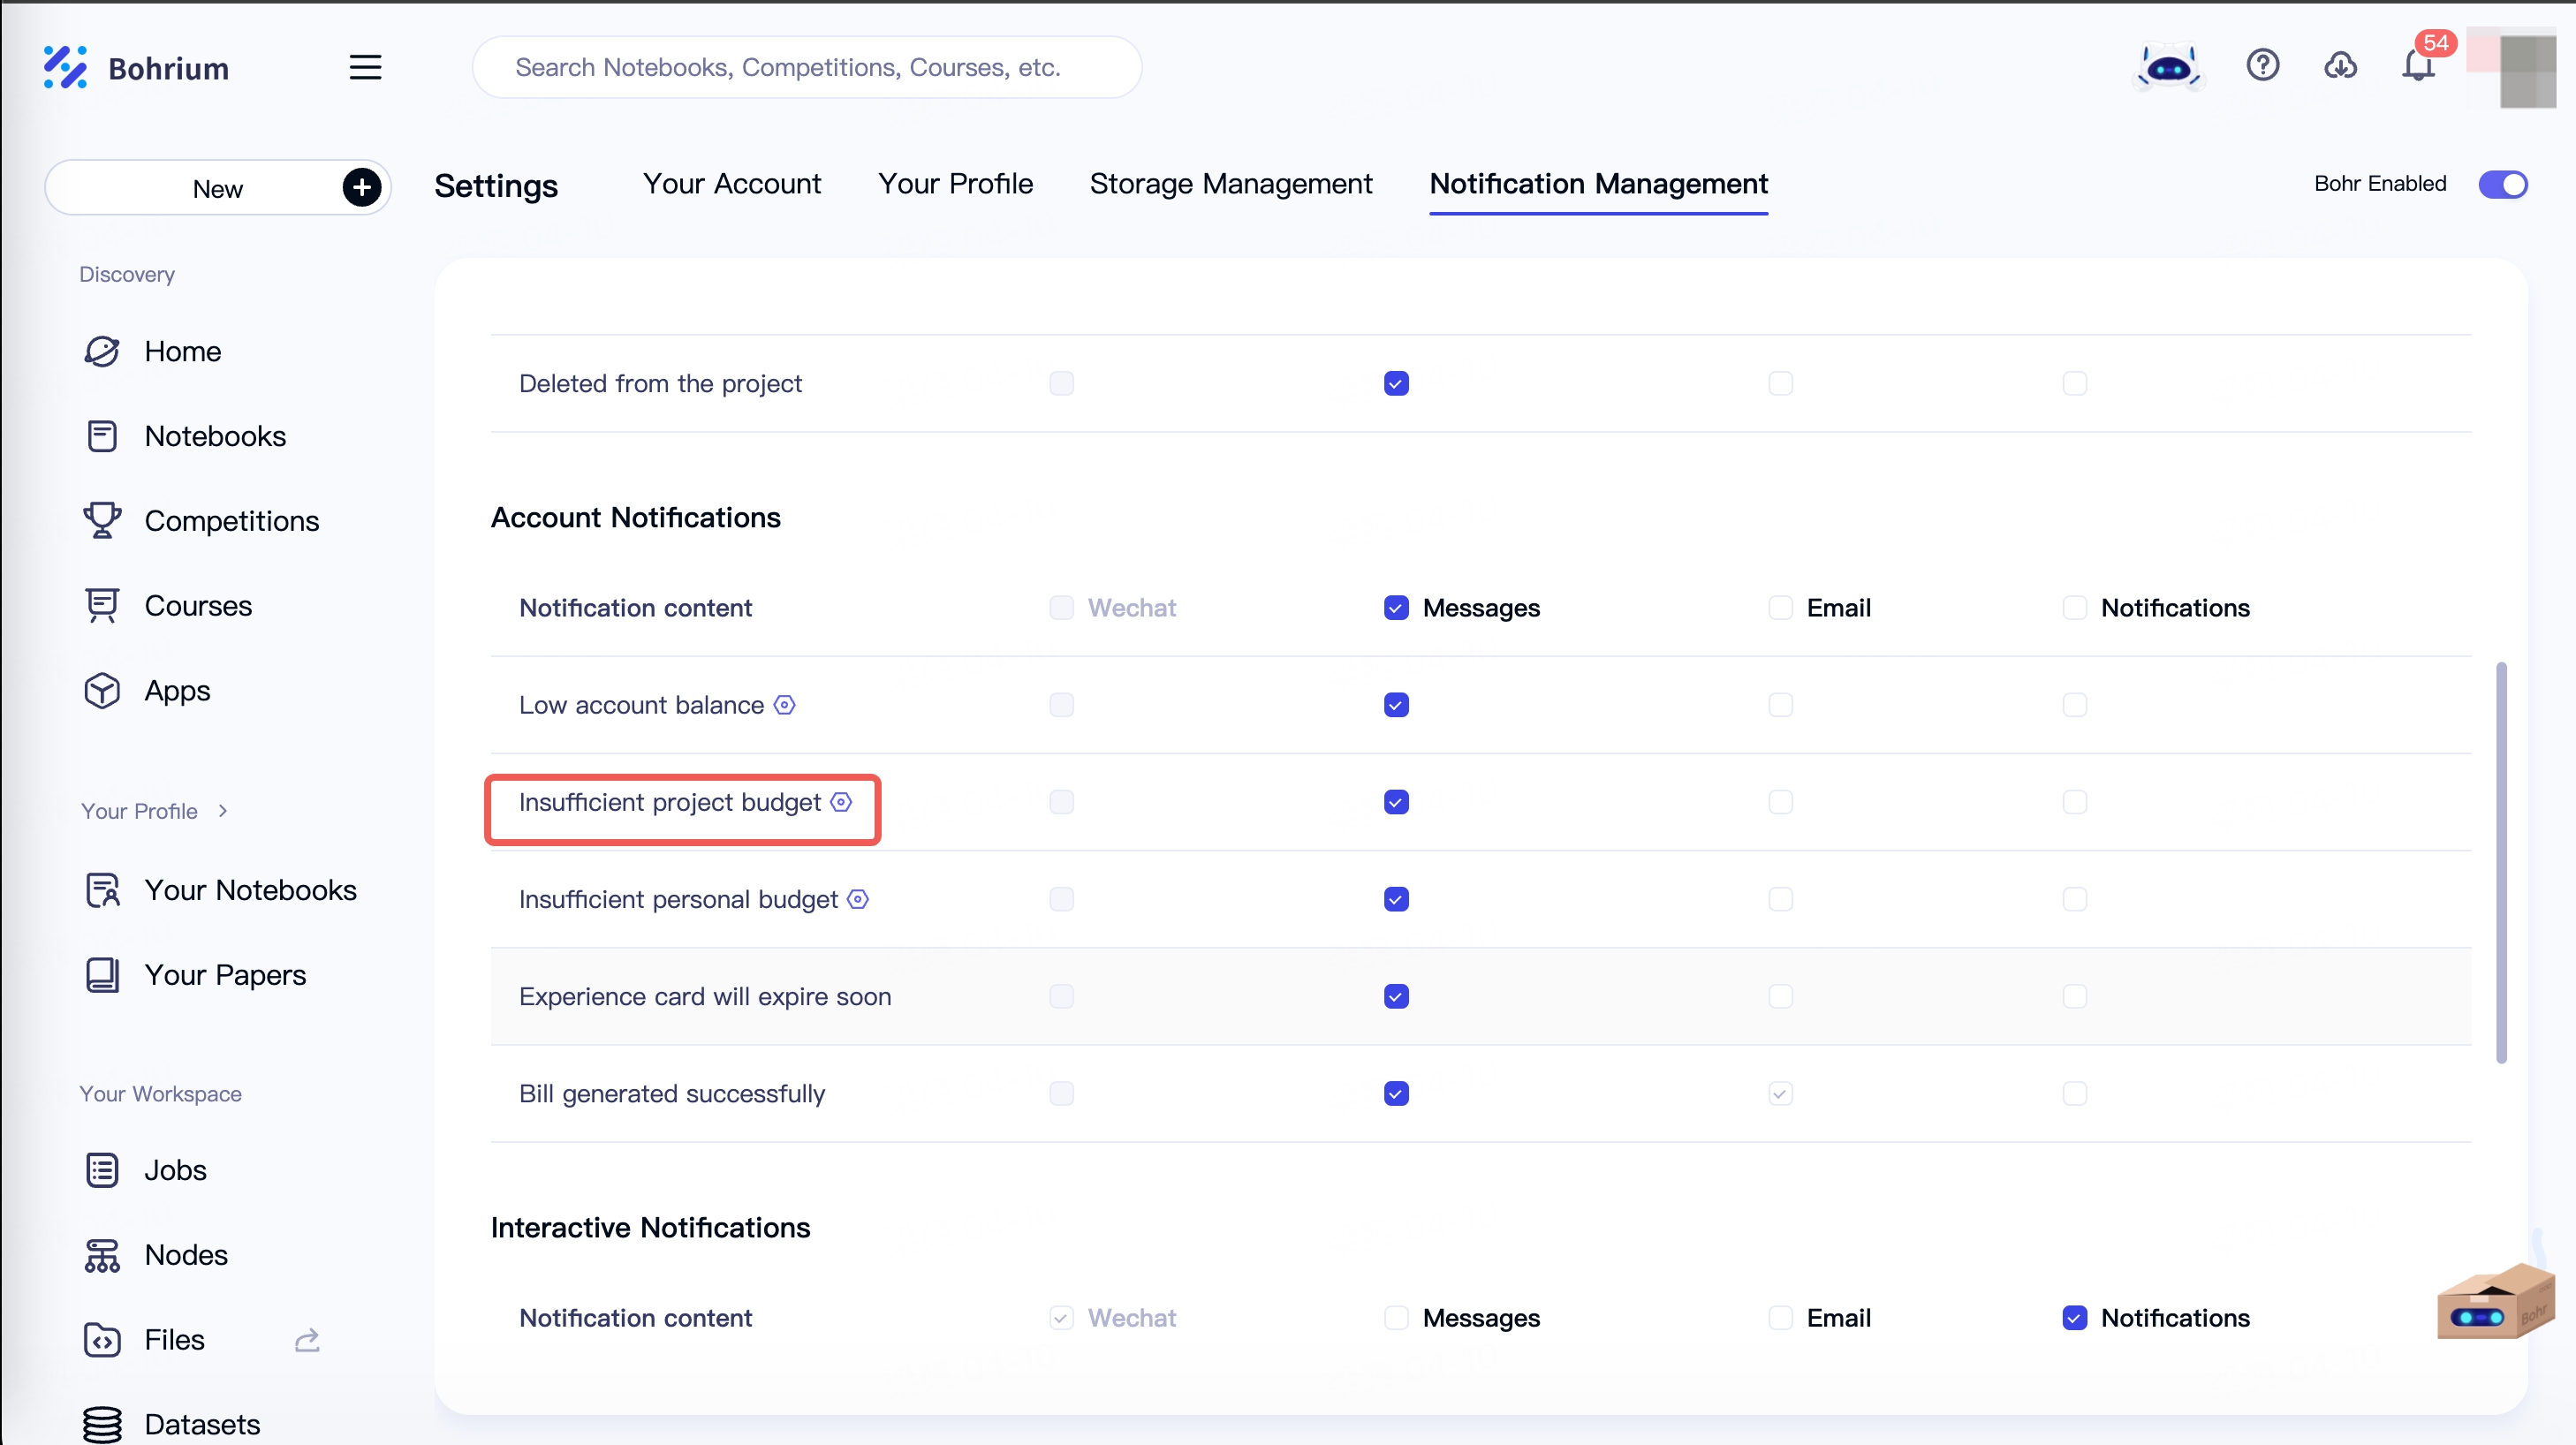
You can set a reminder threshold in Notification Management. When the remaining project budget falls below the threshold, you will receive a message reminder.
- Member Budget
The creator and administrators of the project can allocate the consumable budget for the project members, so as to control the overall spending.
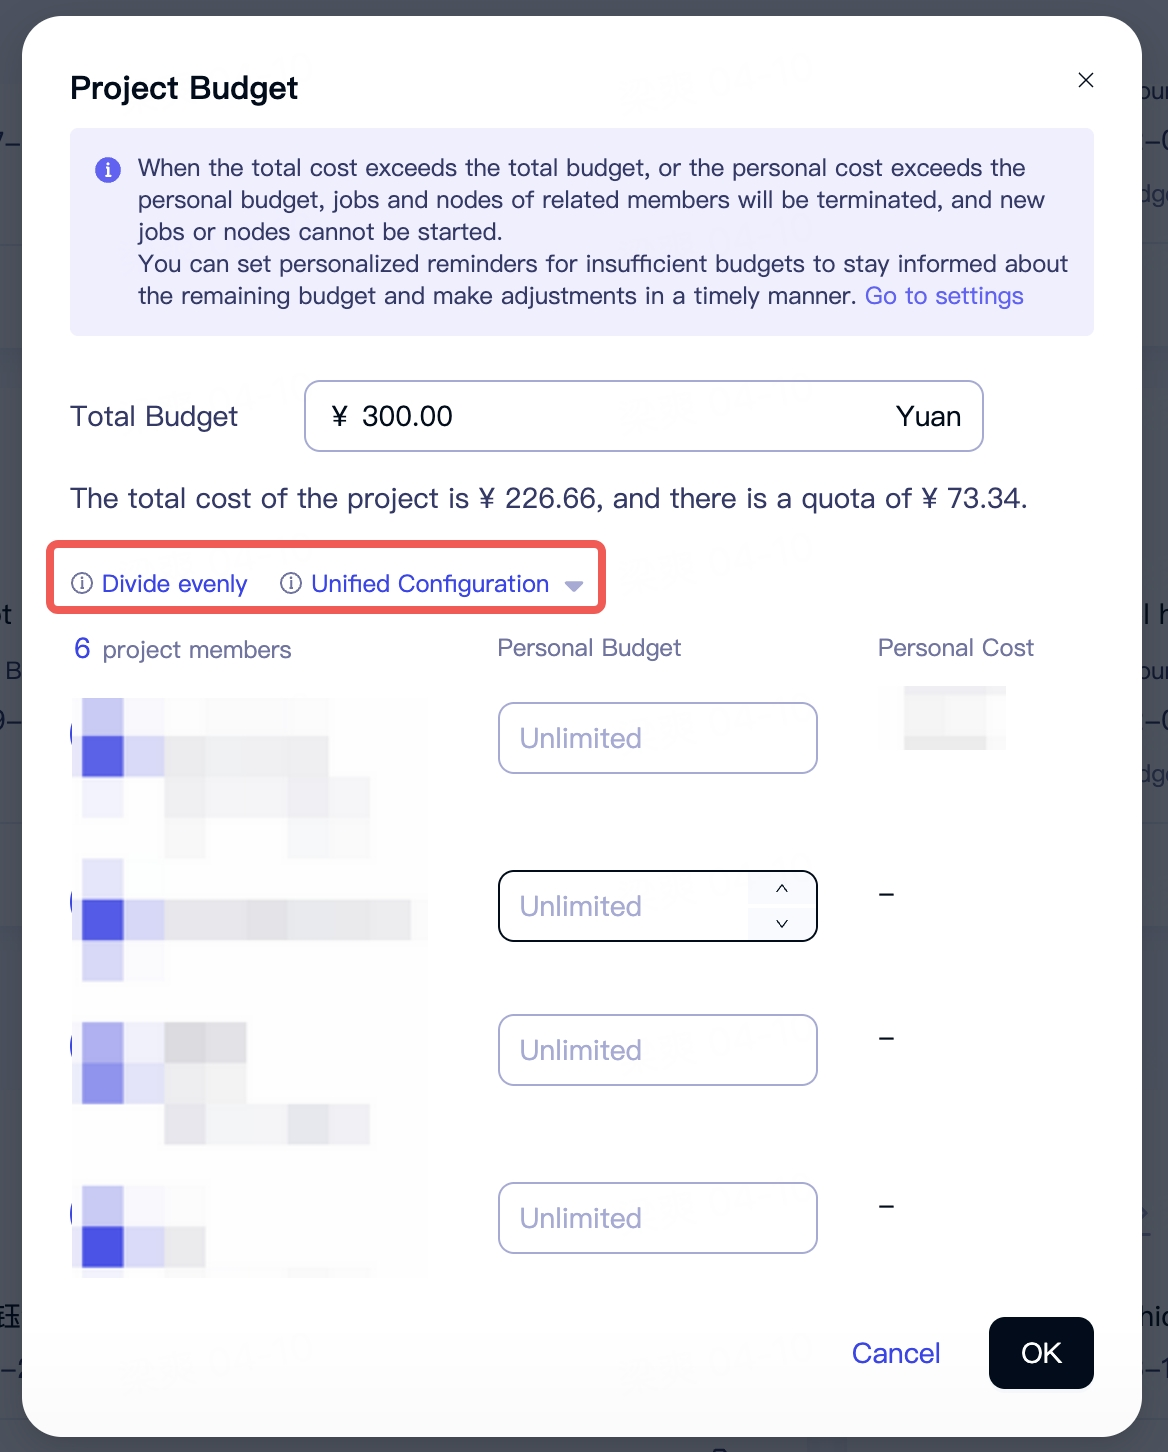
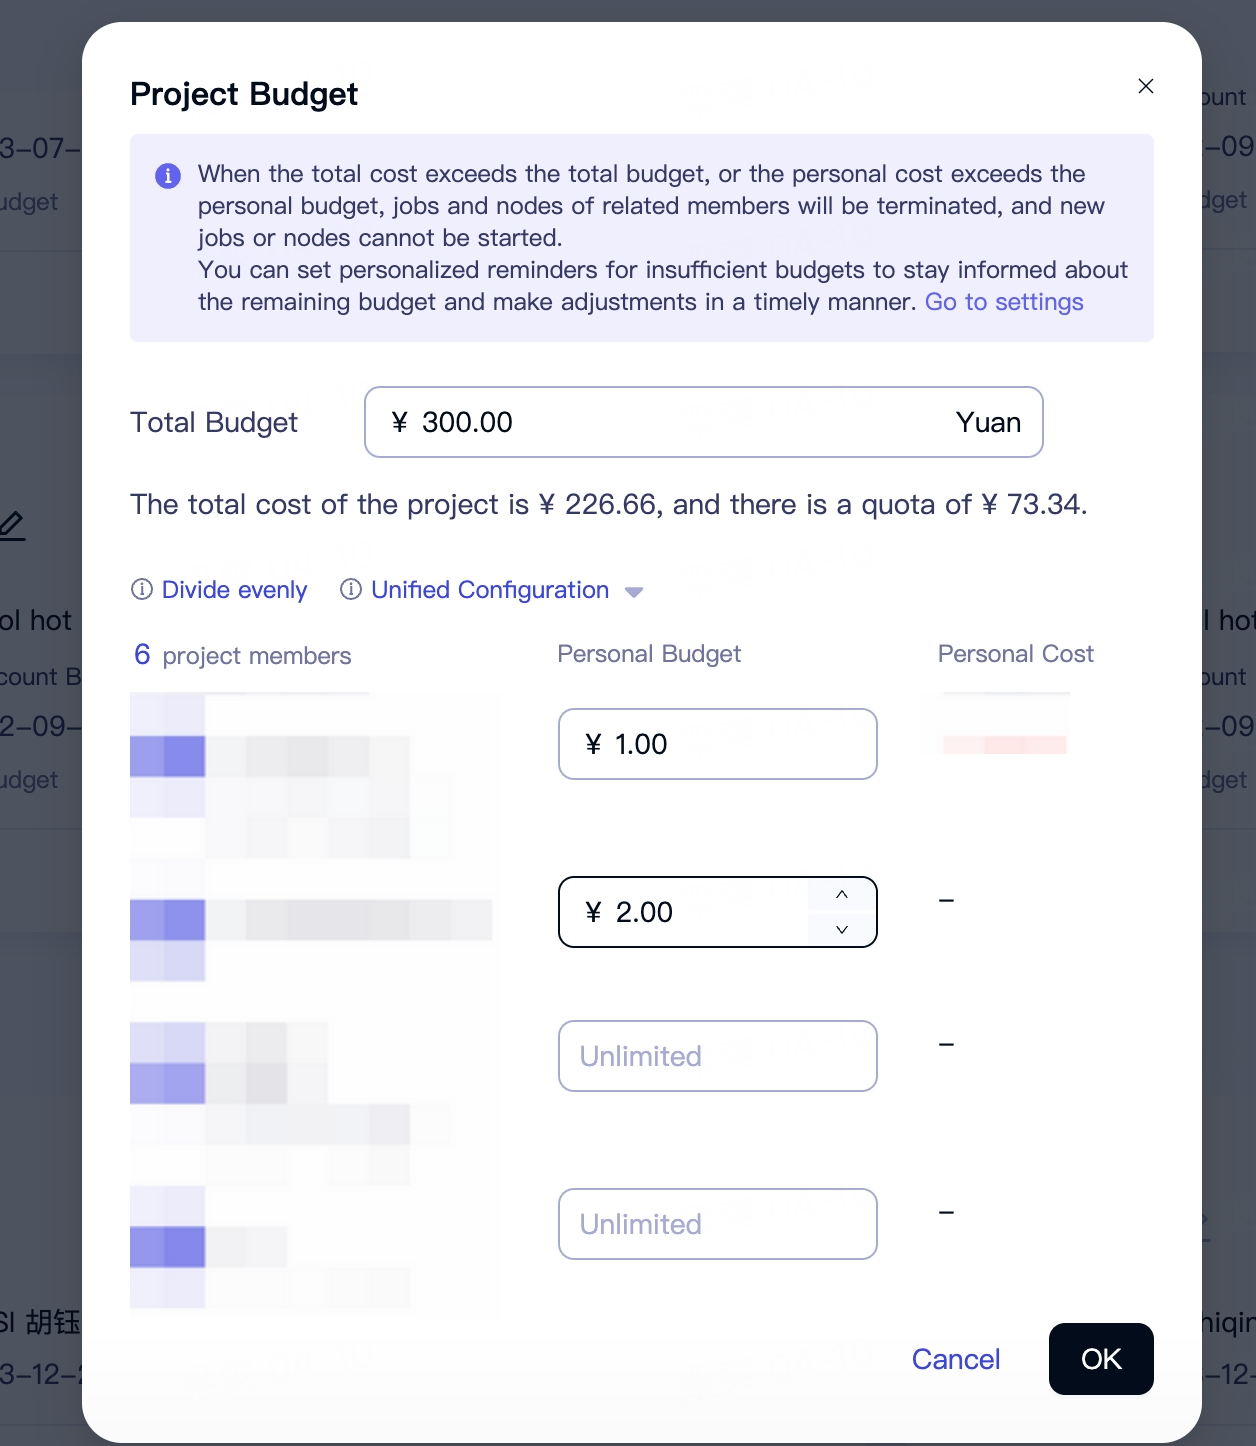
In the "Project Budget" settings window, click the "Divide evenly" button to evenly distribute the total project budget among all members. You can also click "Unified Configuration" to allocate the same budget for each member. Of course, you can also set individual budget amounts for each member separately.
Distribute the budget evenly to all members:
Set different budgets for different members:
Shared Files
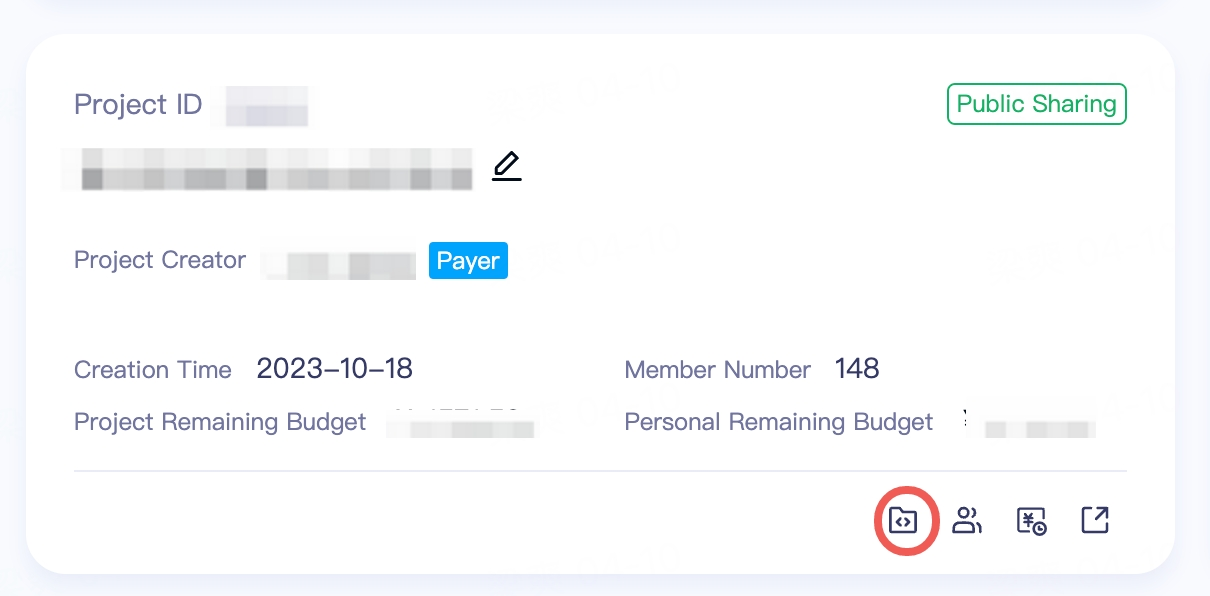
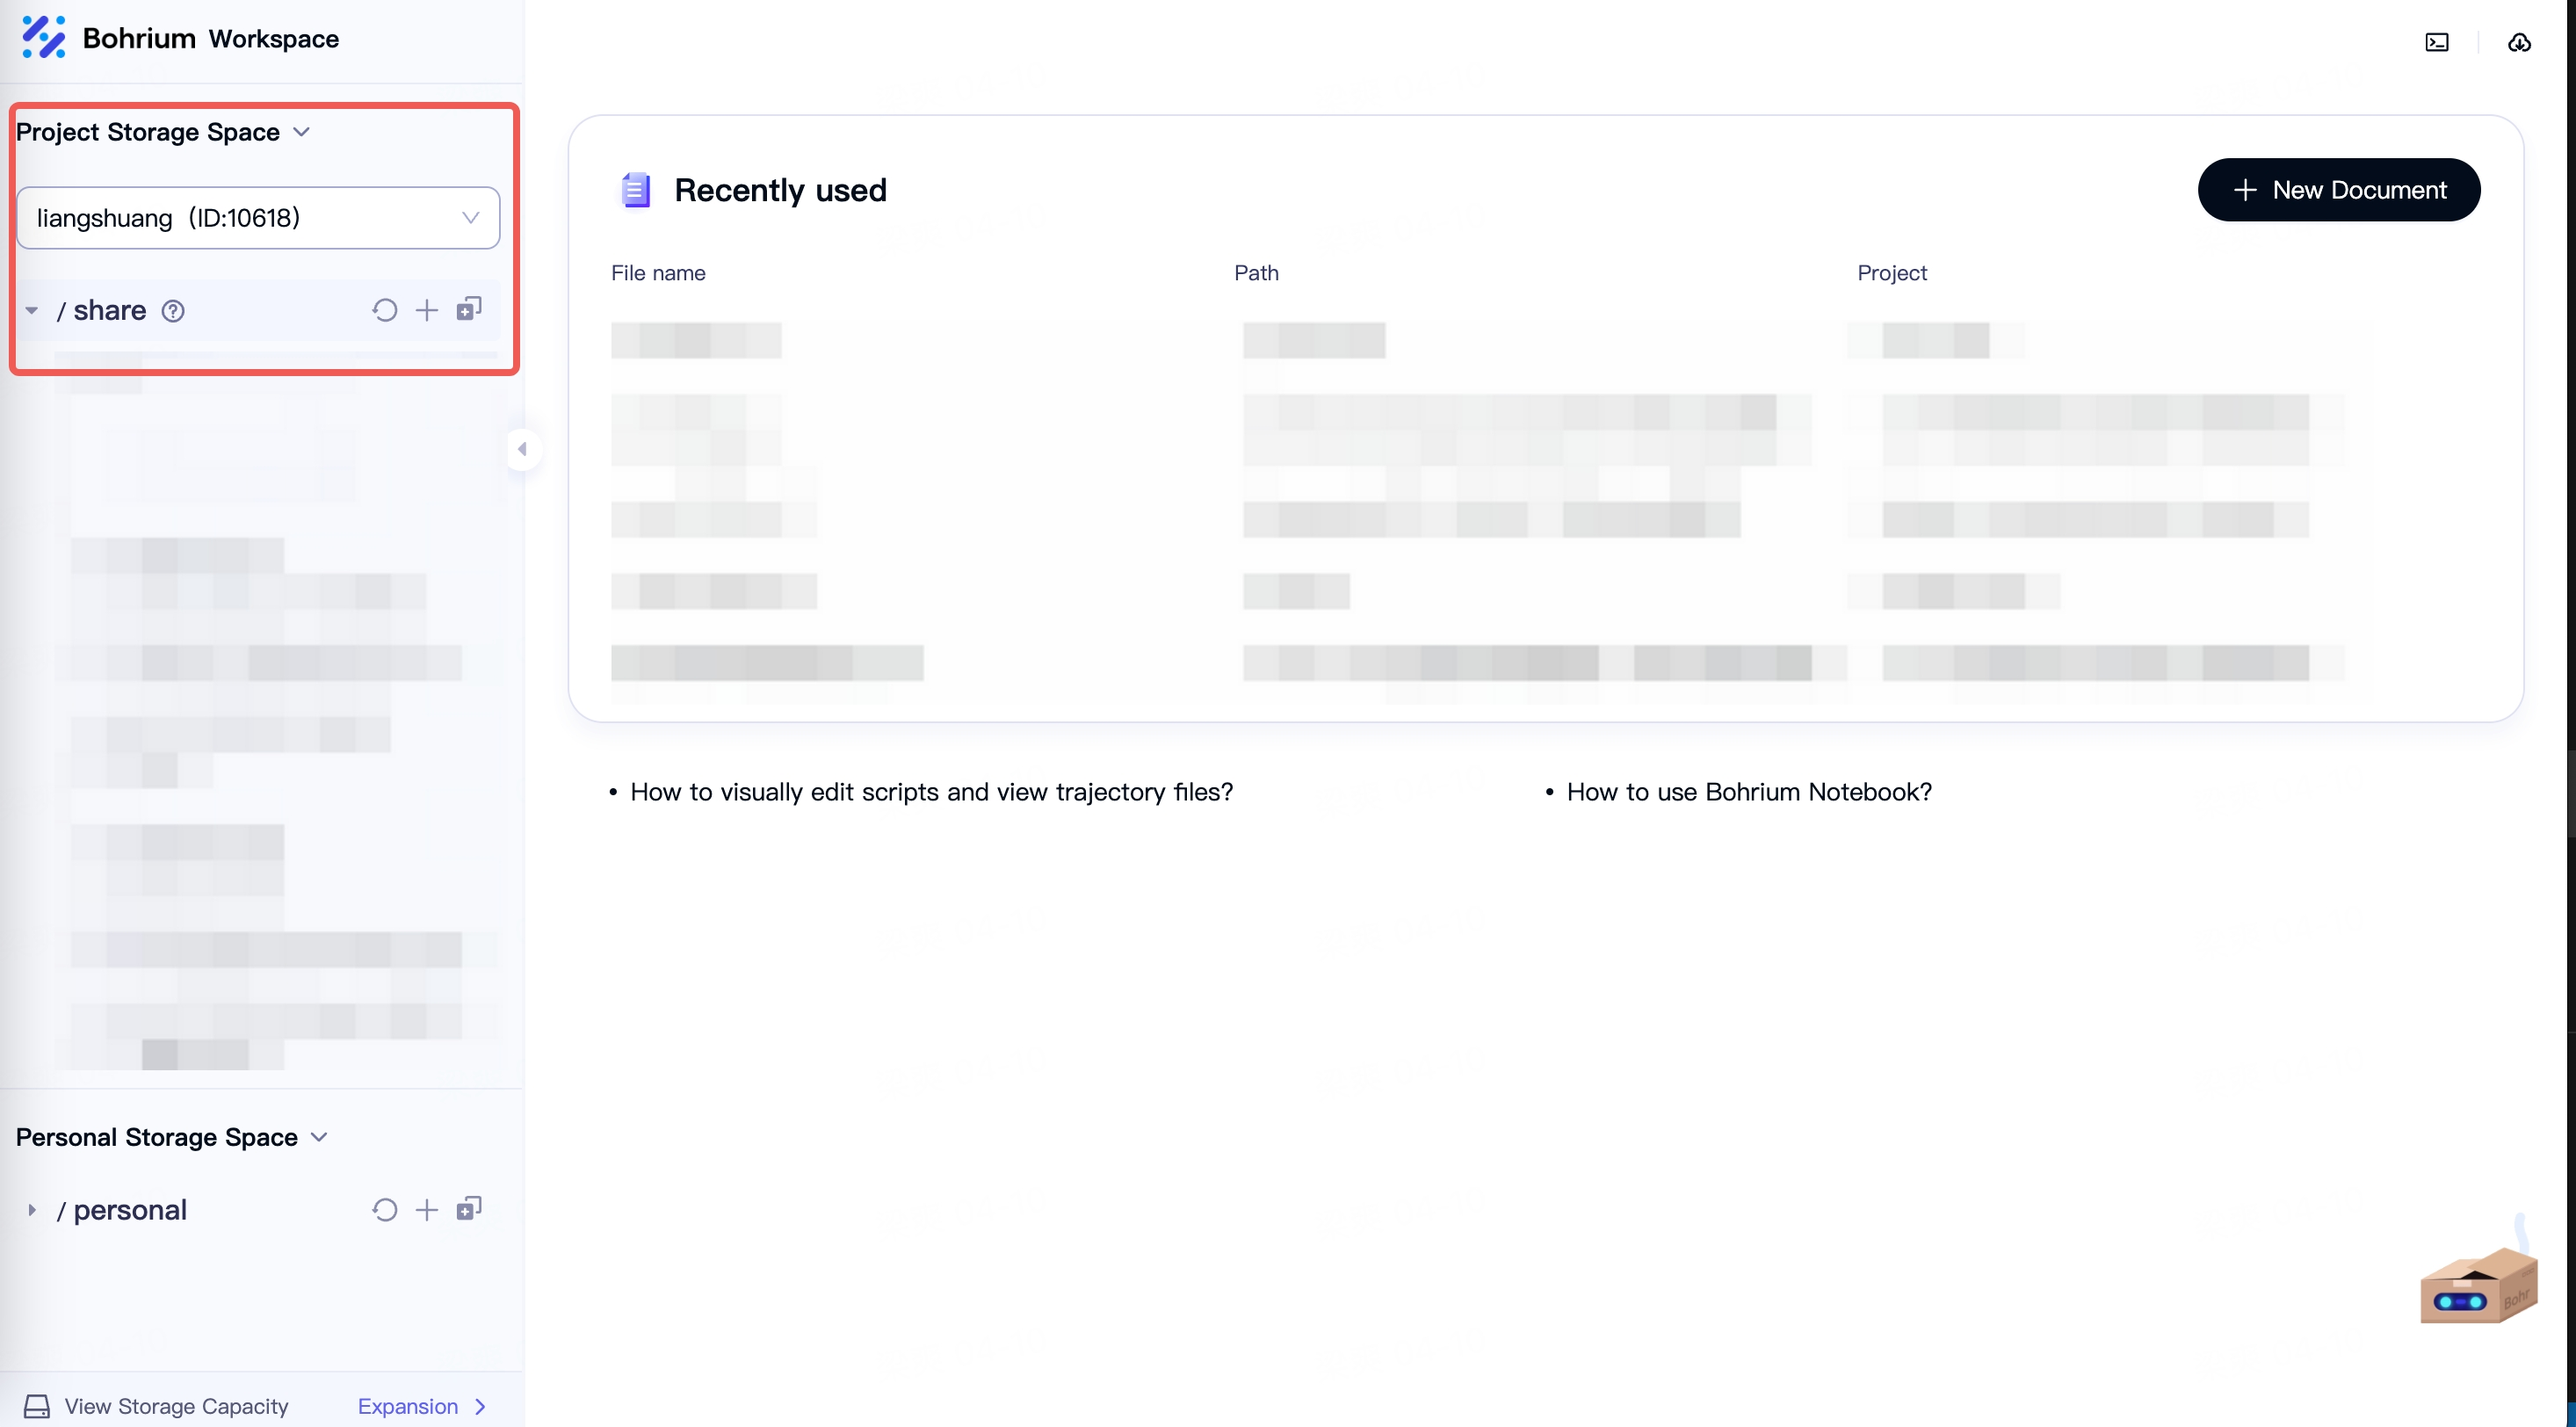
Each project has a /share drive available for file sharing, with a default free space of 1024GB. All members within the project have read and write access to the files in this drive. Click the "View Files" button (circled in red in the image) to view the shared drive files for the project.
Shared Images
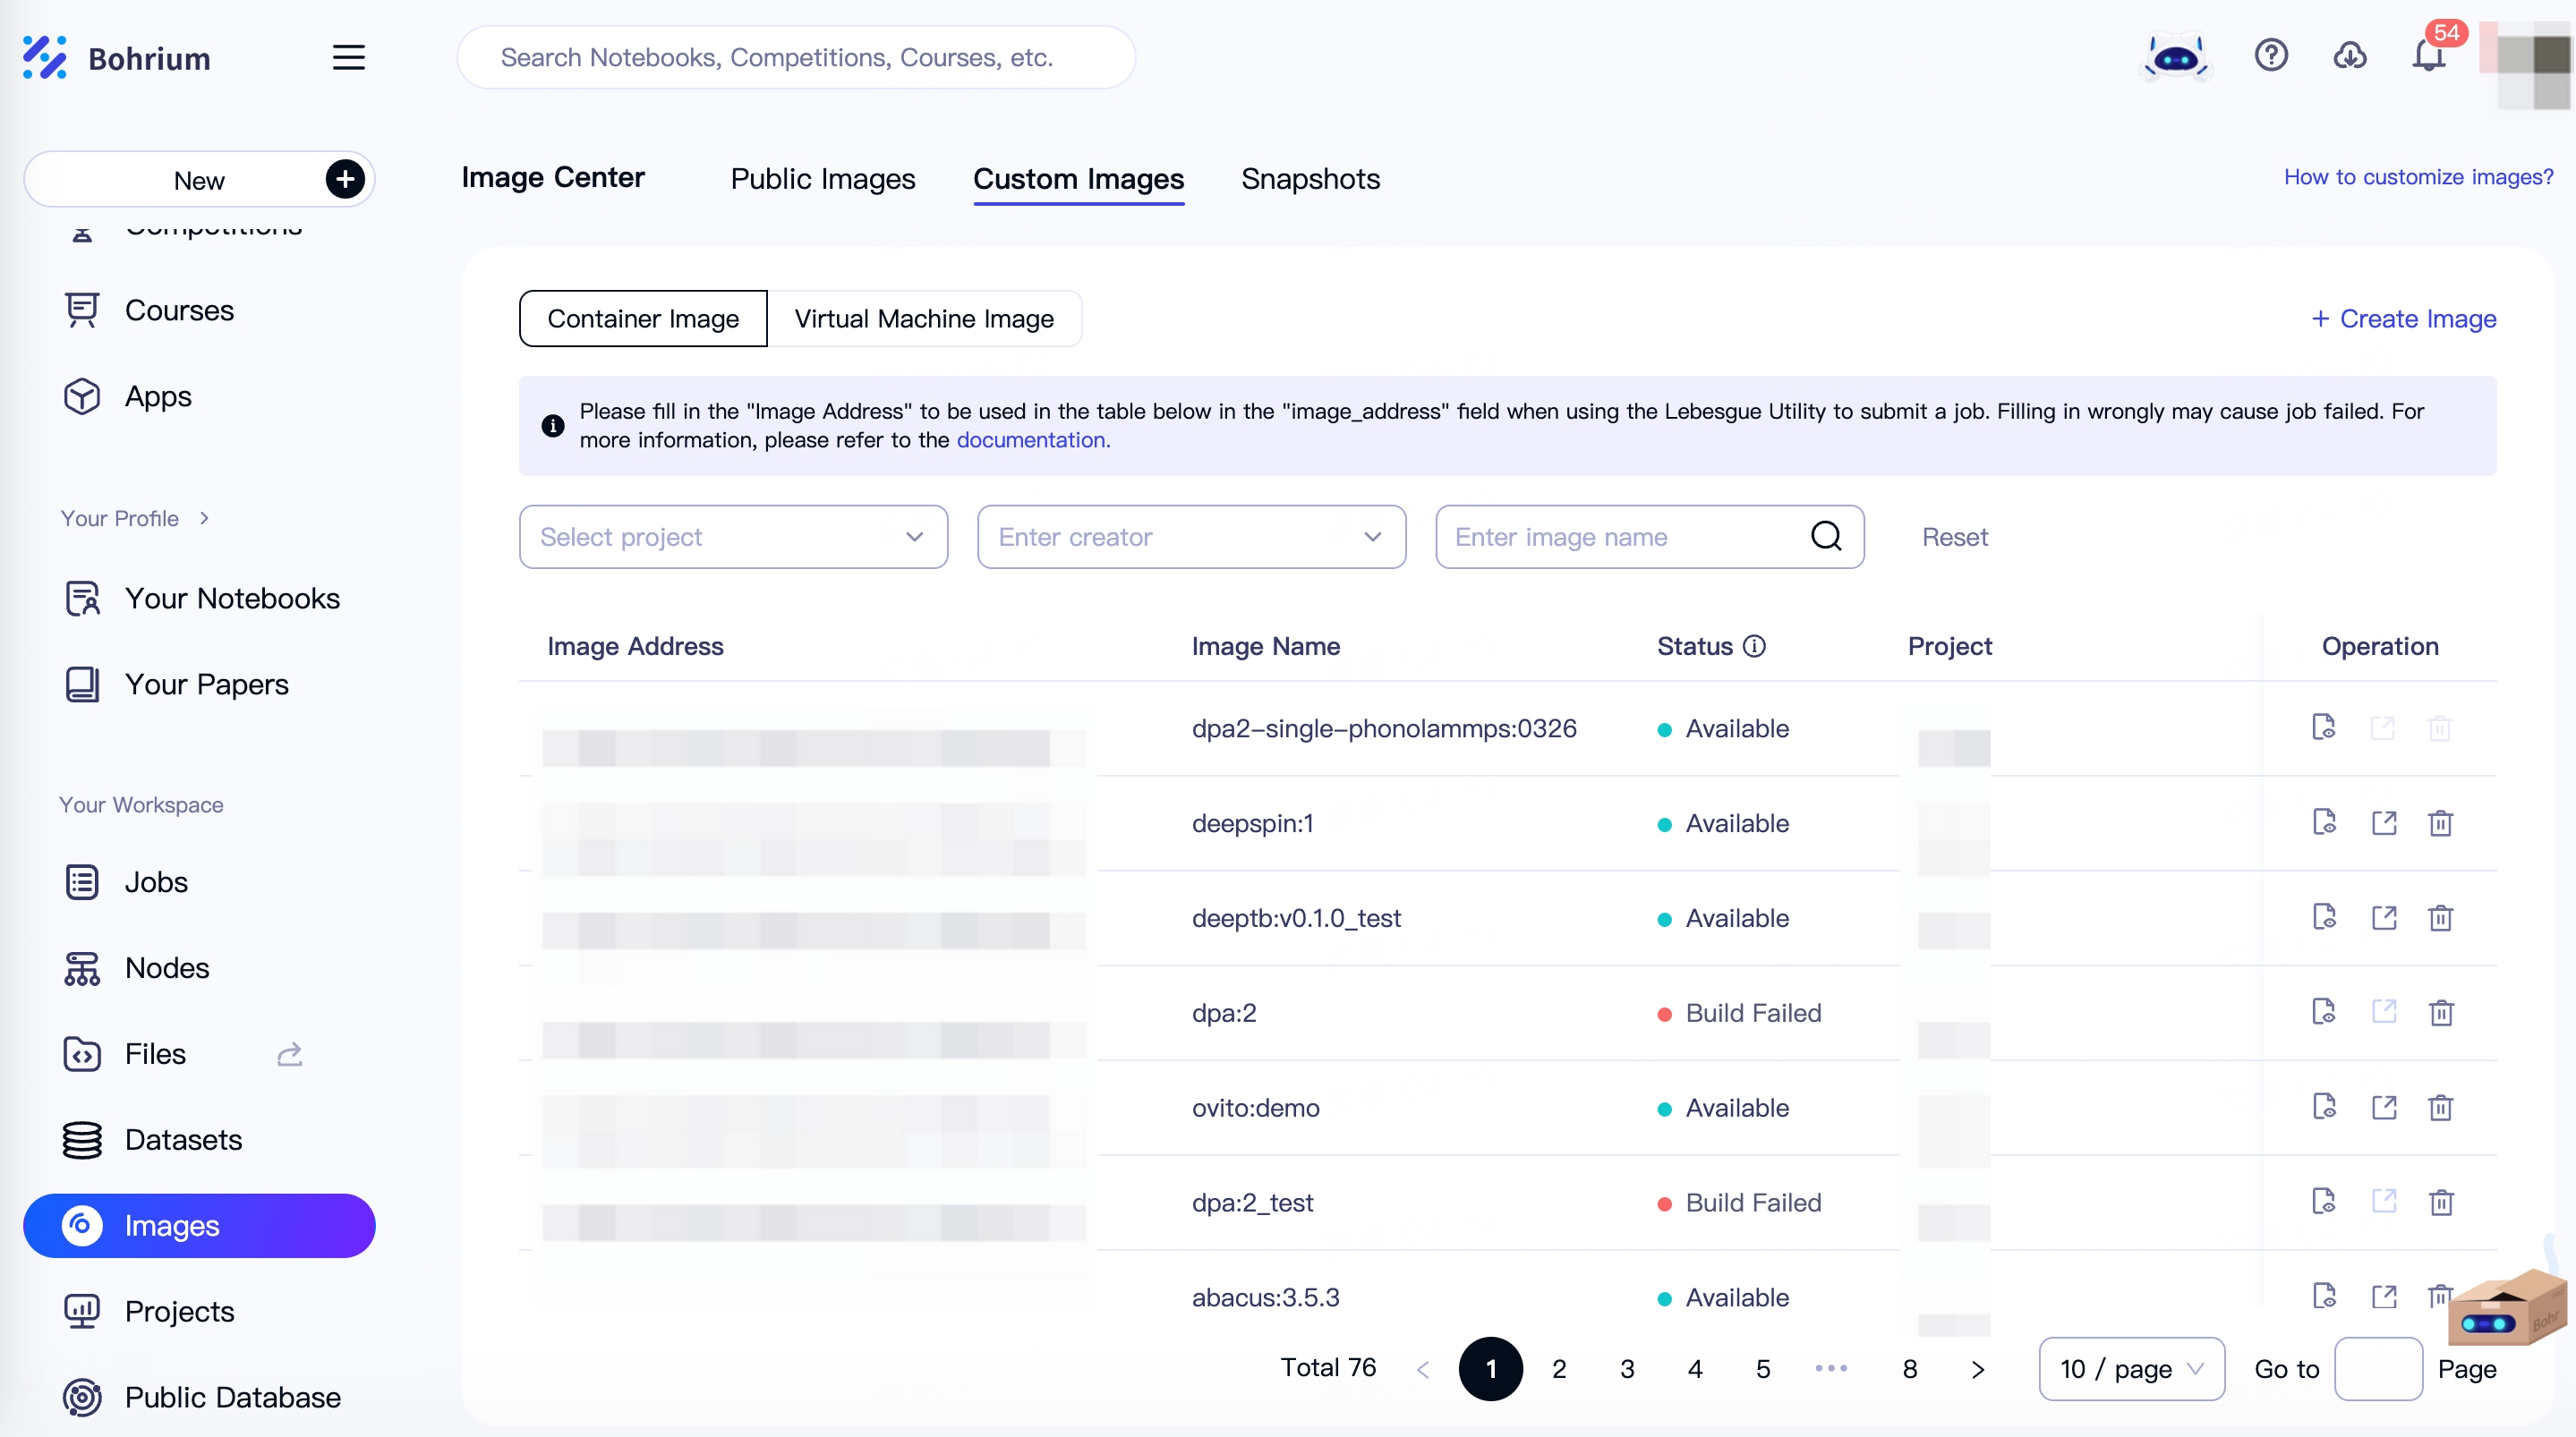
All members within the project can view and use the images created by other teammates in the same project in the Bohrium "Images" - "Custom Images". This allows for a more convenient way to set up a consistent working environment, debug code, or directly deploy in a production environment.
Delete Project
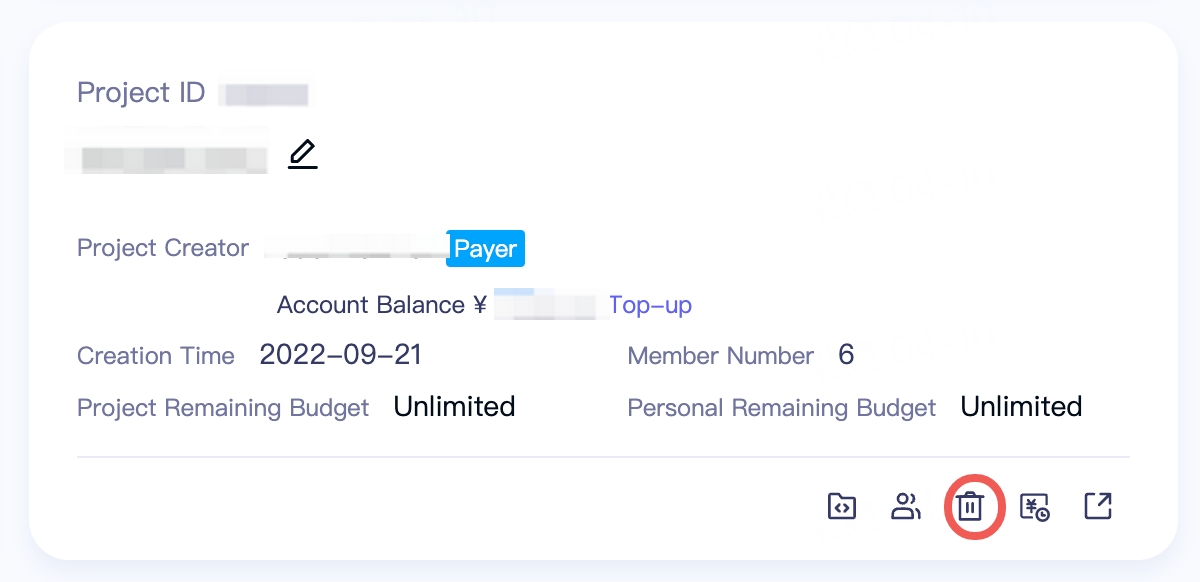
When you finish a project, you can click the "Delete" button (the red circle in the picture) to delete the project and disband the members within the project. However, after the project is deleted, all jobs and images within the project will be permanently deleted and cannot be viewed. The deletion operation is irreversible, so please be cautious.
